


Load 1 CD
• Press LOAD, all available numbers
will flash amber.
• Select the number desired.
• Wait for amber lights to flash on
sides of slot before inserting CD.
• Repeat to load more CDs.
Unload 1 CD
• Press EJECT.
• Press number for CD desired.
Play a CD
• Option 1: Select the number for
the CD desired (wait eight
seconds).
• Option 2: Press 5/SIDE button on
radio face to scroll through CDs.
Select CD Track
• Option 1: PREV/NEXT on radio.
• Option 2: SEEK arrows on radio.
• Option 3: SEEK arrows on steering
wheel.
NAVIGATION RADIO SYSTEM
Preset a radio station
1 Press the power button to turn the
radio on.
2 Press BAND button repeatedly to
choose one of the following
bands: AM/FM1/FM2 or
XM1/XM2 (if equipped).
3 Use either the joystick or the
SEEK button to tune to a station.
4 Press and hold one of the six
buttons on the right side of the
radio until you hear a beep or see
the station displayed next to the
button pushed.
Set the time
• Turn the radio on.
• Press the CONFIG hard key.
• Press the CLOCK soft key.
• Use joystick to highlight the hour
and minute box (near top of
screen).
• Move joystick up or down to
select correct hour and minute(s).
• Push the joystick in to store the
correct time.
HomeLink
®
TRANSMITTER
Program HomeLink
Your vehicle’s engine should be
turned off while programming the
transmitter. Follow these steps to
program up to three channels:
1. Press and hold down the two
outside buttons, releasing only
when the indicator light begins to
flash, after 20 seconds. Do not
hold down the buttons for longer
than 30 seconds and do not
repeat this step to program a
second and/or third transmitter to
the remaining two HomeLink
buttons.
2. Position the end of your hand-held
transmitter about 1 to 3 inches (3
to 8 cm) away from the HomeLink
buttons while keeping the
indicator light in view.
❏
Reviewed with Customer (Please Check Box)
Refer to Owner Manual for further information.
1
2
3
4
Note: See your Navigation Radio
Supplement/Instructional CD or Navigation
Quick Reference Guide for detailed
operating instructions.
Driver
Information
Seats and
Mirrors
Automatic
Climate
Controls
Vehicle
Personalization
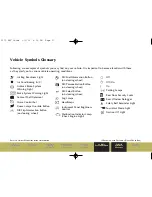
Vehicle
Symbols
Glossary
Owner
Privileges
TM
Entertainment/
Convenience
Features
Drive and
Security
Systems
3572 ESV Guide 9/3/03 8:08 PM Page 11
Содержание 2004 ESCALADE
Страница 20: ...3572 ESV Guide 9 3 03 8 09 PM Page 20...


