background image

21

VERA 7 - 7.0 - 7.0 UP _ INDIGO EVO - 7_LORD 7 - 7.0 _FLOYD 7.0 - 5.0

9.4 

STOVE SWITCH-ON

We remind you that the first start-up must be carried out by skilled and authorised technical personnel who check that everything 

is installed according to the regulations in force and verifies its functionality.

•  If inside the combustion chamber there are booklets, manuals, etc. remove them.

•  Check that the door is closed properly.

•  Check that the plug is inserted into the socket.

•  Before turning the stove on, make sure that the burn pot is clean.

Start up the stove by pressing button P3 for a few seconds so that 

Turn on 

StArt 

"is displayed. In these conditions, the stove goes 

into the preheating state: the spark plugs go on (visible from the spark plug LED) together with the flue gas extraction fan. Any 

anomalies during the ignition phase are shown on the display and the stove goes into alarm status.

The pellet loading phase starts after about 1 minute, and the display shows the message 

Pellet loading

 " 

LoAd PELLEt 

" and the 

ON/OFF LED flashes intermittently. In the first phase, the feed screw loads the pellet into the burn pot. After the temperature of 

the flue gas has reached and exceeded the contained value, the system goes into ignition mode and 

Fire present

  "

FLAME LiGHt 

" appears on the display and the ON/OFF LED flashes.

When the flue gas temperature has reached and exceeded the intended value, the stove goes into the normal operating mode. The 

display shows the word 

Work

 " 

uorK 

" and the ON/OFF LED is lit. 

The power can be set by keeping button P2 pressed and the room temperature can be set by pressing button P1.

At set intervals, an automatic burn pot cleaning is performed in order to prevent dash from accumulating. On the display you will 

see 

Cleaning fire-pot

 “

cLEAninG FirE-Pot

”.

If this function lasts for a few seconds, it is NOT an alarm.

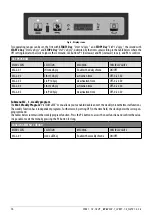
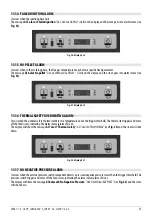
Fig. 18 - Display

9.5 

FAILED IGNITION

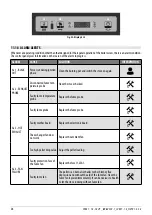
If the pellets do not burn, the failed ignition will be indicated by the alarm 

AL 5 FAILED IGNITION 

AL 5 ALAr no LiGHtin 

".

If the room temperature is lower than 10°C, the plug is not able to bear the ignition stage. To support it please insert some pellets 

in the burning pot and a piece of burning firelighter igniter material on the pellets (for example firelighters cubes).

Too much pellets in the burning pot, or humid pellet, or sooty burning pot make ignition difficult and create dense white smoke 

which is harmful to health and can cause explosions on the combustion chamber. It is therefore necessary not to stand in front of 

the stove during ignition stage if dense white smoke is present.

If after some months the flame appears weak and/or orange colored or the glass tends to blackens and the 

burning pot to become encrusted, clean the stove, clean the fume conduit and the chimney flue.

9.6 

POWER FAILURE

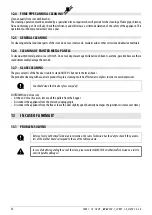
After a 

Black-out 

bLAc-out 

" lower than 5 seconds, the stove turns back to the power which was settled.

After a 

Black-out 

 " 

bLAc-out 

"of more than 5 seconds, the stove enters the 

COOLING WAIT 

uAit cooLinG 

" phase. Completed this 

phase, it starts automatically up with the different phases (see 

STOVE SWITCH-ON a pag. 21

).

9.7 

TEMPERATURE SETTING

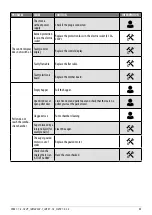
Change the room temperature by simply pressing button 

P1

The display shows the set room temperature (

temperature SETTING

). 

Therefore, the value can be changed by pressing buttons 

P1 (decreases) and P2 (increases

). 

After about 5 seconds the value is saved and the display returns to normal display, or exit by pressing 

P3

.

Содержание VERA 7

Страница 1: ...EN 2020CADELsrl Allrightsreserved Tuttiidirittiriservati USER MANUAL Pellet Stove VERA 7 7 0 7 0 UP INDIGO EVO INDIGO EVO 7 LORD7 7 0 FLOYD 5 0 FLOYD 7 0...

Страница 2: ...T FICHA DO PRODUTO PL KARTA PRODUKTU CZ INFORMA N LIST V ROBKU SK INFORMA N LIST V ROBKU RO FI A PRODUSULUI HU TERM KISMERTET ADATLAP SL PODATKOVNI LIST IZDELKA HR INFORMACIJSKI LIST PROIZVODA GR BG L...

Страница 3: ...gy Efficiency Class Classe d Efficacit nerg tique Energie effici ntieklasse Energieeffizienzklasse Clase de eficiencia energ tica Classe de Efici ncia Energ tica Klasa efektywno ci energetycznej T da...

Страница 4: ...u inkovitosti Indeks energetske u inkovitosti Energijos efektyvumo indeksas Energiat hususe indeks Indeks energieffektivitet Energieffektivitetsindex 126 126 126 Efficienza utile alla potenza termica...

Страница 5: ...a con las advertencias y las indicaciones de instalaci n y de mantenimiento peri dico indicadas en los cap tulos espec ficos del manual de instrucciones Respeitar as advert ncias e as indica es de ins...

Страница 6: ...Efficienza Energetica Energy Efficiency Class Classe d Efficacit nerg tique Energie effici ntieklasse Energieeffizienzklasse Clase de eficiencia energ tica Classe de Efici ncia Energ tica Klasa efekty...

Страница 7: ...u inkovitosti Indeks energetske u inkovitosti Energijos efektyvumo indeksas Energiat hususe indeks Indeks energieffektivitet Energieffektivitetsindex 126 126 126 Efficienza utile alla potenza termica...

Страница 8: ...a con las advertencias y las indicaciones de instalaci n y de mantenimiento peri dico indicadas en los cap tulos espec ficos del manual de instrucciones Respeitar as advert ncias e as indica es de ins...

Страница 9: ...d Efficacit nerg tique Energie effici ntieklasse Energieeffizienzklasse Clase de eficiencia energ tica Classe de Efici ncia Energ tica Klasa efektywno ci energetycznej T da energetick innosti Trieda...

Страница 10: ...u inkovitosti Indeks energetske u inkovitosti Energijos efektyvumo indeksas Energiat hususe indeks Indeks energieffektivitet Energieffektivitetsindex 126 126 126 Efficienza utile alla potenza termica...

Страница 11: ...ento peri dico indicadas en los cap tulos espec ficos del manual de instrucciones Respeitar as advert ncias e as indica es de instala o e manuten o peri dica apresentadas nos cap tulos espec ficos do...

Страница 12: ...WER SETTING 22 9 9 SWITCHING OFF 22 9 10 CONNECTIONTOTHE EXTERNALTHERMOSTAT 22 10 FUEL 22 10 1 FUEL 22 10 2 PELLET SUPPLY 23 10 3 PELLET REFUELLINGTIMER 23 10 4 VENTILATION 23 10 5 REMOTE CONTROL OPTI...

Страница 13: ...ective 2009 125 EC Eco Design and where applicable Directives 2014 35 EU LowVoltage 2014 30 EU Electromagnetic Compatibility 2014 53 EU Radio Frequency 2011 65 EU ROhS Read carefully the instruction c...

Страница 14: ...ed with 1 meter If the floor is made of combustible material we recommend using a protector made of in combustiblematerial steel glass etc thatalsoprotectsthefrontpartfromanyfallingburnt particles dur...

Страница 15: ...of the product for the warranty to be valid and effective We recommend testing the product before completion with the relative finishes claddings painting of walls etc Installations not meeting the c...

Страница 16: ...faults Save for the legal or regulatory limits the guarantee does not cover the containment of atmospheric and acoustic pollution The company declines all liability for any damage which may be caused...

Страница 17: ...der the conditions and following the methods provided by national laws transposing the Directive 2012 19 EU Separate waste collection and recycling of unused electric and electronic equipment batterie...

Страница 18: ...nstallation is correct and if the chimney flue is efficient Switch on the stove at Power 1 for at least 2 hours in order to enable the materials which make up the boiler and the fireplace to adjust th...

Страница 19: ...ON MODE ACTION 1 Decreases temperature and power TEMPERATURE SETTING Decreases the value of the am bient temperature SETTING PROGRAMMING Decreases the selected parameter POWER SETTING Decreases the va...

Страница 20: ...POWER SETTING Power setting programming 3 ON OFF Work status 4 CHRONO Chrono is enabled 5 ALARM Stove is in alarm 6 FEED SCREW ON Feed screw moving 7 HEAT EXCHANGER Heat exchanger on 8 SPARK PLUG Ign...

Страница 21: ...00 99 M2 Chrono setting M2 SEtcHrono M2 1 Enable chrono M2 1cHronoEnAbLE 01 enable chrono 01 cHronoEnAbLE on off M2 2 Daily programming M2 2ProGrAMdAy 01 daily chrono 01 cHronodAyLy on oFF 02 start 1...

Страница 22: ...G2 oFF 0 23 50 12 stop Prg 2 12 StoPPrG2 oFF 0 23 50 13 Monday Prg2 13 MondPrG2 on oFF 14 Tuesday Prg 2 14 tuESPrG2 on oFF 15 Wednesday Prg 2 15 uEdnPrG2 on oFF 16 Thursday Prg2 16 tHurPrG2 on oFF 17...

Страница 23: ...FF 33 Wednesday Prg 4 33 uEdnPrG4 on oFF 34 Thursday Prg4 34 tHurPrG4 on oFF 35 Friday Prg 4 35 FridPrG4 on oFF 36 Saturday Prg 4 36 SAtuPrG4 on oFF 37 Sunday Prg 4 37 SundPrG4 on oFF M2 4 Weekend pro...

Страница 24: ...1 StAnd by on oFF M5 Buzzer M5buCCEr 01 Buzzer 01 buCCEr on oFF M6 First load M6LoAdinitiAL 01 First load 01 LoAdinitiAL 90 M7 Stove status M7StAtEStoVE 01 Stove status 01 StAtEStoVE 01 Feed screw sta...

Страница 25: ...ncreases selectsitem M1 and M1 SEt cLocK will scroll M1 SEtcLocK see Fig 9 Fig 6 Display M1 9 3 2 Menu M2 CHRONO SETTING Submenu M2 1 Enable chrono The menu shown on the M2 1 chrono setting cHrono EnA...

Страница 26: ...activation time OFF 0 23 50 M2 2 03 StoP 1 dAyLy deactivation time OFF 0 23 50 M2 2 04 StArt 2 dAyLy activation time OFF 0 23 50 M2 2 05 StoP 2 dAyLy deactivation time OFF 0 23 50 Submenu M2 3 weekly...

Страница 27: ...SIBLEVALUES M2 3 11 StArt PrG2 activation time off 0 23 50 M2 3 12 StoP PrG2 deactivation time off 0 23 50 M2 3 13 Mond PrG2 reference day on off M2 3 14 tuES PrG2 on off M2 3 15 uEdn PrG2 on off M2 3...

Страница 28: ...ases or P2 increases button Setting the CS Grassetto 02 Start 1 weekend 2 StArt1uEEKEnd and 03 Stop1 weekend times StoP 1uEEKEnd setstheoperatingperiodforSaturday SAtu whereas04 Start 2 weekend StArt2...

Страница 29: ...lows the feed screw to be loaded with the first start up of the stove whenthepellettankisempty AfterselectingmenuM6 themessagePressMore PrESSMorE willscrollonthedisplay seeFig 15 ThenpressP2 increases...

Страница 30: ...aft of the flue see Fig 18 Thanks to this adjustment the fuel supply in the burn pot may be modified by an amount between 18 and 18 value from 9 18 to 9 18 Fig 15 Display pellettype 9 3 10 Menu MA FLU...

Страница 31: ...ic burn pot cleaning is performed in order to prevent dash from accumulating On the display you will see Cleaning fire pot cLEAninGFirE Pot If this function lasts for a few seconds it is NOT an alarm...

Страница 32: ...n authorized technician 10 FUEL 10 1 FUEL Use top quality pellets because they have influence in the calorific value and in ash remains Pellets features are dimension 6 7mm D06 Class maximum lenght 40...

Страница 33: ...nto A05 depression alarm and proceeds to switch off Wait until it switches off then light it again Fig 21 Dooropen Fig 22 deterioratedgasket Fig 23 Timer 90seconds Tooperatecorrectly thestovemustworkw...

Страница 34: ...ttery Operating temperature 0 C 50 C 38 khz infrared signal Used batteries contain metals which are harmful for the environment they must therefore be disposed of separately in the special containers...

Страница 35: ...product Other fuses that protect the electronic boards are found on the latter 11 6 SMOKE FAN If the fan stops the electronic board promptly shuts off the pellets supply and an alarm message is displ...

Страница 36: ...L 2 ALAr AL2 ProbE EXHAuSt see Fig 30 and will shut down Fig 27 Display AL2 11 12 FLUE GAS OVERTEMPERATURE ALARM Occurs when the flue gas probe detects a temperature higher than a fixed set value that...

Страница 37: ...11 16 THERMAL SAFETY OVERHEATING ALARM Occurs when the general safety thermostat detects a temperature above the trigger threshold The thermostat triggers and turns off the feed screw indicating the...

Страница 38: ...Disconnected fume tem perature probe Have the stove checked Faulty fume temperature probe Replace the fume probe AL 3 HOT EXHAUST Faulty fume probe Replace the fume probe Faulty mother board Replace t...

Страница 39: ...Please check it Blocked thermal probe Replace the thermal probe Faulty mother board Replace the mother board AL 6 NO PELLET Empty hopper Full the hopper AL 7 THERMAL SAFETY Boiler overheating Let the...

Страница 40: ...k and switch the stove on again The fire door is not cor rectly closed Close the fire door correctly and check if the gaskets are broken Fire door microswitch faulty or out of order Replace the fire d...

Страница 41: ...brazier that could clog the air passage holes Ifthepelletsinthehopperfinish unburnedpelletsmayaccumulateinthebrazier Alwaysemptytheresidueinthebrazierbefore startingup Checkthatthereisnoexcessiveasha...

Страница 42: ...olinebecausethese could irremediably damage the varnish 12 7 GLASS CLEANING The glass ceramic of the fire door is able to stand till 700 C but not to thermal shocks The probable cleaning with usual sa...

Страница 43: ...ol display Faulty flat cable Replace the flat cable Faulty electronic board Replace the mother board Pellets do not reach the combu stion chamber Empty hopper Full the hopper Open fire door or open pe...

Страница 44: ...totally obsturcted Contact an expert stove repairer who checks the stove from the exhaust up to the chimney pot Provide immediately for stove cleaning Obstructed stove Provide immediately at the inner...

Страница 45: ...fume outlet limit tempe rature The stove runs at minimum NO PROBLEM The stove s smoke duct produces condensation Low smoke tempe rature Check that the flue is not clogged Increase stove power to mini...

Страница 46: ...NOTE...

Страница 47: ...NOTE...

Страница 48: ...CADEL srl 31025 S Lucia di Piave TV Via Foresto sud 7 Italy Tel 39 0438 738669 Fax 39 0438 73343 www cadelsrl com www free point it www pegasoheating com Rev 02 2021...

Отзывы: