


6
REMOTE CONTROL FUNCTIONS
The remote control is the interface between the user and the
high- wall systems. Commands are entered by the user to control
the system. Any command that has been entered with the remote
control will remain in the memory until it is changed by the user
or the batteries are replaced.
NOTE: When entering commands, point the remote control in
the direction of the LED display on the front panel. The
OPER
appears for a short period of time on the remote control when
the command is entered. The unit only emits an audible beep
when the signals are received correctly.
ON/OFF:
Press this button to turn unit on and off.
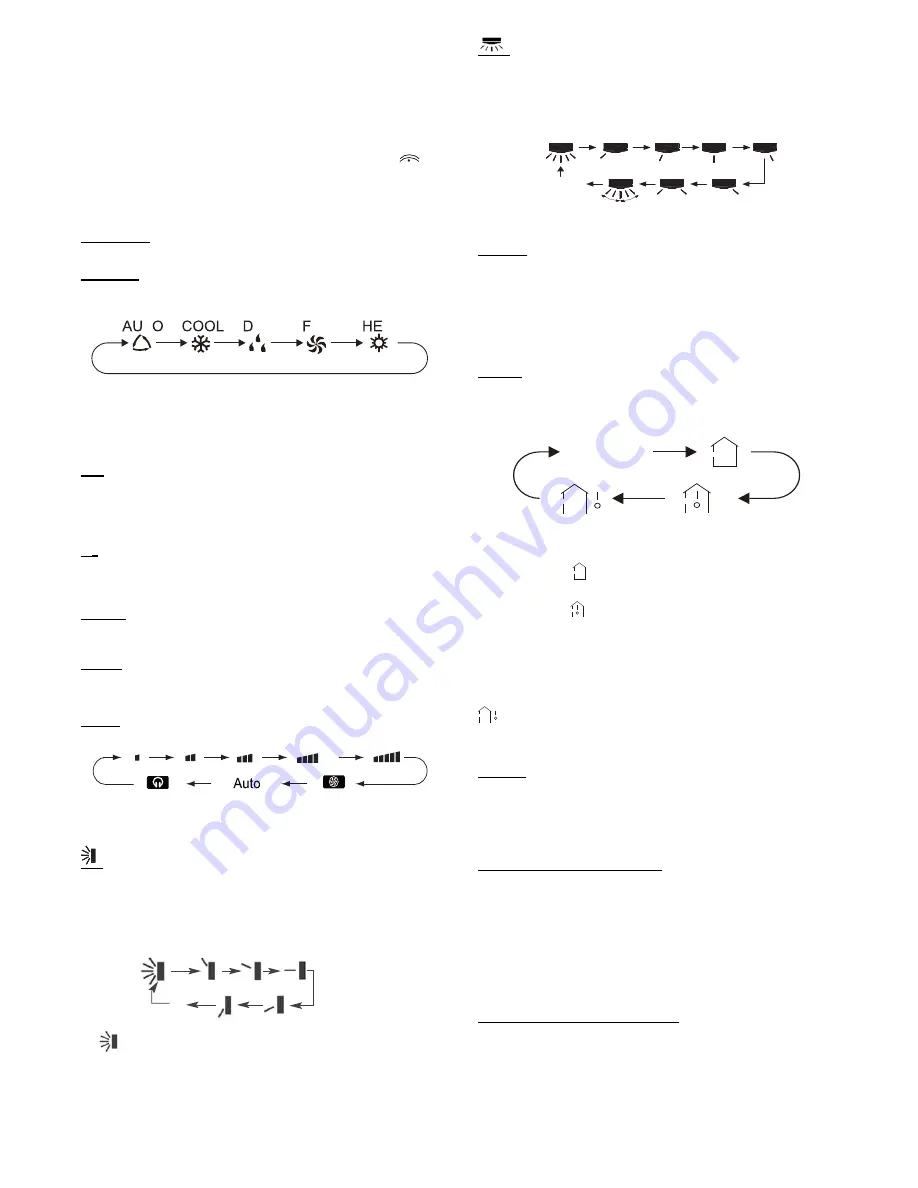
MODE:
Each time this button is pressed, a mode is selected in a sequence that
goes from AUTO, COOL, DRY, FAN and HEAT, as shown below:
T
AN
RY
AT
Fig. 6 - Modes
AUTO mode is the default setting at start- up. In AUTO mode, the
set temperature will not be displayed on the LCD, and the unit
automatically selects the suitable operation mode to provide
comfort based on parameters set from the factory.
—:
Press this button once to decrease the setpoint by 1
_
F. If the button
is pressed for more than two seconds, the setpoint decreases rapidly
in increments of 1
_
F. In AUTO mode, set temperature is not
adjustable.
+
:
Press this button to increase the setpoint by 1
_
F. If the button is
pressed for more than two seconds, the setpoint increases rapidly in
increments of 1
_
F. In AUTO mode, set temperature is not adjustable.
COOL:
To cool to the selected set point and remove moisture.
System varies compressor speed to maintain desired temperature.
HEAT:
To heat to selected room set point. System varies compressor speed
to maintain desired room temperature.
FAN:
This button is used to set the fan speed in the following sequence.
Fig. 7 - Fan speed
:
Press the Vertical Swing Louver button to select five different
vertical (up and down) air discharge directions including
Continuous Sweep. The Swing Louver icon appears. Press this
button to set swing angle, which changes directions as shown
below.
Indicates louver swings back and forth in the five directions, as shown.
OFF
1
0
2
3
4
5
1
Fig. 8 - Swing buttons
:
Press the Horizontal Swing Louver button to select five different
horizontal (left and right) air discharge directions including
Continuous Sweep. The Horizontal Swing Louver icon appears.
Press this button to set swing angle, which changes in direction as
shown in the following figure.
no display
(stops at current
position)
Fig. 9 - Horizontal Swing Louver Angles
I FEEL:
Press this button to use the I FEEL function, and the icon appears.
The unit senses room temperature at the remote controller instead of
at the indoor unit. It then adjusts airflow and temperature accordingly
for the ultimate in personal comfort control and energy savings.
Press the button again to exit this function. For best performance,
keep remote controller away from heat or cold temperature sources
while using this function.
TEMP:
Each time this button is pressed, the display on the indoor unit is
switched in a sequence that goes from No display > Set
Temperature > Indoor Ambient Temperature, as shown below.
no display
Fig. 10 - Temp Modes
When selecting
with remote controller or no display, the
temperature indicator on indoor unit displays the set temperature.
When selecting
with the remote controller, the temperature
indicator on indoor unit displays indoor ambient temperature; 3s
later or within 3s it receives another remote controller signal that
will return to display the setting temperature.
NOTE: This model does not have an outdoor ambient
temperature function. While the remote controller can operate
and the indoor unit displays the set temperature. It’s
defaulted to display the set temperature when turning on the
unit.
X- FAN:
Press the X- FAN button in COOL or DRY mode to activate the
DRY function and the X- FAN icon appears. When this function
is activated, the indoor fan continues to run for 2 minutes to dry
the indoor coil after the unit is turned off. X- FAN is not available
in AUTO, FAN and HEAT mode.
T- ON button (Timer ON)
To set when you want the unit to turn On at the end of a selected
time period, use the button labeled “T- ON” on the remote
controller. Press this button to make the clock icon disappear,
replaced with the word “ON” (blinking). Press “+” or“- ” buttons
to adjust timer setting 1 minute at a time. Press and hold “+”
or “- ” button to set timer more quickly. Press“T- ON” button
again to confirm setting, and the word “ON” stops blinking.
To cancel, press“T- ON” button again.
T- OFF button (Timer OFF)
NOTE: Under Timer On and Off status, you can set T- ON
and T- OFF simultaneously. Before setting timer, be sure to
set clock to correct time.


