background image


– 4 –


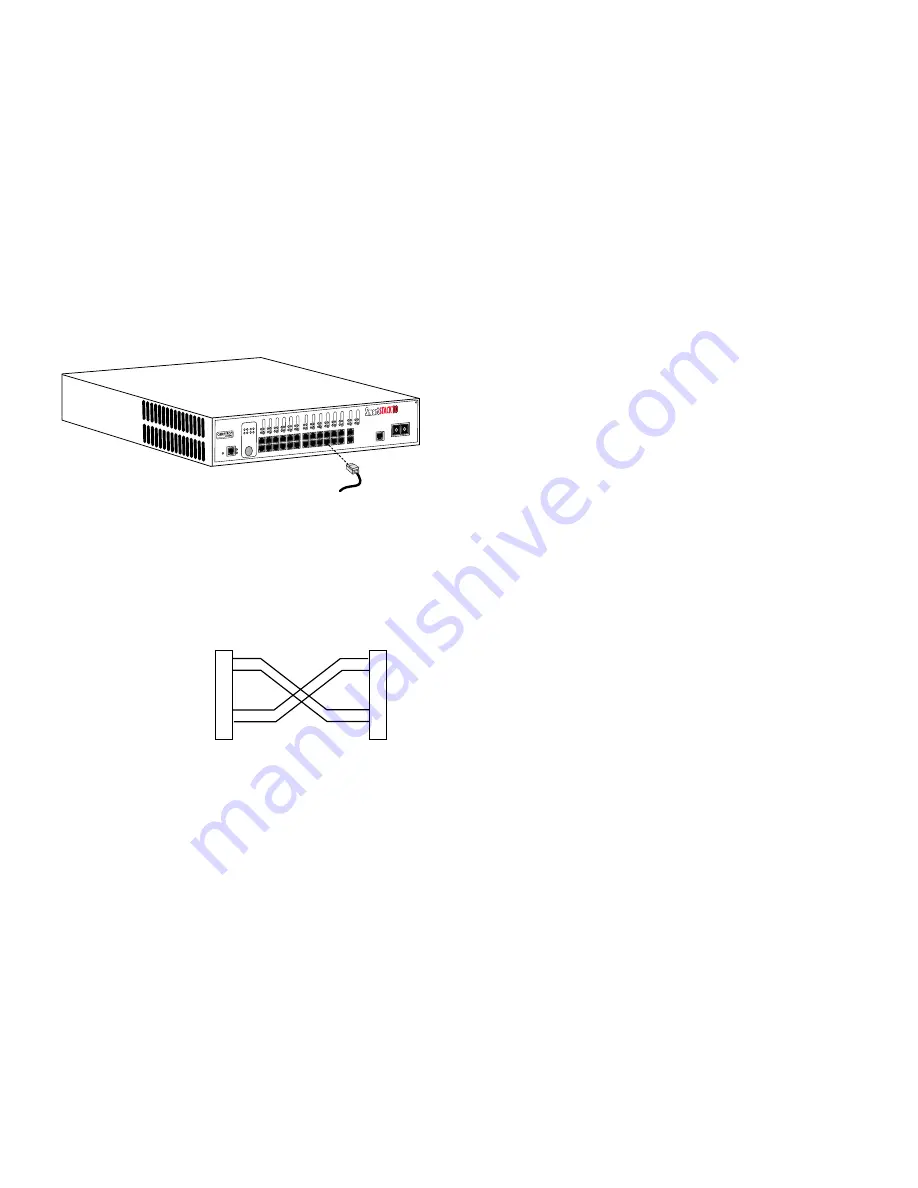
Connecting UTP Cables 


Before connecting a segment to the ELS10-26, check each end of 
the segment to verify wire crossover.

Connect a twisted pair segment to the ELS10-26 as follows:

1. Ensure that the device at the other end of the segment is 

connected to the segment and is powered ON.

2. Connect the twisted pair segment to the ELS10-26 by inserting 

the RJ45 connector on the twisted pair segment into the 
desired RJ45 port (refer to figure).

3. Verify that a Link exists by checking that the port 


LINK


 LED is 

on (solid green). If the 


LINK


 LED is off, perform the following 

steps until it is on:

a. Check that the 10BASE-T device at the other end of the 

twisted pair segment is ON and connected to the segment.

b. Verify that the RJ45 connectors on the twisted pair segment 

have the proper pinouts (refer to figure) and check the cable 
for continuity.

c. Check that the twisted pair connection meets the dB loss 

and cable specifications.

If a link is not established, contact Cabletron Systems 

Global Call Center. Refer to the


 Getting Help


 section at the 

beginning of this guide


for details.

4. Repeat step 2, above, until all connections have been made.

ELS10-26TX

STATUS

PORT STATUS MODE

10BASE-T/
100BASE-TX

FEPIM

2X         4X         6X         8X        10X       12X

14X       16X       18X        20X       22X       24X

MONX

26X

27

LINK

ST

A

TUS

LINK

ST

A

TUS

26

27

LINK

ST

A

TUS

LINK

ST

A

TUS

LINK

ST

A

TUS

LINK

ST

A

TUS

LINK

ST

A

TUS

LINK

ST

A

TUS

13

14

15

16

23

24

21

22

17

18

19

20

LINK

ST

A

TUS

LINK

ST

A

TUS

LINK

ST

A

TUS

LINK

ST

A

TUS

LINK

ST

A

TUS

LINK

ST

A

TUS

3

4

1

2

7

8

5

6

11

12

9

10

TX ACT

FDX MON

RX COL 100

USR

PWR

CPU

RESET

25

MON

COM

1
2

3
6

1
2

3
6

TX+

TX-

RX+

RX-

TX+

TX-

RX+

RX-

TO

ELS10-26 RJ-45 Port

TO

10Base-T Device Port

Note: RX+/RX- and 
TX+/TX- must share a 
common color pair.


Caution: 


To establish a link, you must have an odd number of 

crossovers (preferably one) between 10BASE-T devices of the 
same type (i.e., from repeater to repeater or transceiver to 
transceiver).

Содержание SmartSTACK 10 ELS10-26

Страница 1: ...6X 18X 20X 22X 24X MONX 26X 27 LINK STATUS LINK STATUS 26 27 LINK STATUS LINK STATUS LINK STATUS LINK STATUS LINK STATUS LINK STATUS 13 14 15 16 23 24 21 22 17 18 19 20 LINK STATUS LINK STATUS LINK ST...

Страница 2: ......

Страница 3: ...ce with the operator s manual may cause harmful interference to radio communications Operation of this equipment in a residential area is likely to cause interference in which case the user will be re...

Страница 4: ...TIONS AND EXCLUSIONS MAY NOT APPLY TO YOU UNITED STATES GOVERNMENT RESTRICTED RIGHTS The enclosed product a was developed solely at private expense b contains restricted computer software submitted wi...

Страница 5: ...ing to a Power Source 2 Checking the Power up Diagnostics Sequence 2 Connecting UTP Cables 4 Installing a Fast Ethernet Port Interface Module FEPIM 5 Connecting a UTP Segment to FE 100TX 6 Connecting...

Страница 6: ...iv...

Страница 7: ...0 Mbps Ethernet ports one fixed 100 Mbps Fast Ethernet port and one slot for an optional FEPIM Fast Ethernet Port Interface Module Getting Help If you need additional support related to the SmartSTACK...

Страница 8: ...up sequence press the reset switch on the front panel When you power up the ELS10 26 the following occurs 1 All LEDs turn on for one second 2 The Power Pwr LED remains on 3 The CPU LED starts flashing...

Страница 9: ...agnostics the CPU LED will turn off and the ELS10 26 will attempt to reboot If the CPU LED does not stay on contact Cabletron Systems Global Call Center ELS10 26TX STATUS PORT STATUS MODE 10BASE T 100...

Страница 10: ...ity c Check that the twisted pair connection meets the dB loss and cable specifications If a link is not established contact Cabletron Systems Global Call Center Refer to the Getting Help section at t...

Страница 11: ...Remove the two screws securing the plate on the side of the FEPIM slot 4 Install the FEPIM as shown in the illustration Ensure that the rear module connector is seated firmly before tightening the th...

Страница 12: ...on the module Verify the Link by checking that the port LINK LED is on solid green If the LINK LED is off perform the following steps until it is on a Check that the cable is properly connected at bo...

Страница 13: ...ossing over of fiber strands between the applicable port on the ELS10 26 and the fiber optic device at the other end of the fiber optic link segment d Verify that the fiber connection meets the dB los...

Страница 14: ...A complete list of LCM commands appears on the following pages Pin Signal Name 1 Transmit Data XMT 2 Data Carrier Detect DCD 3 Data Set Ready DSR 4 Receive Data RCV 5 Signal Ground GND 6 Data Termina...

Страница 15: ...ear statistics on all ports Example clearstats community Allows you to assign a new community name or change an existing one Example community date Allows you to display or set system date Option MMDD...

Страница 16: ...t Options Rx Tx both half duplex mode only off Example mirror 6 Tx ping Allows you to send ICMP ECHO_REQUEST packets Options rvsx HOST DATASIZE count Example ping r reboot Allows you to enter the numb...

Страница 17: ...the host Options m MAX_TTL q NQUERIES w WAIT HOST_IP DATA_SIZE Example traceroute m traplog Displays the traps messages captured by the ELS10 26 Example traplog trunk Displays the current trunking st...

Страница 18: ...12...

Отзывы: