OWnER’s manual
EN
10
DISC INSTALLATION
This NVR supports SATA discs up to 8 TB. Follow below instructions to install external disc:
1. Disconnect the NVR from power suppy
2. Dissasemble the casing of the NVR (unfasten the mounting screws at the back and sides
of the device).
3. Connect the data and power cables of the disc
4. Fasten the SATA disc to the NVR base
5. Assemble the NVR casing.
NETWORK PREVIEW
IMPORTANT:
User can preview image from the NVR by loging with NVR's IP on a browser
installed on Windows running device. Prior to using this function, user needs to download a
plug-in, and restart browser to login.
The device supports LAN and WAN access, as well as IP and domain name access. Use
Internet Explorer (version 7 or later, other browsers may not support or restrict connection).
NOTE:
The NVR allows for its remote control and management with the use of smartphone
or computer. Please, keep in mind that configuration of the devices for such use requires
additional knowledge and setting up! Please bear in mind, that remote preview via smartphone
is only accessible through devices running Android or iOS or a computer running Windows.
Internet Explorer browser settings
Prior to use IE browser access, configure its settings first:
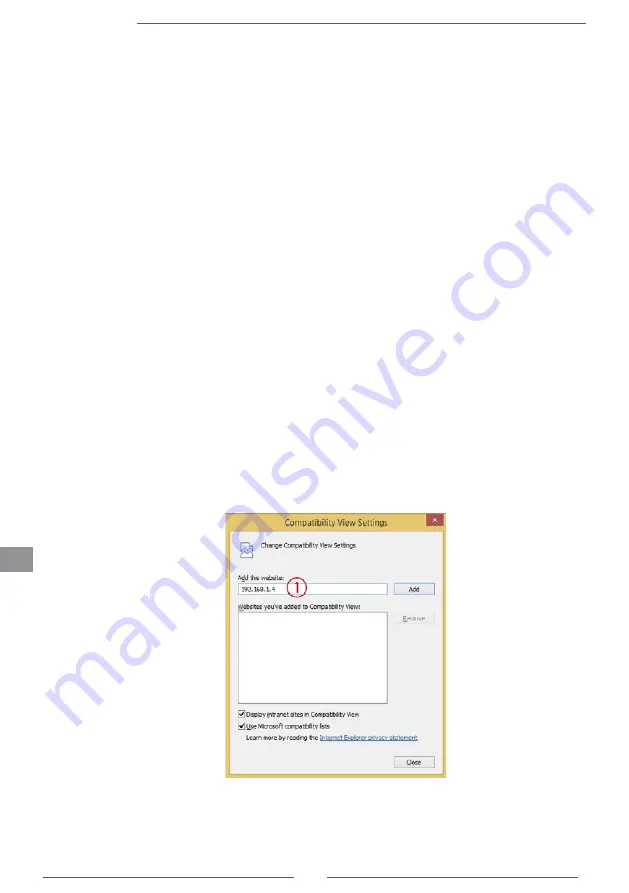
1. Open the Internet Explorer browser, go to “Tools” (ALT + X) > “Compability view settings”
and add NVR's IP address; click “Add” then “Close”.
2. Go to “Tools” (ALT + X) again > “Internet options” > “Security” > “Trusted sites” > “Sites”.
Input NVR's IP address into “Add this website to the zone” space. Make sure the “Require
server verification (https:) for all sites in this zone” is unchecked. Press “Add”, then “Close”
to approve changes and exit.


