


►
Maintenance
For daily cleaning, use a dry cloth and a soft liquid cleaner.
Never use abrasive cleaners containing acetone, chlorine or strong bleach. Also, do not use tools as scrapers,
metallic brushes, and other products which can scratch or tarnish surfaces.
Under no circumstances should you use chrome cleaner on chrome-plated or brass trim, hinges, handles, sockets
etc.
Good ventilation is essential for maintaining the quality and look of this furniture.
Warranty and Customer Care Information
For the most up to date warranty information for your product, please visit our website - www.cabinetstogo.com to get
the specific details. If you have any questions with warranties or to make a claim, please contact Customer Care by
email - [email protected] or call 1-800-CABINET.
13
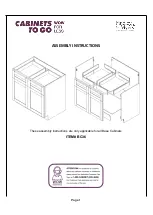
Ins
ert the assembled drawer
s
(
H
)
onto the
glides
.
Push in until you
hear clicks from the drawer clips
locking into the glides.
(Figure
1
3
)
Figure
1
3
Page
9


