background image

52

52

11 

Service Menu

11.1 

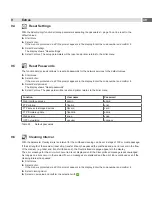
Reset Service Counter

Access only with service key inserted!

The printer has total and service counters.

• 

Total counter: The total counter contains the values for the entire service life of the printer up to now. The values 
of the total counter are displayed in the 

Info

 menu and in the 

Status print

.

• 

Service counter: The service counter can be reset after more substantial maintenance or repair work with the 
service key inserted. Here, it provides information on the printing output since the last reset. The values of the 
service counter are displayed in the 

Status print

.

The following data is recorded in both counters:

Data

Description

Operative time

Printer switch-on time

Number of labels

Number of labels printed

Transfer printing

Length of medium printed with transfer printing

Thermal printing

Length of medium printed with thermal direct printing

Table 27 

Total and service counter data


Insert service key into an USB host interface.


Start menu.


Select 

Service > Reset service counter

.  

The display shows 

Reset service counter.


Select 

Continue

. The data recorded by the service counter is set to the value 0. 

The status print can be used to check whether the values were reset.

11.2 

Printhead Zero Position X

Access only with service key inserted!

The purpose of the 

Printhead zero pos. X

 setting is to fundamentally align the printing image to the printhead perpen-

dicular to the printing direction in order to compensate for printhead tolerances.


Determine the deviation of the actual from theoretical position of the printing image perpendicular to the printing 
direction.


Select menu 

Service > Printhead zero pos. X

.


Choose a setting that counteracts deviation.


11.3 

Printhead Zero Position Y

Access only with service key inserted!

The purpose of the 

Printhead zero pos. Y

 setting is to fundamentally align the printing image to the printhead in the 

printing direction in order to compensate for printhead tolerances.


Determine the deviation of the actual from theoretical position of the printing image in the printing direction. 


Select menu 

Service > Printhead zero pos. Y

.


Choose a setting that counteracts deviation.

Содержание SQUIX Series

Страница 1: ...cab Label Printers Configuration Manual...

Страница 2: ...ducts For more information see www cab de opensource Editor Regarding questions or comments please contact cab Produkttechnik GmbH Co KG Topicality Due to the constant further development of our produ...

Страница 3: ...guration 17 6 1 Configuration via Control Panel 17 6 1 1 Printing 17 6 1 2 Labels 18 6 1 3 Ribbon 20 6 1 4 Tearing off 20 6 1 5 Cutting 21 6 1 6 Peeling off 21 6 1 7 Labelling 22 6 1 8 Interfaces 23 6...

Страница 4: ...FTP Login 54 12 2 FTP Printing 54 12 3 FTP Access to Storage Devices 54 12 4 FTP Firmware Update 55 13 Storage Devices 56 13 1 Suitable Storage Devices 56 13 2 Installation 56 13 3 Directory Structur...

Страница 5: ...f not avoided may result in death or serious injury Caution Draws attention to a danger with low risk which if not avoided may result in minor or moderate injury Attention Draws attention to potential...

Страница 6: ...S 232 interface 2 6 on page 10 Connection via optional Bluetooth adapter connected to an USB host interface 4 9 2 7 on page 10 SQUIX 1 2 5 3 4 7 6 8 9 EOS 1 2 5 3 4 7 6 9 MACH 4S 3 2 4 5 6 7 1 HERMES...

Страница 7: ...ters 2 Right click the icon of the label printer A pop up menu appears 3 Select Properties in the pop up menu 4 Open the Details or Connections tab This tab contains among other things the connections...

Страница 8: ...Point The search for access points will be started The display shows the available access points including the hidden access points X X Select an access point an confirm with X X For hidden access po...

Страница 9: ...ted of the OEM name and the last six digits of the MAC address and the password hotspot Both parameters can be changed if necessary X X Select Hotspot Info The display shows the IP address of the prin...

Страница 10: ...7 RTS Request to Send 8 CTS Clear to Send 9 RI Ring Indication not used Table 1 Pin assignment of the RS 232 interface X X Connect the 9 pin socket to the matching port of the computer For the most c...

Страница 11: ...porting the configuration or checking the function of the label printer 1st Selection Level 2nd Selection Level 3rd Selection Level Info Storage Setup Printing Labels Ribbon Tearing off Cutting Peelin...

Страница 12: ...ontents can be turned in steps of 90 degree 6 1 12 on page 27 i Note In that manual all following screen shots are shown in the portrait orientation Start level Selection level Parameter function leve...

Страница 13: ...Selection parameters Numerical parameters Date time Figure 5 Samples for parameter setting Scroll bar for rough value setting Decreasing the value step by step Increasing the value step by step Return...

Страница 14: ...rently installed Figure 7 Service key Attention Incorrect settings and data loss via unauthorized access Access protection is deactivated when the service key is inserted Operation of the printer by u...

Страница 15: ...3 IPv4 address of the printer when connected to a network via Wi Fi MAC address of the Wi Fi adapter Wi Fi IPv4 192 168 10 1 MAC e8 4e 06 3e 72 26 4 Zeroconf host name mDNS cab 05cbbf local 5 Operati...

Страница 16: ...Security web service Access only when Interfaces Network services Web service On Authentication type for the SOAP protocol Digest Password web service Access only when Interfaces Network services Web...

Страница 17: ...ifting of the entire print image perpendicular to the direction of paper flow The absolute shifting is limited by the margins of the print zone Those are determined by the width of the printing line o...

Страница 18: ...to the position of the last detected label front edge considering the programmed label distance Off Table 5 Parameters of the Setup Printing menu 6 1 2 Labels X X Start menu X X Select Setup Labels P...

Страница 19: ...nue After a few seconds the message Sensor successfully calibrated appears The display shows the characteristic values of the sensors e g Brightness 12 28 X X Select Continue to quit the function MACH...

Страница 20: ...interrupted when the wrong ribbon winding direction has been detected The error message Ribbon ink side appears Off Ribbon tension Only at EOS Adaptation of the winding torque at the ribbon rewinder t...

Страница 21: ...re not installed access only with service key inserted X X Start menu X X Select Setup Peeling off Parameter Meaning Default Peel off position Shift the position of the dispensed label relative to the...

Страница 22: ...tart and switching on the supporting air The delay prevents swirling at the front of the label and consequently avoids faults when the label is being picked up from the printer 0 ms Support delay off...

Страница 23: ...ter Only valid with DHCP Off Netmask Subnet mask classification and address range of the local network Only valid with DHCP Off Gateway Connection address between the local network and other networks...

Страница 24: ...tion DHCP Ethernet DHCP On IP adress Ethernet IP adress Netmask Ethernet Netmask Gateway Ethernet Gateway Off Gateway address Ethernet Gateway address DNS Server Ethernet DNS Server Operation mode Hot...

Страница 25: ...MP community Keyword to assign the SNMP rights public VNC server Activation of the VNC server for remote access to the control panel Off Zeroconf Activation of the auto configuring Zeroconf method for...

Страница 26: ...gray area is printed instead of the barcode On Network error Printer switches to error mode when problems with the network connection occur Off Table 15 Parameters of the Setup Errors menu 6 1 10 Regi...

Страница 27: ...s then changed automatically EU Time synchronisation Activation of a service to synchronize date and time of the printer NTP Time server for Time synchronisation Off Address of the time server Table 1...

Страница 28: ...pt FTP Choosing between the programming languages JScript and ZPL for data transfer via FTP JScript LPD Choosing between the programming languages JScript and ZPL for printing with LPD JScript RawIP C...

Страница 29: ...enter the user name admin and a password The default value of the password is also admin The password can be changed via the web interface Setup Tab page 32 X X Start the browser X X Call the web inte...

Страница 30: ...sly printed paper length with thermal direct printing A list of the events which have occurred since the printer was switched on is to be found in the left bottom section of the tab The right section...

Страница 31: ...ia the control panel in the Setup menu Figure 9 Setup tab on the printer web interface To change a parameter 1 Locate parameter in the tree structure 2 Set the value of the parameter at the right end...

Страница 32: ...e parameters as the Security menu of the Setup page 16 Figure 10 Security tab on the printer web interface To change a parameter 1 Locate parameter in the tree structure 2 Set the value of the paramet...

Страница 33: ...ations tab on the printer web interface To change settings 1 If necessary expand the tree structure 2 Locate and click the message in the tree structure 3 Select management station or e mail address 4...

Страница 34: ...face The contents of the display correspond with those of the Device list Table 22 on page 38 6 2 6 Fonts Tab The most important parameters of the fonts available in the printer are listed on the Font...

Страница 35: ...the chosen tab some help functions can be selected Figure 15 Help menu on the printer web interface Check of the firmware version and offer for update Visit the cab Website Information about the vers...

Страница 36: ...ay 0 ms Lock time 0 ms Vacuum delay On Vacuum control On Label hand over Passive Cleaning blow Off Peel off position 0 0 mm Interfaces Ethernet Hostname cab 999163 DHCP Off IP address 192 168 9 13 Net...

Страница 37: ...h Font list Wed Aug 14 10 44 21 2019 cab SQUIX 4 300MP Firmware V5 27 Jul 25 2019 164162036456 No Name Type Description 1 _DEF1 Bitmap Default Font 12x12 dots 2 _DEF2 Bitmap Default Font 16x16 dots 3...

Страница 38: ...1 10296933 Rev 1 06 Mfr 0985 ID 0BD8 Class FF 00 Protocol FF Driver cab_key USB 5 Microchip Technology Inc AR1100 HID DIGITIZER Full Rev 1 01 Mfr 04D8 ID 0C03 Class 00 00 Protocol 00 Driver usbhid USB...

Страница 39: ...hout taking the label gaps into consideration This is why endless media are most suitable for this purpose X X Insert printable medium labels endless paper which extends across the entire printing wid...

Страница 40: ...rmal transfer printing insert transfer ribbon with the maximum width X X Start menu X X Select Test Wi Fi status The printout can be canceled with Wi Fi status Wed Aug 14 10 36 15 2019 cab SQUIX 4 300...

Страница 41: ...lution of the printhead Resolution 12 DPMM dots millimeter 6 Print width Number of dots Width no of dots 106mm 1248 7 Operative time Number of printed labels with the current printhead Hours no of lab...

Страница 42: ...X X Insert printable medium labels endless paper which extends across the entire printing width X X If the printout is to occur using thermal transfer printing insert transfer ribbon with the maximum...

Страница 43: ...ge Insert appears in the display once the advance is complete X X Insert printable medium labels endless paper which extends across the entire printing width X X If the printout is to occur using ther...

Страница 44: ...ss paper which extends across the entire printing width X X If the printout is to occur using thermal transfer printing insert transfer ribbon with the maximum width X X Start menu X X Select Diagnost...

Страница 45: ...stream X X Select the external storage device X X Enter a file name The predefined name is composed of the identifier log date clock time and the suffix lbl but may also be altered Confirm the select...

Страница 46: ...module installed on the printer X X Insert SD card or USB memory module X X Start menu X X Select Diagnostics Save print image X X Select the external storage device X X Enter a file name The predefin...

Страница 47: ...SD card or USB memory module X X Start menu X X Select Diagnostics Save system log X X Select the external storage device X X Enter a file name The predefined name is composed of the identifier sys da...

Страница 48: ...PIN a prompt appears in the display Enter the code number and confirm it X X Select Save settings X X Select the external storage device X X Enter a file name The predefined name is composed of the i...

Страница 49: ...name Password Web interface access admin admin FTP printing ftpprint print FTP access to storage devices ftpcard card FTP f irmware update ftpadmin admin Web service soap soap OPC networking opcuser o...

Страница 50: ...ies of third party solutions used in the printer firmware X X Start menu X X Select Extras If the menu is protected via a PIN a prompt appears in the display Enter the code number and confirm it X X S...

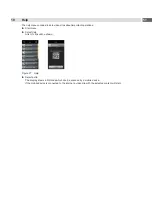
Страница 51: ...perations X X Start menu X X Select Help A list of clips will be shown Figure 27 Help X X Select a clip The display shows a QR code which can be scanned by a mobile device If the mobile device is conn...

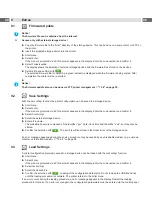
Страница 52: ...Select Service Reset service counter The display shows Reset service counter X X Select Continue The data recorded by the service counter is set to the value 0 The status print can be used to check w...

Страница 53: ...r Model X X Select a model Following the Info function all test prints and the web interface show the selected printer model 11 5 No Branding Access only with service key inserted With the activation...

Страница 54: ...ftpadmin admin Table 28 Default passwords i Notice X X The passwords can be changed in the Setup tab of the web interface page 32 After logging on the FTP server is accessible in a manner similar to...

Страница 55: ...folder of the FTP server will be shown X X Copy a valid firmware file e g 527_9725 cfw to the folder The status of the saving procedure is shown by a progress indicator in the display The printer rese...

Страница 56: ...external storage devices only X X Slide SD card contact side first into the matching slot until it latches To unlatch SD card press it shortly into the slot and remove it or X X Connect USB flash driv...

Страница 57: ...le XYZ is called up The NOPRINT parameter in command A suppresses the printing of a label when the file is saved To print the label a variable number of times use command A 13 5 Storage Device Functio...

Страница 58: ...e single file or all files of the folder can be selected X X Confirm the selection with Under the headline Destination the selection of storage devices will be shown again X X Select destination devic...

Страница 59: ...aces and FTP printer management At functions started from the printer display all storage devices are accessible but the default storage will be offered first X X Start menu X X Select Storage Default...

Страница 60: ...sed Preparing the Computer X X Install the VNC client on the computer Preparing the Printer X X Activate the VNC server under Setup Interfaces Network services VNC server X X Enter password vnc under...

Страница 61: ...et the parameter Setup Region Keyboard matching to the used keyboard i Notice X X If the parameter Keyboard is set to Automatic the keyboard assignment will be defined by the setting of the parameter...

Страница 62: ...y F8 Functions like Enter Starts menu Esc Functions like Space Functions like Table 32 Special key functions general In the menu and for entry of variable data Enter Confirms the input Esc Cancels the...

Страница 63: ...er With the cabFirmwareUpdater it is possible to start a firmware update via USB Ethernet or serial interface 1 Start the cabFirmwareUpdater 2 Select the printer model 3 Select the interface Port 4 Ch...

Страница 64: ...nsor 18 Legal notices 50 Load label 57 Load settings 48 M Menu 11 Monitor mode 42 N Network services 25 P Passwords 54 Peeling off 21 Print Apply 22 Printing 17 Printing intensity 17 Print offset 17 P...

Отзывы: