background image

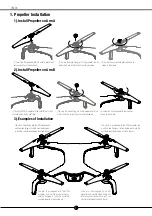
(1) Insert the CW propeller into the shaft A (motor with 
concave points on the shaft end).

(2) Screw the white fixing nut of the propeller into the 
motor shaft, and rotate the nut  counterclockwise.

(3) Screw the nut manually with your hand as 
shown in the picture.

The arm A is equipped with the CW propeller and 
a white blade fixing nut, rotate counterclockwise 
to lock the nut,rotate clockwise to unlock the nut.

The arm B is equipped with the CCW propeller and 
a white blade fixing nut, rotate clockwise to lock the 
nut,rotate counterclockwise to unlock the nut.

The arm B is equipped with the CCW 
propeller and a white blade fixing nut, 
rotate clockwise to lock the nut,rotate 
counterclockwise to unlock the nut.

The arm A is equipped with the CW 
propeller and a white blade fixing nut, 
rotate counterclockwise to lock the 
nut,rotate clockwise to unlock the nut.

(1) Insert the CCW propeller into the shaft B (motor with 
concave points on the shaft end).

(2)Screw the black fixing nut of the propeller into the 
motor shaft, and rotate the nut  counterclockwise.

(3) Screw the nut manually with your hand as 
shown in the picture.

DF805

1

1. Propeller Installation

1). Install Propeller on Arm A

2). Install Propeller on Arm B

3). Examples of Installation 

Содержание DF805

Страница 1: ...manual carefully Please do not disassemble modify or repair the aircraft if necessary please contact agent This manual is concise For more details please go to the Help in the upper right corner of t...

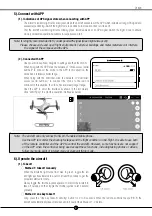
Страница 2: ...otate counterclockwise to unlock the nut The arm B is equipped with the CCW propeller and a white blade fixing nut rotate clockwise to lock the nut rotate counterclockwise to unlock the nut The arm A...

Страница 3: ...flow positioning function cannot be activated due to the low altitude with the aircraft s front indicator light blinking slowly After the aircraft has taken off and the conditions are satisfied the o...

Страница 4: ...craft Long press the power button for 2 seconds 3 Power on the remote controller Long press the power button for 2 seconds to turn on the remote controller 4 Self inspection and pairing Power on the a...

Страница 5: ...the drone to the remote controller In this situation the drone has a relatively longer range Open the APP to enter the interface as shown in the left picture Click Start Flying to enter the operation...

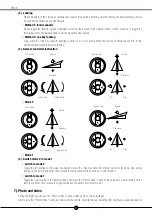
Страница 6: ...g button for 2 to 3 seconds When the remote controller beeps B B B the aircraft will land vertically and stop running 3 Remote controller instruction Mode 2 Mode 1 4 Switch mode 2 to mode 1 switch to...

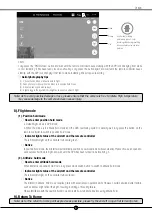
Страница 7: ...in altitude hold mode and the GPS positioning system is working well long press the button on the remote controller to switch to position hold mode Indicator light status of the aircraft and the remo...

Страница 8: ...ce the auto return to home mode is enabled if the aircraft flies below 30 meters of altitude the aircraft will automatically ascend to 30 meters before returning to home point However if the aircraft...

Отзывы: