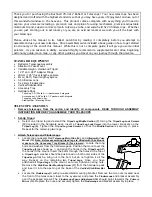
look through the main telescope tube at low power should reveal the same image. With the lowest
power eyepiece (the one with the largest number printed on it) you should be able to focus the same
image that you saw through the finderscope. Avoid the temptation to move directly to the highest
power. The low power eyepiece will give you a wider field of view, and brighter image--thus
making it very easy to find your target object. At this point with a focused image in both scopes,
you've passed the first obstacle. If you don't see an image after attempting to focus it in, you might
consider aligning your finderscope again. Once you pass this step, you'll will enjoy the time spent
ensuring a good alignment. Every object you center in the finderscope will be easily found in the
main telescope tube, which is important for continuing your exploration of the night sky.
3. The low power eyepieces are perfect for viewing the full moon, planets, star clusters, nebulae, and
even constellations. These should build your foundation. However, for more detail, try bumping up
in magnification to higher power eyepieces on some of these objects. During calm and crisp nights,
the light/dark separation line on the moon (called the "Terminator") is marvelous at high power.
You can see mountains, ridges and craters jump out at you due to the highlights. Similarly, you
can move up to higher magnifications on the planets and nebulae. Star clusters and stars are best
viewed through the low power no matter what.
4. The recurring astronomical theater we call the night sky is an ever-changing billboard. In other
words, not the same movie plays all the time. Rather, the positions of the stars change not only
hourly as they seem to rise and set, but also throughout the year. As the earth orbits the sun our
perspective on the stars changes on a yearly cycle about that orbit. The reason the sky seems to
move daily just as the sun and the moon "move" across our sky, is that the earth is rotating about
its axis. As a result you may notice that after a few minutes or a few seconds depending on what
power you are viewing at, the objects in your telescope will move. At higher magnifications
especially, you will notice that the moon or Jupiter will "race" right out of the field of view. To
compensate, just move the fine adjustment controls on your telescope to "track" it in the necessary
path.
Helpful Hints
1. Your telescope is a very sensitive instrument. For best results and fewer vibrations set your
telescope up on a level location on the ground rather than your concrete driveway or your wooden
deck. This will provide a more stable foundation for viewing, especially if you've drawn a crowd
with your new telescope.
2. If possible view from a location that has relatively few lights. This will allow you to see much
fainter objects. You'd be surprised how much more you'll see from your local lake or park when
compared to a backyard in the city.
3. Using your telescope out a window is NEVER recommended.
4. View objects that are high in the sky if possible. Waiting until the object rises well above the
horizon will provide a brighter and crisper image. Objects on the horizon are viewed through
several layers of earth's atmosphere. Ever wonder why the moon appears orange as it sets on the
horizon. It's because you are looking through a considerable more amount of atmosphere than you
would directly overhead. (Note: If objects high in the sky are distorted or wavy, you are probably
viewing on a very humid night.) During nights of unstable atmosphere, viewing through a telescope
can be frustrating if not impossible. Astronomers refer to crisp, clear nights as nights of "good
seeing."


