background image


Congratulations on your purchase of a Bushman DC190L. Please read these instructions carefully 
before installation and use. 
 

Please be safe and use common sense and caution when installing, operating and cleaning this appliance. If 
you are unsure about any of these instructions, contact your local dealer before proceeding. 
 

IMPORTANT INFORMATION 


Do not lay your fridge on its back, top or sides or at any angle exceeding 30º. If your fridge has been 
incorrectly handled, ensure that the fridge is placed in a level upright position for 12 hours to allow the internal 
fluids to redistribute evenly. 
Never operate your fridge directly from a 240 V or AC power supply. 
Do not use a modified sine wave inverter to operate your fridge. 


PRIOR TO INSTALLATION 


DELIVERY 

At delivery, please check that the fridge is complete and is not damaged in any way. Remove all packaging 
and securing tapes from the fridge. To avoid injury and causing damage to the appliance, be extremely 
cautious when using sharp or pointed tools to complete this task. 
 
Do not connect an appliance that has been damaged, contact your local stockist immediately. 


INSTALLATION 


Installation of the DC190L must be completed by a suitably trained professional only. 
 

POWER SUPPLY 

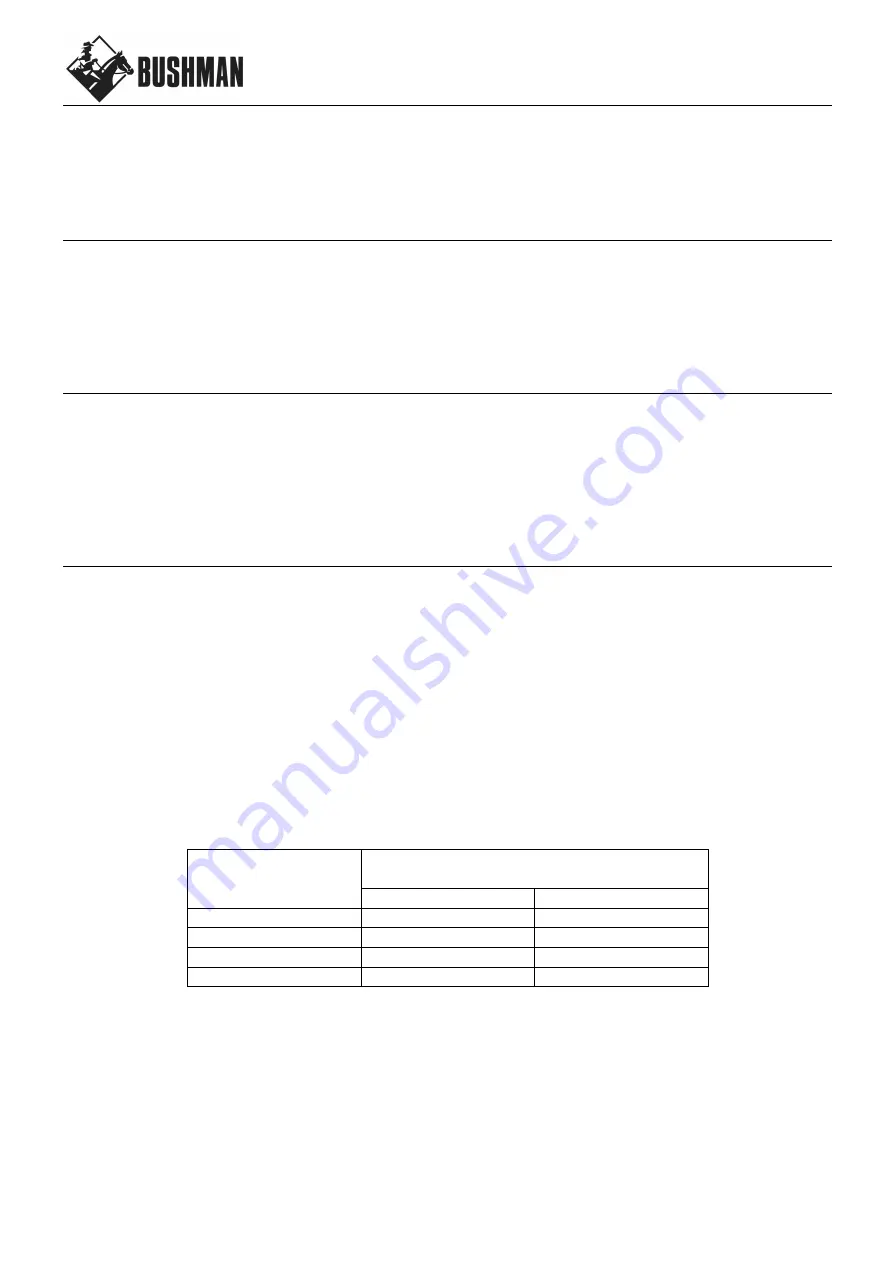
Your fridge must be connected to a stable and regulated 12 V or 24 V DC power supply only. The compressor 
will automatically detect which voltage is present adjust accordingly.  
If you are using a generator or other power supply, the output must be a pure sine wave. Any fluctuations in 
generator current may damage the compressor. 


WIRING 

Wire you fridge directly to your battery bank, without going via a buss bar, battery management system or 
shared circuit. For optimum results, you will need the correct sized wire depending on the distance from your 
power supply to the fridge. Please also ensure the earth is wired directly to your battery, not to a chassis. If 
your wiring is insufficient, your fridge may not perform correctly or may be damaged. 


CROSS 

SECTION 

IN MM2 

MAXIMUM LENGTH OF WIRE IN 

METRES 

12 V 

24 V 

2.5 

2.5 

12 

10 

10 

20 


ISOLATION SWITCH 

Install an isolation switch or breaker for the fridge circuit as close to your battery bank as possible. Any 
switches must have a breaking load not less than 20 A on 12 V or 10 A on 24 volts. 


Ensure the wiring polarity is correct. Connect the red wire to the positive terminal (+) and the black wire to the 
negative terminal (-). 
 
Never connect bare electric wires. Use only connections of a size suitable for the cross section of the wire 
being used. 


Содержание DC190-L

Страница 1: ...User Manual Operating Instructions DC190L CARAVAN MARINE RV OFFGRID ...

Страница 2: ...t be completed by a suitably trained professional only POWER SUPPLY Your fridge must be connected to a stable and regulated 12 V or 24 V DC power supply only The compressor will automatically detect which voltage is present adjust accordingly If you are using a generator or other power supply the output must be a pure sine wave Any fluctuations in generator current may damage the compressor WIRING...

Страница 3: ... of the fridge cabinet and so that the small tab is located at the top as follows 2 Carefully mark the position of each of the 4 holes in the mounting kit on the side of the fridge cabinet 3 Remove the side pieces 4 Drill 2mm pilot holes 5mm deep through the sheetmetal where marked 5 Reposition the side pieces and screw to the fridge cabinet using the 8 screws provided Do not over tighten 6 There ...

Страница 4: ...e thermostat up from there if the fridge is not reaching 4 C Always use the lowest number possible Do not use setting 7 EQUALISING THE FRIDGE During the first 24 hours of operation your compressor will operate for longer than usual This process allows the internal air temperature food drinks condenser and insulation to equalise ENERGY SAVING TIPS Have a much ventilation as possible the more the be...

Страница 5: ... fridge cabinet Only tighten screws finger tight 8 Align the freezer door until it is square with the fridge cabinet by twisting the door into position and manipulatin the postion of the top and middle hinges 9 Tighten top hinge screws fully 10 Align the main door until it is square with the fridge cabinet also by twisting the door into position and manipulatin the postion of the bottom and middle...

Страница 6: ... the back of the fridge This is a normal part of the operation of a low power cooling system However it should build up slowly over many weeks Excessive ice build up is a problem as the ice eventually insulates the cooling element and hinders the fridge s ability to cool In this instance turning the thermostat up to flat out 7 will cause ice to build up even faster Therefore slowing the ice build ...

Страница 7: ...6 V 10 9 V 24 V 21 3 V 22 7 V RED ERROR LIGHT There is a red LED light just to the LHS of the compressor If you are experiencing any problems with your fridge first check to see if the LED is blinking The number of blinks corresponds to the following error codes ...

Страница 8: ...8 ...

Страница 9: ...9 ...

Страница 10: ...shman facility are not covered under this warranty However this warranty covers shipping charges related to returning the repaired product to the customer This warranty does not apply to damage or wear to the product caused by accident abuse misuse neglect unauthorized alteration or repair or if the product was not used in accordance with Bushman printed installation and operating instructions To ...

Страница 11: ...11 NOTES ...

Страница 12: ...12 NOTES For after sales service and enquiries please contact BUSHMAN FRIDGES 3 Contour Close Research VIC 3095 03 8080 9990 info bushman com au ...

Отзывы: