background image

- 16 -

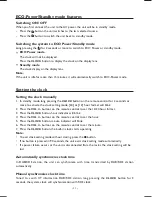
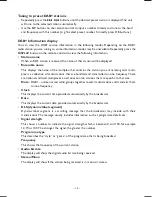
To change the FM reception mode

Press the 

MODE

 button on the remote control to select the Stereo or Mono channel to receive 

the best FM reception mode.

RDS (radio data system) Reception

Many FM stations are broadcasting added data compatible with RDS (Radio Data System). This 
radio set offers convenient functions using such data.
Press the 

DISPLAY

 button repeatedly to select the information that displayed as follows.

Š

 Station name

When an RDS station is received, the “RDS” and the name of that station will be displayed.

Š

  PTY (programme type)

This describes the “Style” or “genre” of music that is being broadcast e.g. “Rock” or “Classical”.

Š

 Time 

The broadcaster (Radio station) provides clock and date information automatically so there’s 
no need to manually set this information.

Š

 Text

The broadcaster can include a scrolling text that displays information about the current pro-
gram.

Š

 Frequency

This shows the frequency of the current station e.g. 95.30MHz.

Disc (audio CDs and MP3/WMA discs) operation

Disc playing

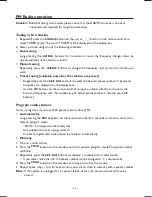
1.  Repeatedly press the 

SOURCE

 button on the unit or directly press 

 button on the remote 

  control to select DISC source. The word “DISC” will be displayed on the display lens.
2. Press the 

K

 button to open the disc door and place the disc on the disc tray (with the printed 

 side 

up).

3. Press the 

K

 button to close the disc door, the unit will read the disc and play it automatically.

Note:

 If in stop mode, please press the 

BF

 button to start playing the disc.

4. Press the 

BF

 button to temporarily stop the playing, press the button again, it will continue 

 to 

play.

5. Press the 

L

 button to stop the disc playing.

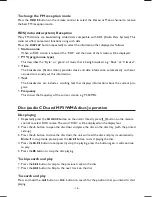
To skip search and play

Š

  Press the 

H

 button to skip to the previous track on the disc. 

Š

  Press the 

G

 button to Skip to the next track on the disc.

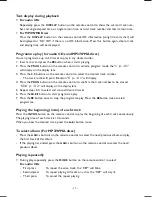
To search and play

Press and hold the 

D

 button or 

C

 button to search for the position that you intend to start 

playing.

Содержание BMS2015DABT

Страница 1: ...BMS2015DABT USER MANUAL DAB BLUETOOTH CD MICRO SYSTEM T ...

Страница 2: ...e 11 Setting the clock 11 Setting the clock manually 11 Automatically synchronzies clock time 11 Manual synchronzies clock time 11 Sound quality 12 Adjusting the volume 12 Mute sound 12 Adjusting the super bass 12 Controlling the loudness 12 Presetting equalizer 12 Changing the front panel darkness 12 DAB Radio operation 13 Tuning to DAB for the first time 13 Store DAB radio stations 13 Tuning to ...

Страница 3: ...ng the beginning intro of each track 17 To select album For MP3 WMA discs 17 Playing repeatedly 17 Play from USB 18 Access a folder 18 Charge for external devices 18 Play from Bluetooth device 19 Setting the sleep timer 19 Set the alarm timer 20 Listen to an external device 20 Specifications 21 Maintenance 22 Cleaning the unit 22 Handling discs 22 Cleaning discs 22 Storing discs 22 Troubleshooting...

Страница 4: ... top of or near the unit Moisture To reduce the risk of fire electric shock or product damage do not expose this unit to rain moisture dripping or splashing No objects filled with liquids such as vases should be placed on the unit If you spill any liquid into the unit it can cause serious damages Switch it off at the mains immediately Withdraw the mains plug and consult your dealer Ventilation To ...

Страница 5: ... exposure Before moving the unit ensure the disc tray is empty Always remove the disc when the unit is not in use Failure to do so will risk severely damaging the disc and the unit Do not stack devices heat from other devices may affect the performance of the unit Service To reduce the risk of electric shock do not remove screws The unit does not contain any user serviceable parts Please leave all...

Страница 6: ...e cases fire or even an explosion Remove dead batteries from equipment and all batteries from equipment you know you are not going to use for a long time Otherwise the batteries may leak and cause damage Never dispose of batteries in fire as this can cause them to explode Please recycle dead batteries do not put with the normal household waste Never attempt to recharge ordinary batteries either in...

Страница 7: ... button G Preset up button G 4 Standby button 5 USB Socket 6 Display lens 7 Source knob SOURCE 8 Stop button LSTOP 9 Search backward button D Tuning backward button D 10 Previous button H Preset down button H 11 Play Pause button BF 12 Search forward button C Tuning forward button C 13 Volume control knob 14 Remote sensor 15 AC Power socket 16 Speaker output sockets L R 17 AUX Input sockets L R 18...

Страница 8: ...button BF Disable the Bluetooth function button PAIRING 13 Album up button ALB 14 Album down button ALB 15 Mute button MUTE 16 Number button 0 9 10 17 Open Close button K 18 USB Function button 19 Bluetooth function button AUX Function button AUX 20 Repeat A B button A B 21 Dimmer button DIM 22 Super bass button S BASS 23 Sleep button SLEEP 24 Timer button TIMER 25 Display Button DISPLAY RDS Displ...

Страница 9: ... control is not going to be used for an extended period of time To avoid possible failure read the following instructions and handle the remote control properly Do not drop or cause impact to the remote control Do not spill water or any liquid on the remote control Do not place the remote control on a wet object Do not place the remote control under the direct sunlight or near sources of excessive...

Страница 10: ...ording to the brightness of the room Note Make sure that there is no obstacle between the infrared remote sensor of the unit and remote control If you install the unit on rack etc the remote controllable range may decrease depending on the thickness or colour of glass door of rack Do not expose the infrared remote sensor to direct sunlight or other strong light such as inverter fluorescent light 6...

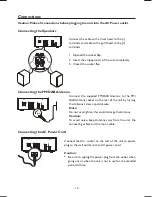
Страница 11: ... Connect the supplied FM DAB Antenna to the FM DAB Antenna socket on the rear of the unit by turning the Antenna screw cap clockwise Note Do not overtighten this could damage the Antenna Caution To avoid noise keep Antenna away from the unit the connecting cables and the mains cable Connecting the AC Power Cord Connect the AC socket on the rear of the unit to power plug to the wall outlet with an ...

Страница 12: ...e the clock setting mode 24 or 12 hour format will blink 2 Press the VOL buttons on the remote control to set the 12 24 hour format 3 Press the CLOCK button hour indicator will blink 4 Press the VOL buttons on the remote control to set the hour 5 Press the CLOCK button minute indicator will blink 6 Press the VOL buttons on the remote control to set the minute 7 Press the CLOCK button the built in ...

Страница 13: ...lay lens Controlling the loudness This unit has a loudness function which can automatically increase the bass sound effect at low volume It can also increase the bass sound effect at high volume but it will be relatively less when it is at high volume Press the LOUDNESS button on the remote control to obtain the loudness function the LOUD will show in display lens Press again to cancel the effect ...

Страница 14: ...ess the SCAN button on the remote control to activate automatic program mode The word SCANNING will be displayed on the display lens All available stations are programmed The system will store all detected stations at completion of the scanning the system will turn to a station on the list IF NO DAB service is available NO DAB will be display Manually 1 Tune to a radio station 2 Press the PROG but...

Страница 15: ...ed and transmitted on one frequency There are national and local multiplexes Local ones contain stations that are specific to that area Note DAB unlike normal radio groups together several radio stations and transmits them on one frequency Clock This displays the current time provided automatically by the broadcaster Date This displays the current date provided automatically by the broadcaster DLS...

Страница 16: ...mote control to input a number directly and tune to the band and frequency with this number e g To select preset number 5 directly press 0 5 buttons Program radio stations You can program a maximum of 20 preset radio stations FM Automatically Long pressing the PROG button on the remote control for 2 seconds or more to activate au tomatic program mode AUTO is displayed on the display lens All avail...

Страница 17: ...ays information about the current pro gram Frequency This shows the frequency of the current station e g 95 30MHz Disc audio CDs and MP3 WMA discs operation Disc playing 1 Repeatedly press the SOURCE button on the unit or directly press button on the remote control to select DISC source The word DISC will be displayed on the display lens 2 Press the K button to open the disc door and place the dis...

Страница 18: ...he PROG button on the remote control to confirm the track number to be stored 008 p 02 will display on the display lens 5 Repeat steps 3 4 to select and store all desired tracks 6 Press the BF button to start programme play 7 Press the L button once to stop the programme play Press the L button twice to clear programme Playing the beginning intro of each track Press the INTRO button on the remote ...

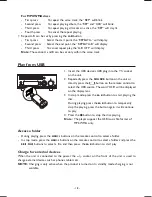
Страница 19: ...on the remote control to select the USB source The word USB will be displayed on the display lens 3 In stop mode press the BF button to start playing the disc During playing press the BF button to temporarily stop the playing press the button again it will continue to play 4 Press the L button to stop the disc playing Note The player support the USB music file format of MP3 WMA only Access a folde...

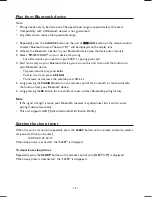
Страница 20: ...ice To pause resume play press BF To skip to a track press H G To increase or decrease the volume press VOL 5 Long pressing the PAIRING button on the remote control for 2 seconds or more to disable the function from your Bluetooth device 6 Long pressing the L button for 2 seconds or more to clear Bluetooth pairing history Note If the signal strength is weak your Bluetooth receiver may disconnect b...

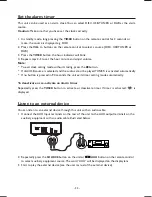
Страница 21: ...d and the audio cannot be played TUNER is activated automatically If no button is pressed in 90 seconds the unit exits timer setting mode automatically To deactivate or re activate an alarm timer Repeatedly press the TIMER button to activate or deactivate timer If timer is activated is displayed Listen to an external device You can listen to an external device through this unit with an audio cable...

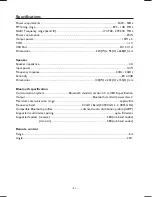
Страница 22: ... Sensitivity 80 4dB Dimensions 140 W x 232 H x 155 D mm Bluetooth specification Communication system Bluetooth standard version 4 0 and EDR specification Output Bluetooth standard power class 2 Maximum communication range approx 8m Frequency band 2 4 GHz Band 2 4000 GHz 2 4835 GHz Compatible Bluetooth profiles advanced audio distribution profile A2DP Supported multi devices pairing up to 8 devices...

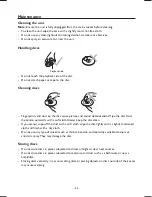
Страница 23: ...tion Wipe the disc from the centre outwards with a soft cloth Always keep the disc clean If you cannot wipe off the dust with a soft cloth wipe the disc lightly with a slightly moistened cloth and finish with a dry cloth Do not use any type of solvent such as thinner benzine commercially available cleaners or antistatic spray They may damage the disc Storing discs Do not store discs in places subj...

Страница 24: ...ly Check if the stripped speaker wires are clamped Disc does not play Insert a readable disc and ensure that the label side faces up Check for any scratches or smudges on the disc Moisture has condensed inside the system Remove the disc and leave the system turned on for about an hour Disconnect and reconnect the AC power plug and then turn on the system again As a power saving feature the system ...

Страница 25: ...ot connect with this unit The device does not support the profiles required for this unit The Bluetooth function of the device is not enabled Refer to the user manual of the device to find out how to enable the function This unit is not in pairing mode This unit is already connected with another Bluetooth enabled device Disconnect that device and then try again Timer does not work Set the clock co...

Страница 26: ...equences on the environment are avoided For this reason electrical equipment is labelled with the displayed symbol Batteries and rechargeable batteries Batteries and rechargeable batteries must not be disposed of with household waste Every consumer is required by law to bring all batteries and rechargeable batteries whether they contain harmful substances or not to a collection point run by the co...

Страница 27: ...jor failure and for compensation for any other reasonably foreseeable loss or damage You are also entitled to have the goods repaired or replaced if the goods fail to be of acceptable quality and the failure does not amount to a major failure For Customer Service and to register your Warranty visit www bushaustralia com au SEP15 BMS2015DABT ...

Отзывы: