Installing your chest freezer
Bringing it all together
Installing your chest freezer
14
Caution:
2 people are required to unpack
and handle the appliance, it is recommended that
gloves are worn.
The appliance should be transported only in
an upright position. Do not tilt the appliance
greater than 45
°
. The packaging as supplied
must be intact during transportation.
After transporting the appliance, leave it for at
least 4 hours before switching on to allow the
cooling system to settle. Failure to comply
could result in damage to the appliance.
Do not move the appliance by pulling the door
or handle as it may damage your flooring and
wall coverings etc.
Ensure the supply cable is not caught under
the appliance during and after moving.
Carefully remove all packaging materials
including the foam base, dispose of correctly.
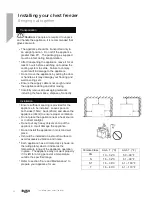
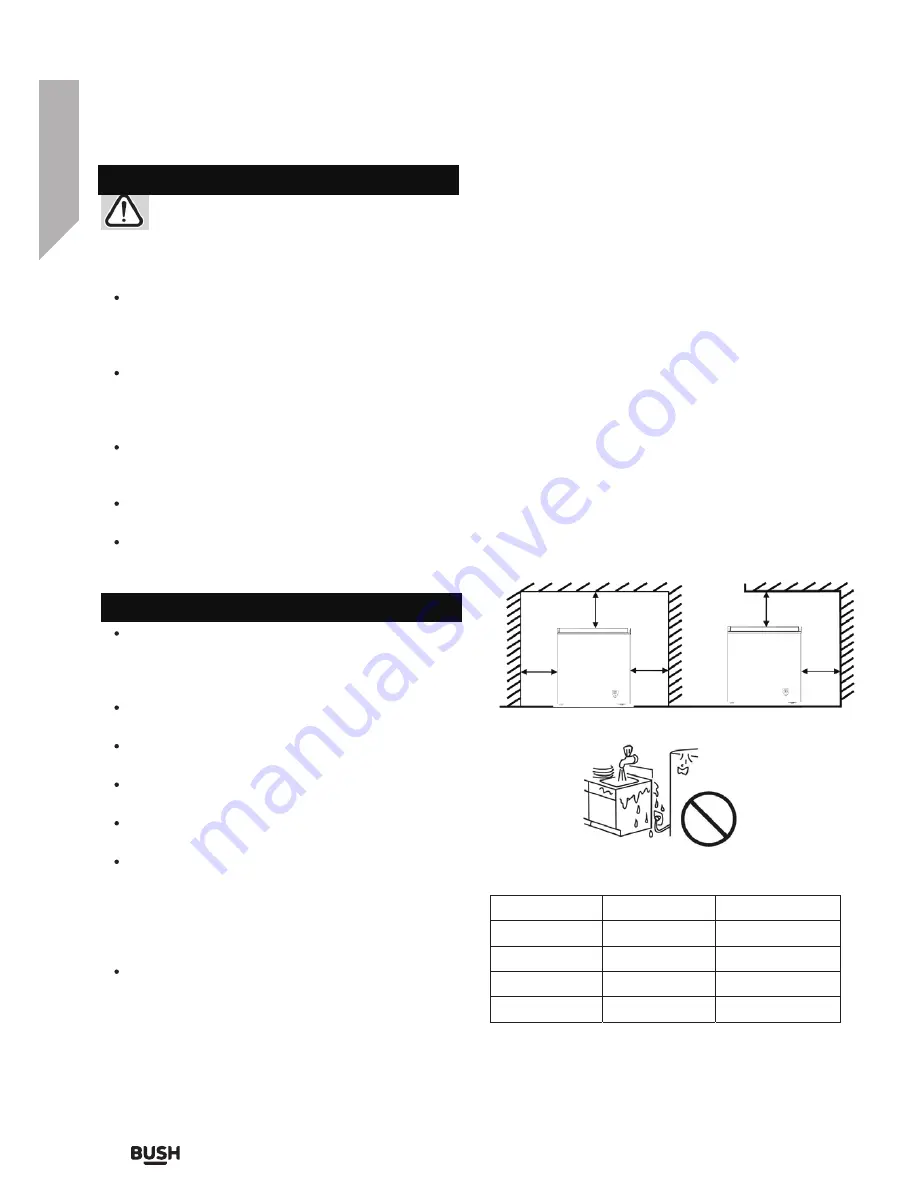
Ensure sufficient spacing is provided for the
appliance to be installed. Leave space on
both sides (15cm), back (20cm) and above the
appliance (30cm) to ensure proper ventilation.
Do not place the appliance near a heat source
or in direct sunlight.
Do not put any heavy objects on top of the
appliance. It will damage the appliance.
Do not install the appliance in moist and wet
place.
It should be installed on a smooth surface to
avoid excessive vibration and noise.
Each appliance has a climate class (shown on
the rating plate) where it indicates the
temperature range of the appliance operation
in place. The appliance may not work properly
if it is left for a long period at a temperature
outside the specified range.
Refer to section “Care and Maintenance” to
prepare your appliance for use.
Climate Class
Amb. T. (
°
C)
Amb. T. (
°
F)
SN
10 ~ 32
°
C
50 ~ 90
°
F
N
16 ~ 32
°
C
61 ~ 90
°
F
ST
16 ~ 38
°
C
61 ~ 100
°
F
T
16 ~ 43
°
C
61 ~ 110
°
F
Installation
Transportation
Содержание BCF198L
Страница 2: ...BCF198L...
Страница 5: ......
Страница 6: ...1 Safety information...
Страница 7: ...6 Safety informtion...
Страница 8: ...7 Safety informtion...
Страница 9: ...8 Safety informtion...
Страница 10: ...Getting to know your chest freezer 2...
Страница 11: ...Getting to know your chest freezer Getting to know your chest freezer 10...
Страница 13: ......
Страница 14: ...Installing your chest freezer 3...
Страница 17: ......
Страница 18: ...Using your chest freezer 4...
Страница 21: ......
Страница 22: ...Care and maintenance 5...
Страница 25: ......
Страница 26: ...Product support 6...
Страница 27: ...Product support Help is always at hand Product support 26 chest freezer chest freezer...
Страница 29: ...28 Product support...
Страница 30: ......
Страница 31: ......
Страница 32: ......
Страница 33: ...Contact www argos support co uk Helpline 0345 257 7271...

