background image

For any help concerning set up and use of your TV please call the Customer Helpline: 0 345 604 0105


Connectivity Functions

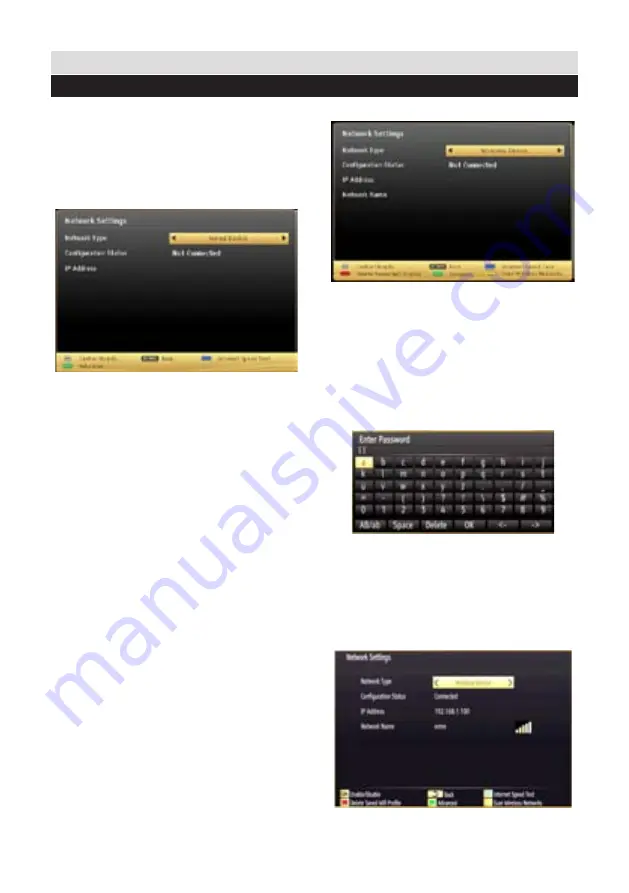
Configuring Network Settings

Your TV’s Network Settings include Wired and 
Wireless Connection options. 

Configuring Wired Device Settings

If you are connecting the TV via ETHERNET 
INPUT, select Network Type as 

Wired Device


to configure.

Network Type

Network  type  can  be  selected  as  Wired  or 

Wireless device, in accordance with the active 

connection to the TV set. Select this as Wired 

if you have connected to the TV a LAN cable. 

Select as Wireless if you connect wirelessly.

Configuration Status

This section displays the status of the connection. 

IP Address

If an active connection is available, the IP address 
will be displayed on this section. If you want to 

configure IP address preferences, press 

GREEN


button and switch to the advanced mode. 

Configuring Wired Network Settings in 

Advanced Mode

After pressing 

GREEN

 button, Advanced mode 

will be available. While in Advanced Mode, press 

RED

 button to edit settings. When finished, press 

OK

 to save, Press 

RETURN

/

BACK

 to cancel.

Configuring Wireless Device Settings (Optional)

Wi-Fi feature can be used for a wireless network 

connection. The feature is used for infrastructure 
purposes only, such as connecting to the web, 
hbb sites and connecting with DLNA servers 
(optional).  Select 

Network Type

 as 

Wireless 

Device

 to start connection process.

Press 

YELLOW

 button to scan wireless network 

from network settings menu. Afterwards, 
available network list will be displayed. Please 
select your desired network from the list. 

If the selected network is protected with a 
password, please enter the correct key by using 
the virtual keyboard. You can use this keyboard 
via 

navigation buttons

 (Left/Right/Up/Down) 

and 

OK

 button on the remote control. 

Wait  until  the  IP  the  address  is  shown  on  the 

screen.

Press 

GREEN

 button to switch to advanced mode 

and then press 

OK

 button to edit settings. This 

means that the connection is now established. To 
disconnect from a wireless network, you should 
highlight 

Configuration Status

 and press 

OK

.

41

Содержание 205/5352

Страница 1: ...RTANT Please read these instructions fully before installing or operating These instructions contain important information which will help you get the best from your television and ensure safe and cor...

Страница 2: ...Mode 25 Conditional Access 25 Setting Sleep Timer 25 Setting Programme Timers 25 Editing a Timer 26 Deleting a Timer 26 Power Save Mode 26 Repair Information 26 Picture Controls 27 Configuring Picture...

Страница 3: ...d or Wireless Network 43 Step 3 Play Shared Files via Media Browser 43 Internet Portal 44 iPlayer Application 44 HBBTV System 45 Internet Browser 46 Getting Started with Skype 47 Sign In Sign Up Now 4...

Страница 4: ...always out of reach of small children If a battery is swallowed immediately seek medical attention Keep the packaging films out of reach of children Risk of suffocation The lightning flash with arrowh...

Страница 5: ...nings on the TV set are intended for ventilation and to ensure reliable operation To prevent overheating these openings must not be blocked or covered in anyway Heat sources and Flames Do not expose t...

Страница 6: ...rol to the TV set NOTE The TV set should be stored in a dry and dust free room Connection to a Television Distribution System Cable TV etc from Tuner Device connected to the protective earthing of the...

Страница 7: ...rts including that lost remote control Any other technical issues you may need assistance with Call us today 0 345 604 0105 Local call rates applies Lines open 9am 8pm Monday to Saturday and 10am 4pm...

Страница 8: ...nnection Automatic programming system Forward or backward manual tuning Automatic power down after up to six hours Sleep timer Child lock Automatic sound mute when no transmission NTSC playback AVL Au...

Страница 9: ...n message will be displayed on the next switch on When the Auto Tv Off timeout is reached the following message will be displayed on the screen Select YES to shut down the TV Select NO to cancel The T...

Страница 10: ...27 Quick menu 28 Previous programme 29 Blue button 30 Yellow button 31 Subtitle on off 32 Rapid advance in media browser mode 33 Stop in media browser mode 34 Pause in media browser mode 35 Media bro...

Страница 11: ...omer Helpline 0 345 604 0105 11 1 Stand is placed on a flat surface fig 1 2 The product is held over the stand so that it coincides with the stand mounting point and then it is left to be mounted with...

Страница 12: ...rn into standby mode NOTE You can move the switch upward or downward to change the volume If you want to change the channel press the middle of the switch once Position 3 and then move upward or downw...

Страница 13: ...OTE When the remote control is not going to be used for long periods of time the batteries should be removed Otherwise the remote control may be damaged caused by battery leakage and corrosion AAA R3...

Страница 14: ...ng or button If Store Mode optional is selected Store mode option will be available in other settings menu and your TV s settings will be optimized for best display quality A confirmation screen will...

Страница 15: ...ill perform search process in a detailed way Searching duration will thus increase accordingly When finished press OK button to start automatic search The TV will search and store available broadcasts...

Страница 16: ...tput on the PC You can use the PC input to allowYPbPr signal connection with a device that has component output Connect the YPbPr to PC cable between the PC INPUT on the TV and the component video out...

Страница 17: ...gular jack of the cable to the TV s Side AV socket Afterwards insert your video cable not supplied connector into the YELLOW input located on the side with several connectors of the suppliedAV connect...

Страница 18: ...deo output it is possible to connect your external device with a SCART S video adapter not included to the scart input of the TV First plug the SCART S Video adapter to the SCART connector on your TV...

Страница 19: ...ED OFF In order to watch certain digital channels a conditional access module CAM can be necessary This module must be inserted in the CI slot of your TV fig 2 1 Obtain the ConditionalAccess Module CA...

Страница 20: ...mat the disk with your personal computer and the formatted disk type should be FAT32 CAUTION Quickly plugging and unplugging USB devices is a very hazardous operation Especially do not repeatedly quic...

Страница 21: ...changetheinputsourcerequired To change Input Selection use one of the following options Option a Press the SOURCE button on the remote control to directly select required source Option b Select SOURCE...

Страница 22: ...YELLOW button Prev day Zooms to programmes INFO button Details displays in detail information on programme selected SWAP button Now jumps to the current broadcast when viewing previous Prev day or fut...

Страница 23: ...splayed Using Main Menu Screen 1 Press MENU button to display main menu highlight the desired control icon using or or or button press OK button to display menu contents 2 Highlight an option inside a...

Страница 24: ...ing screen will be displayed 4 Select Yes if you want to move the channel and press OK Deleting a Channel 1 Select the channel that you want to delete and select Delete box 2 Press OK button to contin...

Страница 25: ...K to view menu items Setting Sleep Timer This setting is used for setting the TV to turn off after a certain time 1 Press MENU button and select the Settings icon by using or button 2 Press OK button...

Страница 26: ...If you set Power Save Mode as Eco the TV will switch to energy saving mode and luminance level of TV set will be decreased to optimum level Note that some picture settings will be unavailable to be c...

Страница 27: ...imum or Medium NOTE Backlight can not be activate in VGA or Media Browser mode or while picture mode is set as Game Noise Reduction If the broadcast signal is weak and the picture is noisy use Noise R...

Страница 28: ...er Settings Favourites Sleep Timer FollowMe TV to DMR CEC RC Passthrough FollowMe TV optional and Information booklet options Press Q MENU button on the remote control to view the quick menu See the f...

Страница 29: ...lected To terminate this operation and control the TV via the remote again press and hold the 0 Zero button on the remote control for 3 seconds Or press Q Menu button on the remote highlight the CEC R...

Страница 30: ...VL function sets the sound to obtain fixed output level between programmes For instance volume level of advertisementstendtobelouderthanprogrammes Headphone Lineout optional When you connect an extern...

Страница 31: ...arrator talks through the presentation describing what is happening on the screen during the natural pauses in the audio and sometimes during dialogue if deemed necessary You can use this feature only...

Страница 32: ...if only the broadcaster supports Otherwise settings will not be available to be changed Audio Changes the audio language for the current channel Subtitle Sets the subtitle language for the current cha...

Страница 33: ...om the connected USB memory stick Media Browser Configuration Select Settings icon from the main media browser page to view the current preferences You can set your Media Browser preferences by using...

Страница 34: ...offset value using or button 2 Press YELLOW button to confirm or press RETURN button to switch back to previous menu Viewing Photos via USB 1 Select Photos from the Media Browser screen and press OK...

Страница 35: ...to play Follow the information on the operations bar for using other commands Using MENU button in Media Browser Mode Pressing MENU button in Media Browser mode displays the following menu screen You...

Страница 36: ...mbol rate network channel scan satellite options for satellite manual search or frequency number for analogue manual search using the numeric buttons and press OK button to start search Network Channe...

Страница 37: ...ou can disable access to the installation menu or the whole menu system Maturity Lock not available for the UK When set this option gets the maturity information from the broadcast and if this maturit...

Страница 38: ...ed Buttons RED GREEN YELLOW BLUE Your TV supports both FASTEXT and TOP text systems When these systems are available the pages are divided into groups or topics When FASTEXT system is available sectio...

Страница 39: ...necting the LAN port at the rear of your TV to your modem s LAN connector as illustrated fig 1 To access and play shared files you must Select Media Browser Press Menu button and select Media Browser...

Страница 40: ...speed differs depending on the distance and number of obstructions between the transmission products the configuration of these products the radio wave conditions the line traffic and the products th...

Страница 41: ...tton Advanced mode will be available While inAdvanced Mode press RED button to edit settings When finished press OK to save Press RETURN BACK to cancel ConfiguringWirelessDeviceSettings Optional Wi Fi...

Страница 42: ...your cell phone Then select files that you would like to share with your TV If the connection is established correctly you should now access the shared files of your cell phone via the Media Browser...

Страница 43: ...g configurations are set properly the following OSD message will be displayed after selecting the desired media type Select OK to display the selected network or USB memory content If you want to refr...

Страница 44: ...he items on Portal screen Press the OK button to confirm your selection Press the BACK button to go to the previous screen Press the EXIT button to quit the Internet portal mode Note Some applications...

Страница 45: ...fferently Figure x Service with red button application taken from HbbTv specification If the user swicthes to another channel while an HbbTv application is active either in red button icon mode or ful...

Страница 46: ...enter any URL in the address bar You can search keywords by clicking the search button in the address dialog box or another way to navigate to pages is by clicking on links on web pages and these wil...

Страница 47: ...see the Terms of Use about Skype The TV must be connected to a network for Skype connection The Skype app will alert you when someone calls whilst you are watching your TV or operating the Skype appli...

Страница 48: ...ou already have a Skype account enter your name and password correctly Select Sign In and press OK If you have a Skype account and you forgot your password press the Red button to view the reset passw...

Страница 49: ...ct you want to find and add Use the remote control or virtual keyboard to enter a keyword Your Skype history can be seen in this section To view recent history options use the p and p buttons To delet...

Страница 50: ...process Voice and video call is ready for your use If available you will see the thumbnail view of yours and the other person s camera feed Help bar Your contact list Press Ok to use video voice call...

Страница 51: ...og is shown when you are logged into Skype and when other users initiate a Skype call A small dialog box will appear in the lower right corner of the TV screen whether the user watches TV or is browsi...

Страница 52: ...ayed automatically double click on the file SetupX located on the Nero MediaHome installation disc 2 Click on the button labeled Nero MediaHome Essentials to start the installation process The Nero Me...

Страница 53: ...ion path 7 Use Typical installation and click the Next button The Prerequisites screen is displayed The Nero MediaHome installation wizard checks the availability of required third party software on y...

Страница 54: ...he anonymous collection of usage data select the check box and click the Next button The final screen of the installation wizard is displayed 12 Click the Exit button 13 A shortcut called Nero MediaHo...

Страница 55: ...ntrol Try once more Also make sure the correct input source has been selected 2 Is the aerial connected properly 3 Are the plugs connected tightly to the aerial socket 4 Is the aerial cable damaged 5...

Страница 56: ...ions DxLxH without foot 80 x 1134 x 671 VESA 400 x 400 mm M6 Display 16 9 display 127 cm 50 Screen Size 56 Manufactured under license from Dolby Laboratories TRADEMARK ACKNOWLEDGMENT Dolby and the dou...

Страница 57: ...al N Brown Live L Green Yellow Earth E As the colours of the wires in the power cable may not correspond with the coloured markings identifying the terminals in your plug and proceed as follows The gr...

Страница 58: ...e parts including that lost remote control Any other technical issues you may need assistance with Call us today 0 345 604 0105 Local call rates applies Lines open 9am 8pm Monday to Saturday and 10am...

Страница 59: ...30fps 50Mbit sec mp4 mov MPEG1 2 Layer 3 AAC HEAAC AC3 EAC3 LPCM ADPCM H 264 1080Px2 25fps 1080P 50fps Other 1080P 30fps 50Mbit sec RMVB RM rv30 rv40 LBR cook AAC HEAAC 1080P 30fps 50Mbit sec avi MPEG...

Страница 60: ...Frequency 1 640x400 70Hz 2 640x350 85Hz 3 640x400 85Hz 4 640x480 60Hz 5 640x480 66Hz 6 640x480 72Hz 7 640x480 75Hz 8 640x480 85Hz 9 800x600 56Hz 10 800x600 60Hz 11 800x600 70Hz 12 800x600 72Hz 13 800x...

Страница 61: ...ing devices to your TV s connectors by using DVI converter cables not supplied you can refer to the following resolution information 56Hz 60Hz 66Hz 70Hz 72Hz 75Hz 640x400 640x480 800x600 832x624 1024x...

Страница 62: ...n standard DVB T MPEG 2 MPEG 4 DVBT2 MPEG 2 MPEG 4 Demodulation COFDM with 2K 8K FFT mode FEC all DVB models Video MP ML PAL 4 3 16 9 Audio MPEG Layer I II 32 44 148kHz Digital Reception DVB C Transmi...

Страница 63: ...oftware version Note on reboot operation Reboot is the last step in software upgrade operation if download of new software is finished successfully During reboot TV makes final initializations In rebo...

Страница 64: ...y please follow the local laws or regulations for disposal These symbols indicate that equipment with these symbols should not be disposed of as general household waste If you want to dispose of the p...

Страница 65: ...e correctly installed and operated in accordance with the instructions contained in this manual It must be used solely for domestic purpose The guarantee will be rendered invalided if the product is r...

Страница 66: ...C Product No 10090771 D Model No DLED50273FHDCNTD E Energy efficiency class A F Visible screen size diagonal approx inch cm 50 inches 127 cm G On mode average power consumption Watt 93 H Annual energy...

Страница 67: ...Home Retail Group 489 499 Avebury Boulevard Saxon Gate West Central Milton Keynes MK9 2NW...

Отзывы: