background image

TSE HOME 4001

English |


10 

Keypad battery replacement

1

  Remove the cover by pressing its detent notches 

on both sides

 with  

a pointed tool towards inside and pulling it up.  

2

  Insert the batteries into the keypad.  

Please check the correct polarity of the cells. 

3

  Place the cover on the keypad. 

When inserting the new batteries, please check the correct polarity, 
which is indicated in the battery compartment of the keypad.

Keypad installation

1

  Choose a place for fixing the keypad. Place the keypad within a maximum 

distance of approx. 

4  m f

rom the lock and carry out an opening test by 

entering the pincode. After a successful test, the keypad can be fixed using 
either the screws (3.9 x 22 and / or 3.9 x 12) or the attached adhesive pad. 
When using the screws, please remove the batteries before installation. 

Please install the keypad at a place, where it is protected against 
weather influences! 

2

  If required, replace the batteries and engage the housing cover  

onto the device box. 

3

  Carry out a function test of the unit while the door is open.  

In order to do so, enter the valid pincode several times.

Installation instructions for TSE cylinder

The installation of the TSE cylinder is described below.
Please read this Manual carefully before the assembly and then store it at  
a safe place.
The cylinder is provided with a special detent system, offering you a 
possibility of using the cylinder for doors up to a thickness of 120 mm  
(60 / 60 mm, measured at the central fixing screws). No prior adjustment  
is necessary.

Attention:
Attention should be paid to prevent the door knob from being 
bumped, as the knob might be damaged.

The lock should not be greased or oiled.

The fixing of the knobs is provided with one incorporated hex screw  
in each knob.

Attention:
Never pull the outer knob completely from the shaft, as this will 
damage the electronics! The hex screw that fixes the knob onto the 
shaft must be loosened only slightly and it must always remain in the 
plastic knob, providing protection against pulling out the knob!

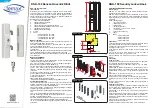
Outer side 

Inner side

Outer knob 

Inner knob

Schematic 
representation 
of an assembled 
cylinder.

Cover

Fixing screw

Hex screw for fixing the 

knob onto the shaft

Содержание TSE HOME 4001

Страница 1: ...58300 Wetter Germany Elektronisches Türschloss BA MA TSE Set 4001 dp mri dn 11 2016 Montage und Bedienungsanleitung Installation and User Manual Instruction de montage et mode d emploi Montage en gebruiksaanwijzing HOME Genial sicher Genial einfach ...

Страница 2: ...r Auswerteeinheit Bitte umgehend Batterien wechseln I Tastenbestätigung Jede erfolgreiche Tastenbetätigung wird mit einem kurzen Aufblinken des Ikons Tastenbestätigung quittiert Structure Sehr geehrter Kunde vielen Dank dass Sie sich für das elektronische BURG WÄCHTER Schließsystem TSE 4001 entschieden haben Dieses System wurde nach den neuesten technischen Möglichkeiten entwickelt bzw produziert ...

Страница 3: ...kschlüssel TSE 5103 E KEY Administratorcode Werksseitig 123456 bitte unbedingt ändern Der Administrator bzw Nutzercode wird im Folgenden als Öffnungscode bezeichnet 1 Inbetriebnahme Bei der 1 Inbetriebnahme des TSE 4001 PINCODE ist es notwendig eine bestimmte Prozedur auszuführen da sich das System vom Werk aus in einem speziellen Stromsparmodus befindet Taste On drücken das grüne Öffnungsbereitsc...

Страница 4: ... diesem Fall wählen Sie bitte einen anderen Kanal im Abstand von mindestens 3 Funkkanälen Taste On drücken 76 eintippen danach Enter drücken 6 stelligen Öffnungscode eintippen Die grüne Tastenbestätigung leuchtet kurz und das Ikon Programmiermodus leuchtet 38X eintippen X beschreibt den Funkkanal dabei sind die Ziffern 1 bis 12 auch 01 etc möglich danach die Taste Enter drücken Die Zahlenkombinati...

Страница 5: ...usedeckel in die Unterschale 3 Funktionstest der Einheit bei geöffneter Tür durchführen Geben sie hierfür mehrmals ein gültiges Öffnungsgeheimnis ein Montageanleitung Zylinder TSE Im Folgenden wird Ihnen der Einbau des TSE Zylinders erklärt Bitte lesen Sie vor der Montage diese Montageanleitung sorgfältig durch und bewahren diese gut auf Der Zylinder verfügt über ein spezielles Rastsystem welches ...

Страница 6: ...n Löchern in der Welle einander zugewandt montiert werden 6 Der Funktionstest muss bei geöffneter Tür durchgeführt werden Batteriewechsel Knauf Außenseite Achtung Achten Sie beim Batteriewechsel darauf dass kein Niederschlag bzw keine Feuchtigkeit an die Batterien kommt da diese im verschlossenen Zustand nicht mehr entweichen können 1 Lösen Sie die obere Madenschraube am Deckel und entfernen Sie d...

Страница 7: ...ed In most cases this is a sign of low batteries in the keypad or in the cylinder Please replace the batteries immediately I Key confirmation Any successful key operation is confirmed with a brief flashing of the green central confirmation LED Structure Dear customer thank you very much for choosing the BURG WÄCHTER TSE 4001 electronic locking system This system has been developed and manufactured...

Страница 8: ...nistrator code Factory setting 123456 you absolutely need to change this In the following description the administrator code is referred to as pincode 1 Commissioning When the TSE 4001 pincode is first put into operation it is necessary to perform a certain procedure as the system is delivered from the factory in a special power saving mode Press On the green ready for opening icon flashes briefly...

Страница 9: ...io channels Press On then type in 76 press Enter Enter the current 6 digit pincode The green key confirmation LED flashes briefly and the program mode icon turns on Type 72X X indicates the radio channel numbers 1 to 12 also 01 etc are allowed then press the Enter key The combination 72 stands for RC RF channel When the action has been performed successfully the green ready for opening LED goes on...

Страница 10: ... a function test of the unit while the door is open In order to do so enter the valid pincode several times Installation instructions for TSE cylinder The installation of the TSE cylinder is described below Please read this Manual carefully before the assembly and then store it at a safe place The cylinder is provided with a special detent system offering you a possibility of using the cylinder fo...

Страница 11: ...in a way that the fixing screw inside the knob faces the shaft with the little holes at the side 6 The function test must be made while the door is open Replacing the knob batteries exterior Attention When replacing the batteries make sure that no precipitations or humidity penetrate the batteries as no water can escape when the compartment has been closed 1 Loosen the hex screw on the cover and r...

Страница 12: ...t les batteries I Confirmation de touche Tout maniement correct d une touche déclenche un bref allumage de l icône de confirmation de touche Structure Cher client Merci d avoir choisi le système de fermeture électronique TSE 4001 de BURG WÄCHTER Ce système a été conçu et fabriqué avec les moyens techniques les plus récents et satisfait les exigences de sécurité les plus hautes Le montage du cylind...

Страница 13: ...KEY Code administrateur Réglage usine 123456 absolument à modifier Le code administrateur respectivement le code utilisateur est désigné dans la suite comme code d ouverture 1 Mise en service Lors de la première mise en service du TSE 4001 il faut suivre une procédure bien déterminée car à la sortie de l usine le système se trouve en mode d économie de courant Appuyez sur la touche On l icône de d...

Страница 14: ... appuyez sur Enter Entrez le code à 6 chiffres La touche verte de confirmation s allume brièvement et l icône du mode de programmation s allume Tapez 38X X désigne le canal radio les chiffres 1 à 12 sont possibles également 01 etc ensuite appuyez sur la touche Enter La combinaison 38 signifie FU canal radio change Si le processus a été exécuté correctement la diode verte de droit d ouverture s all...

Страница 15: ...te en position ouverte en entrant plusieurs fois un code d ouverture valable Instruction de montage du cylindre TSE Vous trouverez ci après l explication du montage du cylindre TSE Veuillez lire ces instructions de montage attentivement jusqu au bout avant de procéder au montage Conservez ces instructions Le cylindre a un système spécial d enclenchement qui vous permet de l utiliser sur des portes...

Страница 16: ...on fileté du bouton et la série de trous dans l axe soient face à face 6 Le test de fonctionnement doit être fait quand la port e est en position ouverte Remplacement des piles bouton côté extérieur Attention Lors du changement de batteries veillez à ce que ni pluie ni humidité n entrent en contact avec les batteries car l humidité pourrait altérer celles ci une fois le boîtier fermé 1 Desserrez l...

Страница 17: ... voor lege batterijen in de invoer of evaluatie eenheid A u b de batterijen onmiddellijk verwisselen I Toetsenbevestiging Iedere succesvolle bediening van de toetsen wordt met een kort branden van het teken voor de toetsenbevestiging gesignaleerd Structure Geachte klant Hartelijk bedankt dat u voor het elektronische sluitsysteem TSE 4001 van de firma BURG WÄCHTER heeft gekozen Dit systeem werd vol...
Страница 18: ... Administrateurcode fabrieksinstelling 123456 a u b in ieder geval wijzigen De administrateur resp gebruikerscode wordt verder als openingscode aangeduid 1 Inbedrijfstelling Bij de 1e inbedrijfstelling van de pincode voor de TSE 4001 is het nodig een zekere procedure uit te voeren omdat het systeem door de fabriek in een speciale stroomspaarmodus wordt geleverd Druk op de On toets het groene openi...

Страница 19: ... ander kanaal met een afstand van tenminste 3 radiokanalen Druk op de On toets voer 76 in druk daarna op Enter Voer een cijfercode met 6 cijfers in De groene toetsenbevestiging brandt kort en het teken voor de Programmeermodus brandt Toets 72X in X beschrijft het radiokanaal daarbij zijn de cijfers 1 tot 12 evenals 01 enz mogelijk Druk daarna op de Enter toets De cijfercombinatie 72 staat voor RC ...

Страница 20: ...en bevestig het deksel op het benedendeel 3 Voer een functietest van de eenheid met geopende deur uit Voer hiervoor enkele keren een geldig openingscode in Montageaanwijzing cilinder TSE Onderstaand wordt de inbouw van de TSE cilinder omschreven A u b voor de montage deze montageaanwijzing nauwkeurig lezen en goed opbergen De cilinder is voorzien van een speciaal rustsysteem dat u de mogelijkheid ...

Страница 21: ...functietoets dient uitgevoerd te worden bij geopende deur Batterijwissel knop buitenkant Let op Let er bij de batterijwissel op dat er geen neerslag resp vocht op de batterijen terecht komt daar dit in gesloten staat niet meer kunnen ontsnappen verdampen 1 Draai de bovenste madeschroef op het deksel los en verwijder deze De schroef mag alleen zodanig worden losgedraaid dat het deksel geopend kan w...

Отзывы: