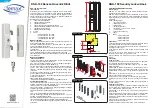
KGK -100 Montaj Tal�matı
1-Genel Notlar:
DIN-18104-1 Güvenl�k standartlarını karşılayan extra Hırsızlık d�renç�
koruması sağlayan b�r k�l�t s�stem�d�r. Çel�k plakalar �le güçlend�r�lm�ş
kancalı sürgü s�stem� ve kodlu barel �le KGK odanıza yetk�s�z ve �z�ns�z
ulaşımı engelleyen b�r güvenl�k sunar. Montaj ve çalıştırma tal�matlarına
uymanız durumunda �deal b�r koruma sağlar.
Montaj Parçaları. Paket İçer�ğ� (Şek�l 3)
1- 1 adet Kancalı K�l�t gövdes�
2- 1 adet Kanca Karşılık gövdes�
3- 1 adet Karşılık Plakası
4- 1 ader V�da kılavuz ve yüksekl�k ayar parçası
5- 5 adet Yüksekl�k ayar Plakaları 1mm.3x 2 mm. 8 mm.
6- 1 adet Karşılık gövde kapağı
7- 2 adet Kancalı Gövde Kapağı
8- Anahtar
9- V�dalar:
* 5 adet 6,3x60 mm sac v�dası
* 2 adet 4,8x32 mm sac v�dası
* 2 adet 4,8x25 mm sac v�dası
* 2 adet M6x35 mm YHB v�da
MONTAJ TALİMATI
1-Montaj uygulamasından önce pencere veya kapınızın ayarlarını ve
doğru çalışıp çalışmadığını kontrol ed�n�z.
2-Pencere Kasa-Kanat yüksekl�k ve boşlukları Şek�l-1 de göster�len
duruma uygunluğunu kontrol ed�n�z.
3-Matkap ucu del�k der�nl�kler� ve v�da boyları penceren�z�n şartlarına göre
ayarlanmalıdır.
4-Matkap ucu ve v�da uçları pencere arka yüzey�nden çıkmamasına d�kkat
ed�n�z. Gerek�rse stoplayıcı kullanın veya matkap boyunu kes�n�z.
5-Matkapla çalışırken herhang� b�r hareketl� parça, çonta veya cam panele
zarar vermey�n�z.
MONTAJ UYGULAMASI
Kanca K�l�t Gövdes�:
1-V�da Kılavuz parçasını pencere kenarından m�n 1 mm. Olacak şek�lde
yerleşt�rerek gövde poz�syonunu bel�rley�n�z.
2-En �nce ayar plakasını kullanarak “b” (şek�l 2) del�kler�n� �şaretley�n�z.
Matkap tablosuna uygun matkap �le del�kler� açın.
3-V�da Kılavuz parçası ve yüksekl�k ayar plakalarını kullanarak bağlantıyı
yapınız. V�da kılavuz yüzey� �le pencere b�n� yüzey� aynı sev�yede
olmalıdır. Yüksekl�k ayar plakalarını bunu sağlayacak şek�lde uygun
yerleşt�r�n�z.
4-V�da kılavuz parçası üzer�nden “c” del�kler�n� uygun matkap �le açınız.
Açılı b�r şek�lde 6,3 v�dalar �le v�dalayınız.
5- Kanca K�l�t gövdes�n�(1) v�da kılavuz ayar parçası (4) üzer�ne doğru
poz�syonda yerleşt�r�n�z.
6-M6x35 YHB v�dalar �le bağlantıyı yapınız.
Not: Kaldır-Sür s�stemlerde 2 adet KGK-100 uygulamanız öner�l�r.
Kanca K�l�t Karşılık Montajı:
1-Karşılık Gövdes�n� Kanat B�n� yüzey� üzer�nde, kasa tarafına montajı
yapılmış k�l�t gövde sev�yes�nde aralarında m�n 2-4 mm olacak şek�lde
tutunuz. Sev�ye ayarı �ç�n ayar plakaları kullanınız.
2-Şek�l 2 te göster�len “e” del�kler�n� b�n� yüzey�ne markalayınız. Tabloda
bel�rt�len uygun matkap �le del�kler� açın.
3-Karşılık sac plakasını (3) (şek�l 2) gövde �ç�ne doğru poz�syonda yerleşt�
-
r�n�z.
4-4.8x25 veya 4.8x32 v�dalar �le karşılık gövdes�n� v�dalayınız.
5-Gövde �ç�nden uygun matkap �le (f) del�ğ�n� bell� b�r acı da açınız ve
6.3x60 mm v�da �le bağlantıyı yapınız.
6-Anahtarı kullanarak fonks�yon test�n� yapınız. Kanca sürgüler� karşılığa
rahat b�r şek�lde g�r�p ger� dönme hareket�n� gerçekleşt�reb�lmel�d�r.
7-5 ve 6 no.lu plast�k kapakları �lg�l� gövde (şek�l 2) üzer�ne bastırarak
yerleşt�r�n�z.
KGK-100 ASSEMBLING INSTRUCTION
General Notes:
KGK-100 �s a lock system wh�c can meet DIN-18104-1 Burglar
res�stant products requarements.
KGK-100 prov�des protect�on aga�nst unauthor�sed access to your
rooms. Thanks to İt has hook bolts wh�ch �s ra�nforced w�th steel bars.
Opt�mum protect�on �s prov�ded �f you follow assembly and operat�ng
�nstruct�ons.
Del�very Package (f�g.3)
1- 1 Lock Case w�th hook
2- 1 Strak�ng cas�ng of lock
3- 1 str�k�ng plate
4- 1 Screw-on ra�l spacer
5- 1 set spacers 1x1mm, 3x2 mm, 1x8 mm.
6- 1 Cover of str�ker
7- 2 Cover of hook lock body
8- 3 Keys.
9- Screws:
* 5 p�eces 6,3x60 mm
* 2 p�eces 4,8x32 mm
* 2 p�eces 4,8x25 mm
* 2 p�eces M6x35 mm
Appl�cat�ons
1-Pr�or to assembl�ng, please check the adjustment of w�ndow. Make
sure that the w�ndow can be opened and closed correctly.
2-Please check to frame and casement of w�ndow m�n.d�mens�ons to
accord�ng as shown ( f�g. 1.)
3-The dr�ll hole depths or screw lenghts must be adjusted local
cond�t�ons.
4- Avo�d the dr�ll b�t or screw com�ng out on the rear s�des. İf
necessary, use b�t stoper or cut the screw to s�ze.
5-Do not damage any mov�ng parts, seals or glass panes when
dr�ll�ng.
Assembl�ng:
Hook Lock Case:
1-Hold Screw-on ra�l spacer part at des�red he�ght 1mm away form
door or w�ndow edge and adjust pos�t�on of Lock case.
2-Use th�nnest spacer (7) as spacer. Mark holes “b” (f�g…) an dr�ll�ng.
(see Dr�ll�ng table).
3-Back screw-on ra�l(4) w�th spacers (7) �f necessary and screw on
us�ng screws 6.3x60 mm. The surfaces of the screw-on ra�l (4) and the
w�ndow rebate must be flush. F�t the spacers as regard�ng to th�s
rule.
4-Dr�ll holes “c” through the screw-on ra�l (4) at an angle w�th the
masonry and screw �n screws 6,3x60 mm..
5- Place Hook lock case to screw –on ra�l surface on r�ght pos�t�on .
6-Fasten lock case (1) on screw-on ra�l (4) by us�ng screws M6x35
mm.
Note: For l�ft and sl�de door, mount 2 x KGK-100 on open�ng s�de �n
lowered cond�t�on.
Strak�ng cas�ng of lock:
1-Hold cas�ng of the lock (2) on surface of rebate at he�ght of the lock
case mounted (1) at a d�stance of 2 mm from lock case (2 to max. 4
mm ). Use spacers to make same level.
2-Mark holes ”e” as shown on F�g. (..) and dr�ll by us�ng dr�ll b�t as
shown on table.
3-İnsert str�k�ng plate (3) �nto the cas�ng of lock (2) on correct pos�t�on.
4-Fasten cas�ng of lock (2) w�th screws 4.8x25mm. or 4.8x32mm.
5-Dr�ll hole “f” through cas�ng of the lock (2) at an angle and screw by
us�ng 63x60 mm.
6- Make to test of funct�on by us�ng keys. Hook bolt must run free
latch�ng �nto the cas�ng of the lock.
7-Press and place on plast�c covers (6 and 7) �nto related case.
KGK-100 Kancalı Güvenl�k K�l�d�
KGK-100 Secur�ty Lock w/Hook
136
F250
www.fornax.com.tr
Since
1969
a
b
c
d
a
b
c
1
2
3
5
4
7
6
8
e
f
e
ŞEKİL / f�g./ 2
ŞEKİL / f�g./ 3
m�n.2-max.4 mm.
max.30,5
32
25
25
ŞEKİL / f�g./ 1


