background image

ADVANCED SETUP

27

Heating Humidity

If you have a whole house humidifier, heat recovery ventilator (HRV)

or energy recovery ventilator (ERV) as a part of your system, you 

can select your desired heating humidity setting and change how

your system controls the humidifier or fresh air ventilation. 

1

Open the door of the 

Evolution

®

Control.

2

Press the ADVANCED setup button.

3

Press the RIGHT button twice to view the HEATING HUMIDITY 

screen (3 of 5).

4

Use the LEFT button to select your desired humidity setting.

5

To exit, press ADVANCED or simply close the door.

- OR -

6

If you want to change how your system controls the heating 

humidity, scroll to HUMIDITY. You will have three options to 

choose from:

a. OFF – The system will disable humidification or 

ventilator dehumidification.

b. MANUAL – The system will control the relative humidity 

in your home based on your desired set point.

c. AUTO – The system will control the relative humidity

in your home based on the setting you have selected 

and outside air temperature. The humidity target is     

lowered automatically as the outdoor temperature 

decreases.

7

Use the Right Up/Down button to make your selection.

8

If you want to change how your system controls fresh air 

ventilation scroll to FRESH AIR. For a description of settings 

see FRESH AIR VENTILATION, page 24 in this manual.

9

Use the Right Up/Down button to select AUTO, HIGH, LOW 

OR DEHUM.

10

To exit, press ADVANCED or simply close the door.

NOTE: You can exit Advanced Setup at any time. When exiting, you

will be prompted to save changes if you have made any. Select

“YES” to save your changes, “NO” to revert back to previous settings.


Содержание Evolution Control

Страница 1: ...Evolution Control Homeowner s Guide...

Страница 2: ...re recognized Please take a few moments to review this manual set up a comfort schedule that makes sense for your lifestyle then relax and enjoy the comfort Temperature Humidity Button displays curren...

Страница 3: ...Heat Button selects heating operation Cool Button selects cooling operation Heat Cool LEDs indicate heating or cooling operation Right Up Down Button Off Button turns the system on and off Advanced S...

Страница 4: ...t Button 12 Resetting Accessory Usage Indicator 13 Accessory Maintenance Pop Up Messages 13 Service Pop Up Messages 14 Keyboard Lock out 15 PROGRAMMABLE FEATURES SETUP OPERATION 16 Backlighting 16 Det...

Страница 5: ...E 5 Adjust the MINUTE setting using the Left Up Down button 6 Press SCROLL to highlight DAY 7 Adjust the current DAY setting using the Left Up Down button until the correct day is displayed 8 Press SC...

Страница 6: ...button until the desired override time is selected OR Press the HOLD button to override the schedule indefinitely Adjust Cooling Temperature 1 Press the blue COOL button Cooling is confirmed when the...

Страница 7: ...epeatedly until ALLDAYS is displayed 4 The WAKE time period will be highlighted Set the start time for this time period using the Left Up Down button 5 Press the red HEAT button Heating temperature wi...

Страница 8: ...ime for maintenance of your air filter humidifier pad UV lamp or ventilator When an accessory reminder pop up message appears perform the accessory maintenance yourself OR contact your dealer contract...

Страница 9: ...the red HEAT button to set the heating humidity 10 Adjust the desired heating humidity using either Up Down button 11 Press the blue COOL button to set the cooling humidity 12 Adjust the desired cool...

Страница 10: ...pulsing on and off The LEDs can be turned off For details see ADVANCED SETUP DISPLAY on page 26 The heating temperature will appear in the lower right screen with the text HEAT AT Auxiliary Heat Auxil...

Страница 11: ...conditions HEATPUMPONLY only the heat pump will be used for heating ELECTRIC HEATONLY only electric heat will be used for heating If your system is a HYBRID HEAT Dual Fuel System heat pump with gas or...

Страница 12: ...n your comfort during transitional heating and cooling seasons To select AUTO operation press the red HEAT and blue COOL buttons simultaneously The red and blue LEDs will light up and both heating and...

Страница 13: ...yed on the lower right An override time will be displayed on the lower left Please note an override time will not appear if programming has been turned off 3 You can change the override time in 15 min...

Страница 14: ...ight Up Down button to select the desired temperature for VACATION operation 4 Use the Left Up Down button to select the number of days for VACATION operation as seen in lower left corner of screen 5...

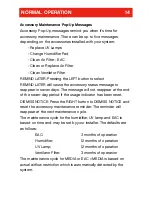
Страница 15: ...nual page 29 Check System Status The system status function allows you to view detailed information about the system s status 1 Press the RIGHT button to check Equipment status Accessory status Curren...

Страница 16: ...EFT button to show the status of Air filter FILTER Humidifier pad HUM PAD UV Lamps 2 Press the LEFT button to exit Resetting Accessory Usage Indicator After an air filter humidifier pad or UV Lamp has...

Страница 17: ...ays The message will not reappear at the end of the seven day period if the usage indicator has been reset DISMISS NOTICE Press the RIGHT button to DISMISS NOTICE and reset the accessory maintenance r...

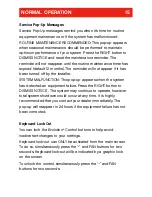
Страница 18: ...YSTEM MALFUNCTION This pop up appears when the system has detected an equipment failure Press the RIGHT button to DISMISS NOTICE The system may continue to operate however total system shutdown could...

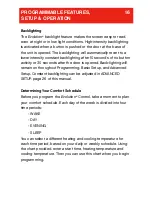
Страница 19: ...pened Back lighting will remain on throughout Programming Basic Setup and Advanced Setup Constant backlighting can be adjusted in ADVANCED SETUP page 26 of this manual Determining Your Comfort Schedul...

Страница 20: ...one for the weekend or you can make every day different Instructions for programming this control are detailed on the pages that follow NOTE You can quit the programming process at any time by simply...

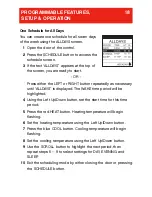
Страница 21: ...l be highlighted 4 Using the Left Up Down button set the start time for this time period 5 Press the red HEAT button Heating temperature will begin flashing 6 Set the heating temperature using the Lef...

Страница 22: ...this time period 5 Press the red HEAT button Heating temperature will begin flashing 6 Set the heating temperature using the Left Up Down button 7 Press the blue COOL button Cooling temperature will...

Страница 23: ...r this period 5 Press the red HEAT button Heating temperature will begin flashing 6 Set the heating temperature using the Left Up Down button 7 Press the blue COOL button Cooling temperature will begi...

Страница 24: ...KE period will be highlighted 5 Using the Left Up Down button set the start time for this time period 6 Press the red HEAT button Heating temperature will begin flashing 7 Set the heating temperature...

Страница 25: ...copy 5 Repeat steps 2 3 until YES appears for each day to which you would like to copy 6 Press the RIGHT button to copy or the LEFT button to cancel 7 A confirmation screen will list the days you hav...

Страница 26: ...rol 2 Press the SCHEDULE button to access the schedule screen 3 Press the FAN button to access the Fan Speed programming screen 4 Press the LEFT or RIGHT button to select the days you wish to program...

Страница 27: ...nuously This setting is recommended for continuous operation in mild climates with low humidity AUTO The system will automatically vary the fresh air ventilator speed to accommodate outdoor seasonal c...

Страница 28: ...e to turn ON or OFF 4 Use the Left Up Down button to turn the reminder ON or OFF A pop up reminder will only appear when it is time for maintenance if ON is selected 5 For a detailed description of ac...

Страница 29: ...LITES Turns on off the heat cool LED indicators COLOR THEME Selects the desired foreground background colors After changing wait two seconds for the change to take affect MAIN SCREEN Select EZ VIEW to...

Страница 30: ...will disable humidification or ventilator dehumidification b MANUAL The system will control the relative humidity in your home based on your desired set point c AUTO The system will control the relat...

Страница 31: ...temperature has been satisfied ON The system dehumidifies by activating the cooling equipment even after the cooling temperature has been satisfied The system will not cool to dehumidify below 70 F n...

Страница 32: ...A TURE 6 Use the LEFT button to select the lowest temperature the system will allow during VACATION operation 7 Press down on the SCROLL button to select MAX HUMIDITY 8 Use the LEFT button to select t...

Страница 33: ...ll significantly Comfort Schedule pg 17 A personalized list of temperature and fan settings organized according to time of day The Evolution Control allows up to four different periods per day with th...

Страница 34: ...Weekdays Schedule pg 19 One comfort schedule that is repeated every weekday Monday through Friday Weekend Schedule pg 20 One comfort schedule that is repeated on Saturday and Sunday A GLOSSARY 31...

Страница 35: ...from your dealer Manufacturer reserves the right to discontinue or change at any time specifications or designs without notice and without incurring obligations OMUID 4BR Bryant Heating Cooling Syste...

Отзывы: