background image

Chapter 4 – Data Operations
Transferring Records to a Computer

50

Brüel & Kjær

Type 2239 B

Hand-Arm Vibration Functions User Manual

4.3

Transferring Records to a Computer

Type 2239B is capable of saving up to 40 records of measured
results. For more information about saving records, refer to
section 4.1. All records can be downloaded to a computer in
a standard spreadsheet format. This enables you to read, print,
and present your test results in any standard spreadsheet
program (such as Microsoft™ Excel).

4.3.1

Connecting to a Computer

1.

Take a set of measurements and save each to a record.
See section 3.3 and section 4.1 for instructions.

2.

Switch off the vibration meter and bring it to your com-
puter.

3.

Switch off your computer.

4.

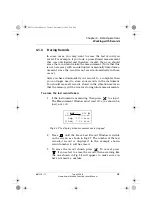
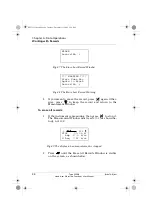
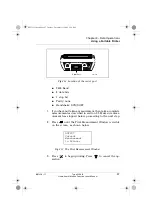
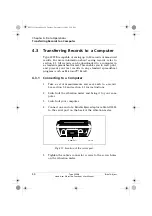
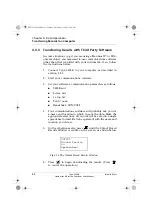
Connect one end of a Brüel & Kjær adaptor cable AO 1442
to the serial port on the back of the vibration meter. 

5.

Tighten the cable’s connector screws to the screw holes
on the vibration meter.

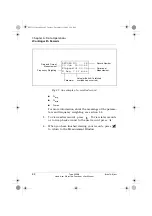
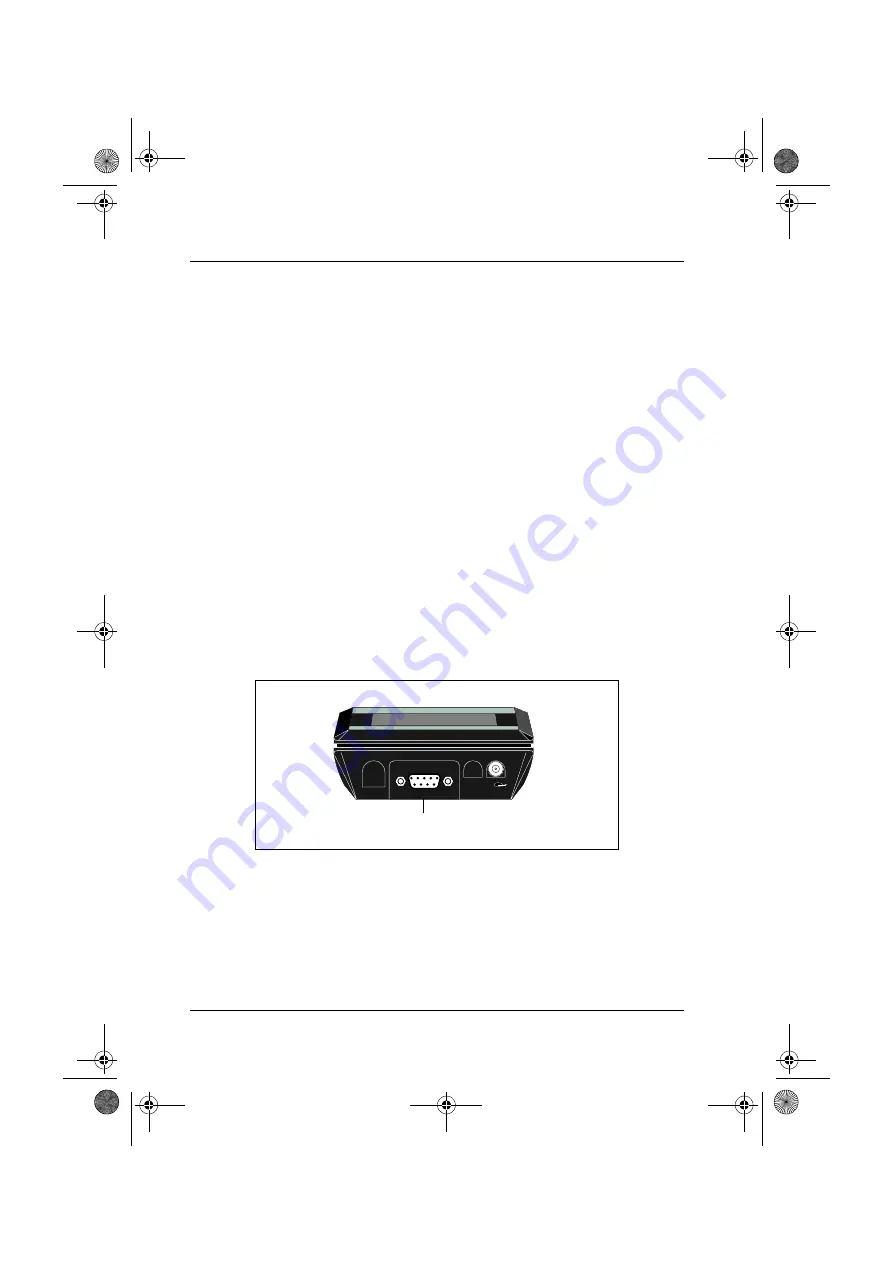
Fig.4.15 Location of the serial port

960159e

Serial Interface

Serial Port

bb122411.book  Page 50  Tuesday, December 11, 2001  2:34 PM

Содержание 2239 B

Страница 1: ...cember 2001 Brüel Kjær BB1224 11 Type 2239 B Hand Arm Vibration and Integrating Sound Level Meter Hand Arm Vibration Functions From serial no 1733094 bb122411 book Page i Tuesday December 11 2001 2 34 PM ...

Страница 2: ...rk of International Business Machines Inc USA Copyright 2001 Brüel Kjær A S All rights reserved No part of this publication may be reproduced or distributed in any form or by any means without prior consent in writing from Brüel Kjær A S Nærum Denmark bb122411 book Page ii Tuesday December 11 2001 2 34 PM ...

Страница 3: ...ing Batteries 8 2 3 Pushkey Definitions 13 2 4 The Measurement Window 15 2 5 Choosing the Language 17 Chapter 3 Taking Measurements 19 3 1 Calibration 20 3 2 Mounting the Accelerometer 22 3 3 Taking Measurements 23 3 4 Reading the Parameters 28 3 5 Making Measurement Settings 30 Chapter 4 Data Operations 37 4 1 Working with Records 38 4 2 Using a Portable Printer 46 4 3 Transferring Records to a C...

Страница 4: ...oting 57 5 4 Warnings and Error messages 58 Chapter 6 Specifications 61 6 1 Specifications 62 6 2 Ordering Information 65 Chapter 7 Quick Reference 67 7 1 The Measurement Window 68 7 2 Displayed Parameters 69 7 3 Set up Functions Flow Chart 72 7 4 Measurement Range Flow Chart 74 7 5 Data Functions Flow Chart 75 Chapter 8 Index 79 bb122411 book Page iv Tuesday December 11 2001 2 34 PM ...

Страница 5: ...BB1224 11 1 Type 2239 B Hand Arm Vibration Functions User Manual Chapter 1 Introduction bb122411 book Page 1 Tuesday December 11 2001 2 34 PM ...

Страница 6: ...e screen and setting the language It also explains how to switch from using the instrument for measuring sound levels to measuring hand arm vibration Chapter 3 Taking Measurements gives instructions for calibrating and measuring with the Type 2239B Chapter 4 Data Operations contains information and instructions about using the data functions and AC output including saving viewing and erasing recor...

Страница 7: ... face For example Press until Aeq is visible on the screen 1 2 Features Type 2239 B contains several features that enable you to take and save hand arm vibration measurements under a variety of conditions Features include Ease of use Two measurement ranges Eight measured parameters see below Easy to read display with backlight Preset measurement time up to eight hours Storage of up to 40 records s...

Страница 8: ...mation about selecting and reading the parameters see section 3 4 1 4 Settings The following settings are available Measurement range Frequency weighting Preset time Time and date You can change the measurement range by pressing the key You can change the other settings through windows that are displayed when you press the key Settings can not be changed while the instrument is measuring For more ...

Страница 9: ...2 Buffer Holds all of the results from the last measurement It is cleared each time you start a measurement or turn off the instrument Results in the buffer can be output to a printer or copied into a record 1 5 3 Records Up to 40 records of measurement results can be stored in memory Records are copied from the buffer They can be stored automatically after a preset timed measurement or manually a...

Страница 10: ... the key Save the buffer to a record Recall a record to the screen Print results of the last measurement Download spreadsheet data of records Erase last record Erase all records For more information about records see section 4 1 1 6 Backlight Type 2239B includes a backlight which makes the display easier to read in low light situations Press to turn it on or off To save batteries the light will sw...

Страница 11: ...BB1224 11 7 Type 2239 B Hand Arm Vibration Functions User Manual Chapter 2 Getting Started bb122411 book Page 7 Tuesday December 11 2001 2 34 PM ...

Страница 12: ... pins in the preamplifier line up with the holes in the socket 4 Tighten the cone shaped nut at the base of the charge amplifier Use finger torque do not over tighten 5 The instrument automatically enables its vibration meas uring features and will behave as described in this manual To return to sound meter functionality reverse the above pro cedure It will then behave as described in the Type 223...

Страница 13: ... pixels including the tip Each line represents approximately 2 5 hours of re maining battery time at room temperature When the indi cator is blinking there is less than one hour left Under extreme cold or hot environments the remaining time may be less Fig 2 1 Type 2239B as a hand arm vibration meter bb122411 book Page 9 Tuesday December 11 2001 2 34 PM ...

Страница 14: ...ation meter in a dry place Never mix different makes or types of battery Never mix charged and discharged batteries Fig 2 2 Location of the battery level indicator Fig 2 3 Interpreting the battery level indicator Battery Level Indicator RUN 00 05 41 Amp 17 9 m ss H Aeq 7 26 m ss 1 316 960156e Batteries full about 14 hours left Batteries half full about 7 5 hours left Replace batteries less than 1 ...

Страница 15: ...n the upper edge of the battery compartment and remove the lid 3 Remove all of the old batteries 4 Insert new batteries four 1 5 V LR6 AA size alkaline bat teries following the orientation shown on the bottom of the battery compartment 5 Press the compartment lid back into place Note If you cannot switch on the vibration meter after replac ing the batteries check that you have inserted them correc...

Страница 16: ...re are standard batteries in the vibration meter It is fully charged after about 10 hours Fully charged the back up battery runs the clock and retains records and settings for about 6 months These charge times are typical for an instrument at room temperature Important If the back up battery is flat then you will see the Set up Language Window when the instrument starts up see section 2 5 The meas...

Страница 17: ...key to step through the measurement settings windows With these windows you can adjust the measurement time time weighting and current date and time Up Arrow Press this key to make changes in the settings data or calibration win dows When recalling records use this key to step through the dis played records It increments the available numbers and choices Down Arrow This key works like the up arrow...

Страница 18: ...w without changing any settings Start Stop OK While viewing the Measurement Win dow press this key to start or stop a measurement While viewing any of the calibration data or setting windows press this key to perform the displayed action e g Erase All Records or apply all new settings you have made While viewing saved records press this key to return to the Measure ment Window Backlight Switches o...

Страница 19: ...t is stopped 2 Quasi analogue display shows a graphical representation of the current acceleration RMS It is updated 15 times a second 3 The upper end of the measurement range in m s2 and overload indicator Peaks above this level will trigger an overload warning If an overload has occurred in the last one second this number will change to read OVL for the duration of the next second If an overload...

Страница 20: ...stop a measurement 6 Elapsed time the amount of time that has passed since measurement began 7 Peak parameter Shows the type of peak reading Amp or Peak displayed Press to select the displayed param eters 8 Value of the peak parameter 9 Frequency weighting Two frequency weightings are avail able The current setting is shown here Possible settings are H Hand arm vibration weighting 5 Hz to 1500 Hz ...

Страница 21: ...hile holding press 4 Release both buttons The instrument does a self test as usual and then displays the Set up Language window 5 Press the and or keys until your preferred lan guage appears in the window The choices are in order English Francais Deutsch Italiano Espanol 6 Press or to choose the language and proceed to the Measurement Window Important If the Set up Language window unexpectedly app...

Страница 22: ...nual and the clock and measurement settings have been reset then the back up battery is probably flat This means that your factory calibration is no longer valid and must be redone at a Brüel Kjær service centre Contact your Brüel Kjær dealer for assistance bb122411 book Page 18 Tuesday December 11 2001 2 34 PM ...

Страница 23: ...BB1224 11 19 Type 2239 B Hand Arm Vibration Functions User Manual Chapter 3 Taking Measurements bb122411 book Page 19 Tuesday December 11 2001 2 34 PM ...

Страница 24: ... do not have calibration equipment then ask your Brüel Kjær dealer about annual calibration service and skip the rest of this section If you do have calibration equip ment then please continue reading this section to find out how to calibrate your vibration meter 3 1 2 Principle of Calibration To calibrate the meter you must apply a vibration of known acceleration and frequency which is created by...

Страница 25: ...easuring 5 Press on the vibration meter to display the Calibration Window as shown below 6 Switch on the calibrator Wait a few seconds for it to warm up 7 Press to calibrate your instrument Press if you want to abort the calibration procedure 8 Your instrument is now calibrated Note If an error message appears after you press make sure that the calibrator is switched on the accelerometer is correc...

Страница 26: ... the tool you are measuring 2 Find a suitable location for mounting the accelerometer It should be at the place where the tool contacts its op erator most likely a handle 3 Hold the mounting bracket with the flat side against the machine 4 Wrap one of the straps over one of the tabs on the bracket and around the tool s handle Repeat with the other strap 5 Tighten both straps as much as possible Ma...

Страница 27: ...ready switched on but not measuring then press and skip to step 4 2 Wait for the vibration meter to start up about 20 seconds 3 Measurement begins automatically 4 Wait an appropriate amount of time In some situations the measurement time will be prescribed by regulations Otherwise watch the Measurement Window until the Aeq reading has stabilized if necessary press until Aeq is visible 5 Press to s...

Страница 28: ...your measurements or download them later to a computer then save your measurements in a record see section 4 1 for instructions Take note of the record number Refer to section 4 3 for instructions for connecting to a computer and downloading records If there are no records left then you will see a warning on your screen see section 4 1 2 for more information 3 3 2 Taking Preset timed Measurements ...

Страница 29: ...ig 3 2 If an overload has oc curred then increase the measurement range by pressing You may want to erase the last record of the over loaded measurement as described in section 4 1 4 Begin a new measurement by pressing and repeat from step 4 6 Step through the displayed measurement parameters by pressing If some of them show no value m ss then input levels were too low for the measurement range un...

Страница 30: ...he last second then the upper limit of the measurement range value will change to read OVL as shown in Fig 3 3 until the overload stops 2 Latched Overload If the instrument is taking a measure ment when the overload occurs it will show OVL until the overload stops as described above Thereafter the up per limit of the measurement range will blink until a new measurement is started If an overload ha...

Страница 31: ...n the printout see section 4 2 2 Spreadsheet results have a special overload column in which overloads are indicated with Y for yes or the equivalent for language settings other than English Fig 3 4 Latched overload RUN 00 05 41 Amp 17 9 m ss H Aeq 7 26 m ss 1 316 Upper limit of the measurement range overload if blinking bb122411 book Page 27 Tuesday December 11 2001 2 34 PM ...

Страница 32: ... parameters press 3 4 1 Parameter definitions The displayed parameters have the following meanings Amp Maximum peak acceleration Aeq Equivalent constant RMS acceleration for the entire measurement period Amax The maximum RMS acceleration that occurred dur ing the measurement period Amin The minimum RMS acceleration that occurred dur ing the measurement period Aeq4 The four hour energy equivalent R...

Страница 33: ...tion Overload status For more information about records see section 4 1 For a complete listing of the available parameter combinations see the section 7 2 3 4 2 Frequency Weighting Effects The human body is not equally susceptible to all vibration frequencies Hand held tools produce vibrations chiefly in the hands and arms of their users which are most sensitive to vibrations in the range of 12 Hz...

Страница 34: ...ow to set the frequency weighting The following codes are displayed in the Measurement Window to indicate the current frequency weighting see Fig 3 5 H Hand arm vibration weighting 5 Hz to 1500 Hz L Linear 6 3 Hz to 5 kHz 3 5 Making Measurement Settings Before you begin measuring your vibration meter must be set up correctly Settings that affect measurements and records are Measurement Range Frequ...

Страница 35: ...hen press to stop it The Measurement Window must read STOP as shown be low not RUN 2 Check the current measurement range It is shown at the top of the Measurement Window In the example above the range is 0 1 to 316 m s2 3 To toggle the range setting press 4 Use the quasi analogue display to decide if you have set the range correctly If the display is blank most of the time and never overloading th...

Страница 36: ...ent is measuring then press to stop it The Measurement Window must read STOP as shown above in Fig 3 6 not RUN 2 Press until the Frequency Weighting Set up Window is visible on the screen as shown below 3 Press or to change the setting Select HA for the hand arm weighting or Lin for the linear weighting 4 To store the new frequency weighting press If you prefer to cancel your changes and return to...

Страница 37: ...be saved automatically For instructions on how to save results from a manually timed measurement refer to section 4 1 1 To begin a measurement regardless of the preset time setting simply switch on the instrument by pressing If the in strument is already switched on but not measuring then press to begin measuring To interrupt a preset timed measurement in progress press Note that the results will ...

Страница 38: ...easurement Win dow 3 5 4 Setting the Time and Date Date and time information is stored with each record you save Therefore it is important to make sure this information is correct To set the time and date 1 If the instrument is measuring then press to stop it The Measurement Window must read STOP as shown in Fig 3 8 not RUN 2 Press until the Date Time Set up Window is visible on the screen as show...

Страница 39: ...move the next parameter the month Use the and keys to set the current month 5 Repeat step 4 until you have set the current year hour minute and second If you want to adjust a previous pa rameter for example to set the day after you have set the year then you must press repeatedly to cycle back through the set up windows 6 To store the new date and time press or It is not possible to cancel Date Ti...

Страница 40: ...36 Brüel Kjær Type 2239 B Hand Arm Vibration Functions User Manual bb122411 book Page 36 Tuesday December 11 2001 2 34 PM ...

Страница 41: ...BB1224 11 37 Type 2239 B Hand Arm Vibration Functions User Manual Chapter 4 Data Operations bb122411 book Page 37 Tuesday December 11 2001 2 34 PM ...

Страница 42: ... record is saved automatically after each preset timed meas urement see section 3 5 3 Results from a manually timed measurement or an interrupted preset timed measurement must be saved manually Records are numbered from 1 to 40 and are filled sequentially Each record holds the following information Aeq Aeq4 Aeq8 Amp Amin Amax Frequency weighting Time and date of measurement Measurement duration Ov...

Страница 43: ...on the screen as shown below 3 Press to store the results in the displayed record number in the example shown in the figure above results will be stored in record number 4 You will then return to the Measurement Window If you wish to cancel the operation rather than store the record press to return to the Measurement Window Fig 4 1 The Store Results Window STORE Current Measurement in Record No 4 ...

Страница 44: ...e or all of your records see section 4 1 4 or take written records of your measurements To prevent problems Always check the number of records available before start ing a series of measurements Always erase all records after you have downloaded and saved them to your computer s hard disk Erase records of invalid measurements e g overloads right away by using the Erase Last Record command see sect...

Страница 45: ...dow is visible on the screen as shown below 3 Press to display the most recently stored record which will resemble the example shown in Fig 4 5 Note that if an overload occurred during the measurement then the value for each parameter will blink 4 To step through the parameters stored in the record press They are displayed in the following order Aeq default Aeq4 Aeq8 Fig 4 3 The display when measu...

Страница 46: ... view later records or to wrap back around to the first record press 6 When you have finished viewing your records press to return to the Measurement Window Fig 4 5 An example of a recalled record RECORD NO 18 10 Jun 15 00 45 Elapsed 01 00 00 H Aeq 7 26 m ss Date and Time of Measurement Duration of Record Number Parameter Value will blink if a latched Measurement overload has occurred Frequency We...

Страница 47: ...rument You should erase all records stored in the vibration meter so that the memory will be free for storing future measurements To erase the last record taken 1 If the instrument is measuring then press to stop it The Measurement Window must read STOP as shown be low not RUN 2 Press until the Erase Last Record Window is visible on the screen as shown in Fig 4 7 The number of the last recorded re...

Страница 48: ...is measuring then press to stop it The Measurement Window must read STOP as shown be low not RUN 2 Press until the Erase All Records Window is visible on the screen as shown below Fig 4 7 The Erase Last Record Window Fig 4 8 The Erase Last Record Warning Fig 4 9 The display when measurement is stopped ERASE Record No 6 WARNING Press Same Key Again to Erase Record No 6 STOP 00 05 41 Amp 17 9 m ss H...

Страница 49: ...ike the one shown in Fig 4 11 will appear to make sure you have not made a mistake 4 If you mean to erase all records press again Other wise press to leave all records stored and return to the Measurement Window Fig 4 10 The Erase All Records Window Fig 4 11 The Erase All Records Warning ERASE All Records WARNING Press Same Key Again to Erase All Records bb122411 book Page 45 Tuesday December 11 2...

Страница 50: ...ed in a spreadsheet format that will not print correctly To connect the vibration meter to a serial printer you must use Brüel Kjær adaptor cable AO1442 Contact your Brüel Kjær dealer if you do not have one To print measurement results 1 If you have already taken the measurement you wish to print do not turn off the vibration meter If you do your results will be erased 2 Connect one end of a Brüel...

Страница 51: ...ement as described in section 3 3 Make sure meas urement has stopped before proceeding to the next step 8 Press until the Print Measurement Window is visible on the screen as shown below 9 Press to begin printing Press to cancel the op eration Fig 4 12 Location of the serial port Fig 4 13 The Print Measurement Window 960159e Serial Interface Serial Port OUTPUT Current Measurement to Printer bb1224...

Страница 52: ...r Manual 4 2 2 Reading the Printout Type 2239B generates a printout that supplies the following information Frequency weighting Measurement range Date and time Elapsed time Amp Amax Amin Aeq Aeq4 Aeq8 Overload status Sample printouts are shown in Fig 4 14 bb122411 book Page 48 Tuesday December 11 2001 2 34 PM ...

Страница 53: ...Kjaer SLM Type 2239 Comments SETTINGS Weighting H Range 1 316 m ss RESULTS 21 May 1996 00 08 09 Elapsed time 01 04 10 Amp 17 9 m ss Amax 13 5 m ss Amin 3 58 m ss Aeq 7 26 m ss Aeq4 3 75 m ss Aeq8 2 65 m ss Bruel Kjaer SLM Type 2239 Comments SETTINGS Weighting H Range 1 316 m ss RESULTS 21 May 1996 00 10 30 Elapsed time 01 03 30 Overload Amp 325 m ss Amax 25 5 m ss Amin 3 58 m ss Aeq 7 26 m ss Aeq4...

Страница 54: ...our test results in any standard spreadsheet program such as Microsoft Excel 4 3 1 Connecting to a Computer 1 Take a set of measurements and save each to a record See section 3 3 and section 4 1 for instructions 2 Switch off the vibration meter and bring it to your com puter 3 Switch off your computer 4 Connect one end of a Brüel Kjær adaptor cable AO 1442 to the serial port on the back of the vib...

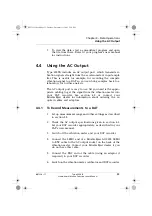
Страница 55: ...r better is required in order to use this software 1 If Brüel Kjær communication software is not installed on your computer then locate the diskette and follow the instructions given on the label 2 Connect Type 2239B to your computer as described above 3 Start running the Brüel Kjær communication software All communication parameters are set automatically so no further configuration is required 4 ...

Страница 56: ...3 Set your software s communication parameters as follows 9600 Baud 8 data bits 1 stop bit Parity none Handshake XON XOFF 4 Your communications software will probably ask you for a name and location to which to save the data Make the appropriate selections All records will be saved in a single spreadsheet format file tab separated with the name and location you choose 5 On the vibration meter pres...

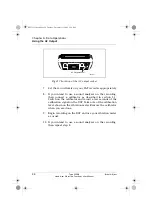
Страница 57: ...vibration meter into your DAT recorder See section 6 2 or contact your Brüel Kjær dealer for information about ordering the re quired cables and adaptors 4 4 1 To Record Measurements to a DAT 1 Set up measurement range and other settings as described in section 3 5 2 Check the AC output specifications given in section 6 1 Set your DAT recorder appropriately as described in your DAT s user manual 3...

Страница 58: ...n 3 1 Switch on the calibrator and record a few seconds of the calibration signal on the DAT Take note of the calibration level shown on the vibration meter Remove the calibrator when you are done 9 Begin recording on the DAT and use your vibration meter as usual 10 If you intend to use a sound analyzer on the recording then repeat step 8 Fig 4 17 Location of the AC output socket 960160e Serial In...

Страница 59: ...BB1224 11 55 Type 2239 B Hand Arm Vibration Functions User Manual Chapter 5 Maintenance and Troubleshooting bb122411 book Page 55 Tuesday December 11 2001 2 34 PM ...

Страница 60: ...ons of this chapter For repair contact your local Brüel Kjær dealer 5 2 Care Cleaning and Storage Type 2239B is a delicate precision instrument When handling storing or cleaning your instrument please take note of the following precautions 5 2 1 Storing the Instrument Keep the vibration meter in a dry place For long term storage remove the batteries Do not exceed storage temperature limits of 25 t...

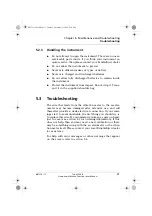
Страница 61: ...p it Trans port it in the supplied shoulder bag 5 3 Troubleshooting The wire that leads from the vibration meter to the acceler ometer may become damaged after extensive use and will thereafter provide a weak electrical connection If your read ings start to seem unreliable the first thing you should try is to replace this wire We recommend you keep a spare on hand just in case see section 6 2 for ...

Страница 62: ...signal or if the calibrator is not switched on Make sure you have turned on and connected the cali brator correctlya and or move to a morevibration free location If the error persists then contact your Brüel Kjær dealer a See section 3 1 for more information During calibration if the instrument has discovered that the required calibration factor is more than 1 5 dB from the fac tory calibration Ch...

Страница 63: ...ction 2 5 not an error However if it appears unexpectedly on start up then your back up battery is probably flat In this case the clock and all settings will also be reset This means that the instrument requires a new fac tory calibration Contact your Brüel Kjær dealer to arrange for a new factory cali bration If you press when there are no records saved and the buffer is empty Make and store meas...

Страница 64: ...60 Brüel Kjær Type 2239 B Hand Arm Vibration Functions User Manual bb122411 book Page 60 Tuesday December 11 2001 2 34 PM ...

Страница 65: ...BB1224 11 61 Type 2239 B Hand Arm Vibration Functions User Manual Chapter 6 Specifications bb122411 book Page 61 Tuesday December 11 2001 2 34 PM ...

Страница 66: ...m s2 DETECTORS RMS Averaging Time 1 s Peak Rise Time 100 µs Automatic reset at 1 s intervals PARAMETERS Amin Amax Aeq Aeq4 and Aeq8 are cal culated based on 1 s exponential averag ing of the instantaneous RMS readings Inst Amp is the highest peak reading Peak OVERLOAD INDICATION Instantaneous indication of overload and latched overload Stored records also in clude a latched overload indicator DISP...

Страница 67: ...ats Buffer printer format or all records spreadsheet format AC OUTPUT Short circuit protected coaxial LEMO se ries 00 socket Max Output 0 5 V RMS corresponding to the top of the selected measurement range 3 dB depending on the transduc er s sensitivity Output Impedance 100 Ω Output Output signal from preamplifier unweighted CLOCK Real time calendar and measurement duration Factory set to CET WARM ...

Страница 68: ...fication CE mark indicates compliance with EMC Directive Safety EN 61010 1 1993 and IEC 61010 1 1990 Safety requirements for electrical equipment for measurement control and laboratory use EMC Emission EN 50081 1 1992 Generic emission standard Part 1 Residential commercial and light industry EN 50081 2 1993 Generic emission standard Part 2 Industrial environment CISPR 22 1993 Radio disturbance cha...

Страница 69: ...94 Vibration Calibration Exciter Type 2322 Portable Printer Type 4500 Cubic Accelerometer Type 4501 Cubic Accelerometer AO 0038 Super Low Noise Teflon Cable for Type 4505 AO 0283 Super Low Noise Teflon Cable for Types 4500 and 4501 AO 0339 Low Noise Cable for Types 4500 and 4501 AO 0403 LEMO to BNC Cable AO 1442 9 pole Cable with 25 pole Adaptor for computer and serial printer UA 1251 Tripod UA 08...

Страница 70: ...66 Brüel Kjær Type 2239 B Hand Arm Vibration Functions User Manual bb122411 book Page 66 Tuesday December 11 2001 2 34 PM ...

Страница 71: ...BB1224 11 67 Type 2239 B Hand Arm Vibration Functions User Manual Chapter 7 Quick Reference bb122411 book Page 67 Tuesday December 11 2001 2 34 PM ...

Страница 72: ... tion 2 4 for a more detailed description 1 The bottom end of the measurement range in m s2 2 Quasi analogue display 3 The upper end of the measurement range in m s2 and overload indicator when showing OVL or blinking see section 3 3 3 for more information about overloads 4 Battery level see section 2 2 1 5 Run Stop indicator 6 Elapsed time 7 Peak parameter Fig 7 1 The Measurement Window RUN 00 05...

Страница 73: ...owchart below details the available paired choices Note that the fre quency weighting H shown in the screens in Fig 7 2 may differ from your own depending on your settings For more information see section 3 4 7 2 1 Parameter Definitions Amp Maximum peak acceleration Aeq Equivalent constant acceleration for the entire measurement period Amax The maximum RMS acceleration that occurred dur ing the me...

Страница 74: ...r the last 1 s interval 7 2 2 Possible Frequency Weightings H Hand arm vibration weighting Makes the vibration me ter more sensitive to those frequencies that affect hu man hands and arms L Measures with a linear unweighted response The vi bration meter will be equally sensitive to all frequencies from 6 3 Hz to 5 kHz bb122411 book Page 70 Tuesday December 11 2001 2 34 PM ...

Страница 75: ...chart Fig 7 2 Displayed parameter flowchart STOP 00 00 00 Amp m ss H Amax m ss 1 316 STOP 00 00 00 Amp m ss H Aeq m ss 1 316 STOP 00 00 00 Amp m ss H Aeq4 m ss 1 316 STOP 00 00 00 Amp m ss H Aeq8 m ss 1 316 STOP 00 00 00 Amp m ss H Amin m ss 1 316 STOP 00 00 00 Peak m ss H Inst m ss 1 316 bb122411 book Page 71 Tuesday December 11 2001 2 34 PM ...

Страница 76: ...nstrument is not measuring Press to step through the available settings as detailed in the flowchart below The arrow on the screen indicates the selected parameter Use to increment the selected parameter and to decrement it See section 3 5 for more information Fig 7 3 Set up functions flowchart part 1 SET UP Freq Weighting HA SET UP Preset Time 10 s STOP 00 00 00 Amp m ss H Aeq4 m ss 1 316 To Fig ...

Страница 77: ...5 02 SET UP Date Time 04 Jan 1996 22 15 02 SET UP Date Time 04 Jan 1996 22 15 02 SET UP Date Time 04 Jan 1996 22 15 02 SET UP Date Time 04 Jan 1996 22 15 02 SET UP Date Time 04 Jan 1996 22 15 02 STOP 00 00 00 Amp m ss H Aeq4 m ss 1 316 To Fig 7 3 From Fig 7 3 To Save all Changes To Cancel other Changes Date Time changes cannot be cancelled bb122411 book Page 73 Tuesday December 11 2001 2 34 PM ...

Страница 78: ...ure the softest relevant vibration yet should never be overloaded You are only able to change the measurement range while the instrument is not measuring To set the meas urement range press to step through the two options as detailed in the flowchart below the measurement range is shown at the top of each screen Refer to section 3 5 1 for more information Fig 7 5 Measurement Range flowchart STOP 0...

Страница 79: ...detailed in the flowchart below See section 4 1 section 4 2 and section 4 3 for more information Note The flow chart shown in Fig 7 7 shows all possible choices The following exceptions apply If the buffer is empty elapsed measurement time 0 then the Store Results window will not appear If there are no stored records then none of the recall output or erase windows will appear If there are no store...

Страница 80: ... 1 STOP 00 00 00 Amp m ss H Aeq4 m ss 1 316 STORE Current Measurement in Record No n RECALL Records to Display OUTPUT Current Measurement to Printer OUTPUT Stored Records to Spreadsheet ERASE All Records ERASE Record No n To Perform To Cancel function 2x To Erase To Cancel Records To Cancel To Fig 7 8 bb122411 book Page 76 Tuesday December 11 2001 2 34 PM ...

Страница 81: ...unctions User Manual Fig 7 8 Data functions flowchart part 2 RECORD No 08 10 Jun 15 00 45 Elapsed 01 00 00 H Aeq 7 26 m ss From Fig 7 7 To display a new record To display the next parameter of this record STOP00 00 00 Amp m ss H Aeq4 m ss 1 316 bb122411 book Page 77 Tuesday December 11 2001 2 34 PM ...

Страница 82: ...78 Brüel Kjær Type 2239 B Hand Arm Vibration Functions User Manual bb122411 book Page 78 Tuesday December 11 2001 2 34 PM ...

Страница 83: ...10 replacing 11 time remaining 8 Blinking battery indicator 9 range values 27 recalled parameters 27 Brüel Kjær Software 51 Buffer 5 C Calibration 20 choosing a calibrator 20 errors 21 58 how often 20 procedure 21 Care Cleaning and Storage 56 Carrying Case 65 CE certification 64 Cleaning 56 Communication software Brüel Kjær 51 third party 52 Connecting to a Computer 50 D DAT recording 53 Data func...

Страница 84: ...ata available 59 No free records 40 59 O Optional accessories 65 Ordering information 65 Overload 26 in printouts 27 49 in records 27 42 in spreadsheets 27 Instantaneous 26 latched 26 OVL 26 P Parameters 4 69 Aeq 28 69 Aeq4 28 69 Aeq8 29 69 Amax 28 69 Amin 28 69 Amp 28 69 definitions 69 flow chart 71 Inst 29 70 Peak 29 69 saved 29 Peak parameter 16 29 69 Preset time 33 off manual 33 setting 33 Pre...

Страница 85: ... 56 Settings 4 30 flow chart 72 measurement range 30 measurement time 33 preset time 33 Set up memory 5 Specifications 62 Storage 56 Switching Between Sound and Vibration Functions 8 T Third party software 52 Troubleshooting 57 U Under range 24 25 W Warning messages 58 Weighting 16 Weightings 70 bb122411 book Page 81 Tuesday December 11 2001 2 34 PM ...

Отзывы: