Z-8550A, 8560A
12. STANDARD ADJUSTMENTS
64
12-8. Adjusting the needle bar height
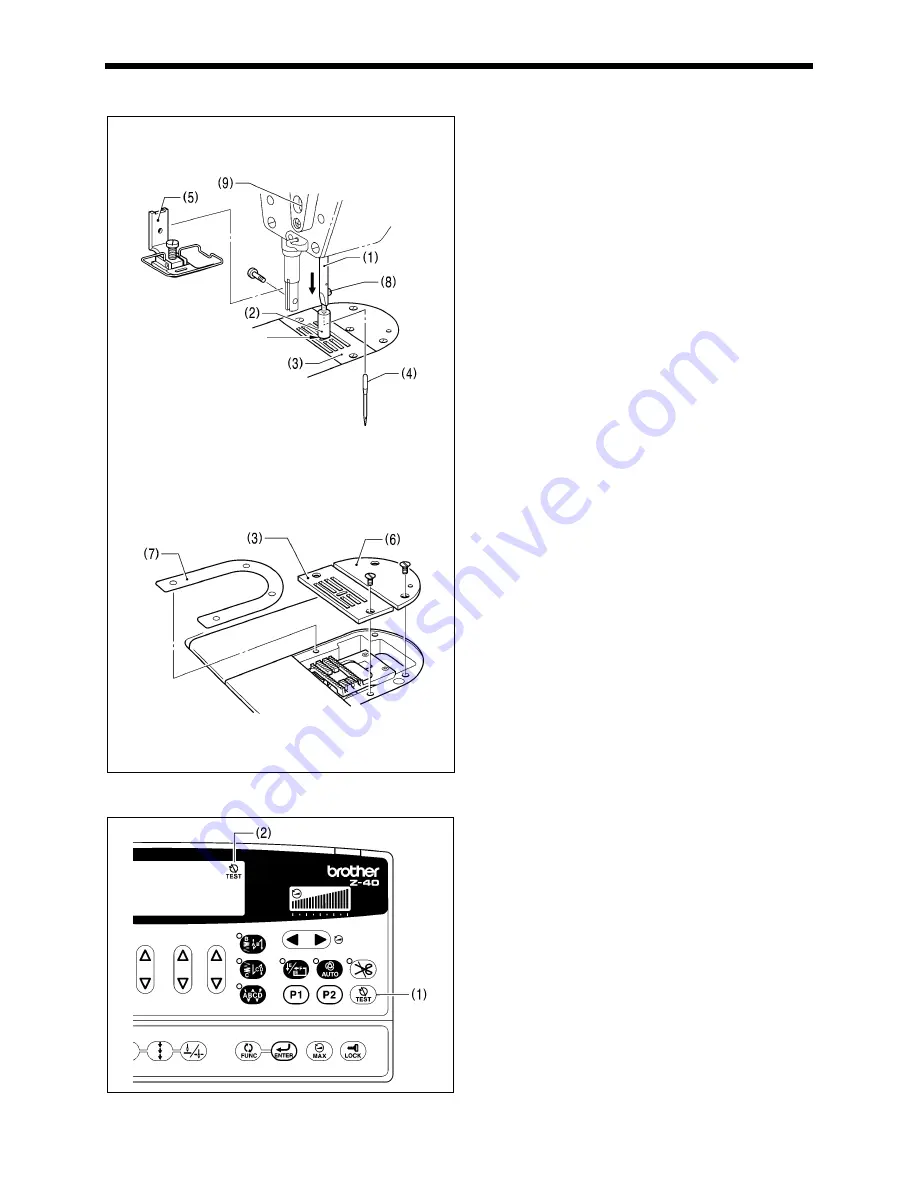
With the accessory needle bar height gauge (2) installed to
the needle bar (1), adjust so that the needle bar height
gauge (2) is touching the top of the needle plate (3) when
the needle bar is at its lowest position.
1. Remove the needle (4) and the presser foot (5).
For the 8560A (Refer to Fig. A)
1) Remove the needle plate (3) and then auxiliary
needle plate (6).
2) Remove the spacer (7).
3) Place the needle plate (3) onto the needle plate
installation surface.
2. Install the accessory needle bar height gauge (2) to the
needle bar (1), and then tighten it with the set screw (8).
3. Loosen the screw (9).
4. Move the needle bar up or down to adjust so that the
needle bar height gauge (2) is touching the top of the
needle plate (3) when the machine pulley is turned so
that the needle bar (1) is at its lowest position.
5. Securely tighten the screw (9).
6. Remove the needle bar height gauge (2).
7. For the 8560A, install the spacer (7), needle plate (3)
and auxiliary needle plate (6).
8. Install the presser foot (5) and needle (4).
12-9. Needle and rotary hook timing
1. Turn on the power switch.
2. Press the TEST key (1) and check that the TEST icon (2)
is illuminated.
(For safety purposes, be sure to carry out this step, as it
prevents the motor from operating even if the treadle is
depressed.)
3. Set both the zigzag width and the zigzag base line
position to “0”. (Refer to pages 31-32.)
(Continued on next page)
For the 8560A (Fig. A)
3522M
3521M
3523M
Touching


