S-7300A
6. USING THE OPERATION PANEL (ADVANCED OPERATIONS)
41
6. USING THE OPERATION PANEL
(ADVANCED OPERATIONS)
6-1. Adding and deleting steps
You can put together programs, such as the one shown in the
illustration at right for pocket sewing, by registering multiple
steps in the main sewing section.
1
Switching to add/delete step mode
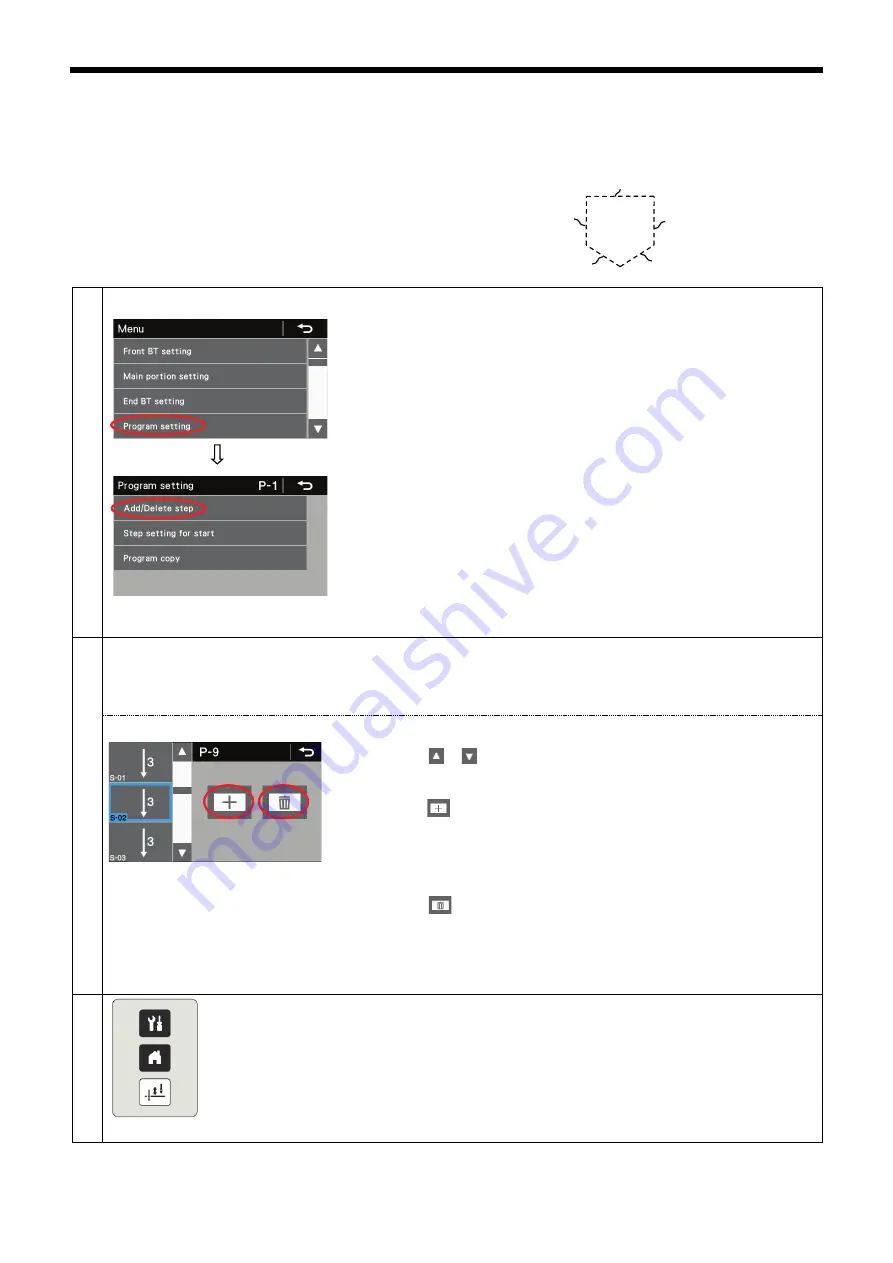
1. At the menu screen, select "Program setting" to switch to program setting
mode.
2. Next, in program setting mode, select "Add/Delete step" to switch to
add/delete step mode.
2
<Add/delete step mode>
Steps can be added (up to a maximum of 20 steps) to or deleted (to a minimum of 1 step) from the currently-selected
program.
However, if fixed stitch sewing or reverse fixed stitch sewing is not selected, it will not be possible to switch to this
mode.
・
The program number (1), step number (2), sewing pattern and cursor (blue
box) for the currently-selected program are displayed.
・
Press the or key to change the cursor position.
★
When adding a step
Press the key (3) to add a step after the current cursor position.
The sewing pattern for the added step will be the fixed stitch sewing pattern.
However, if the number of steps has already reached 20, no further steps
can be added.
★
When deleting a step
Press the key (4) to delete the step at the current cursor position.
However, if only 1 step is remaining, the delete key will be disabled.
3
Press the return key to return to the program setting screen.
Press the menu key to return to the menu screen.
Press the home key to return to the home screen.
* When more than one step had been added for sewing, the number of stitches
in the step which is currently being sewn will be completed, and then sewing
will continue on to the next step.
(1)
④
③
(2)
(3)
(4)
S-01
S-02
S-03
S-04
S-05


