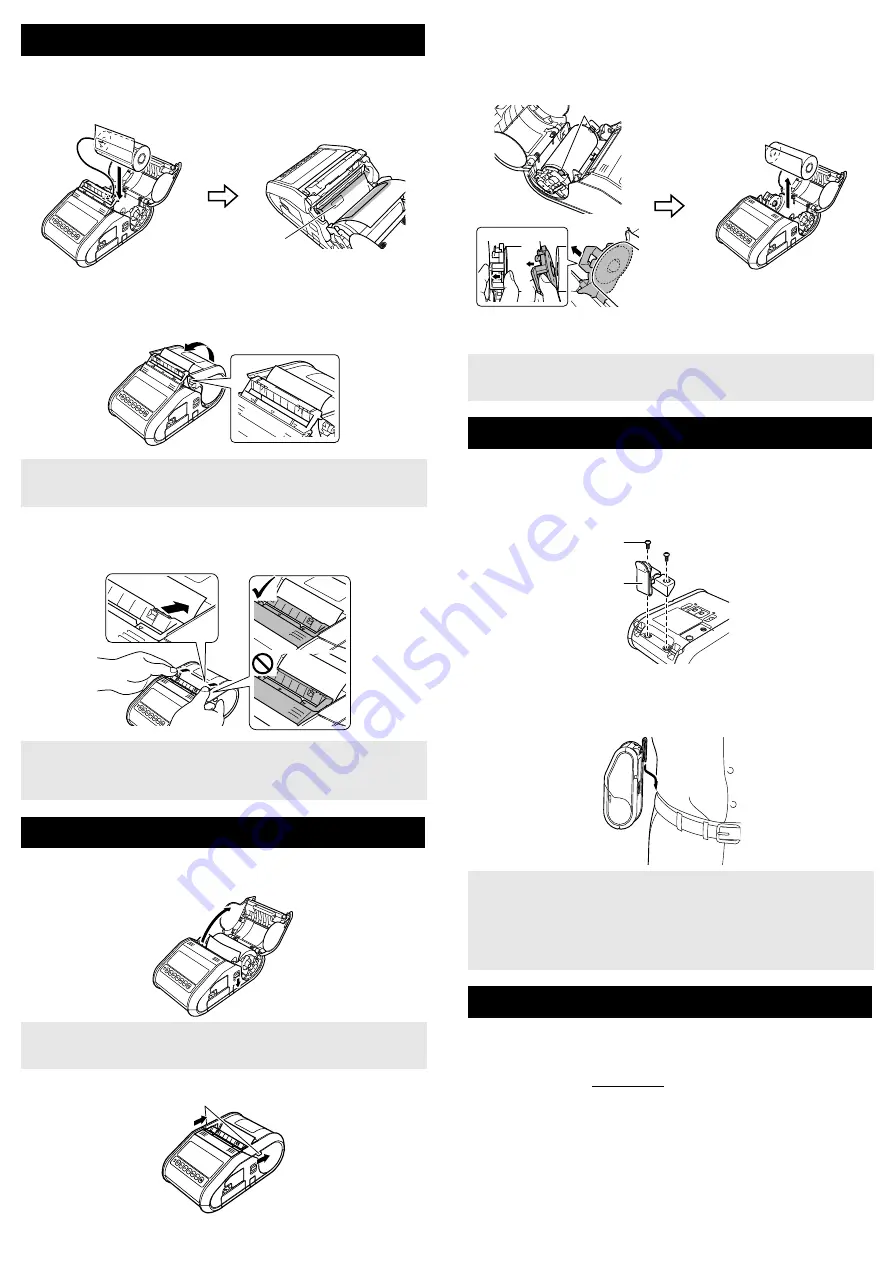
3.
Peel off the first label of the RD Roll. Then, insert the RD Roll so that the
top edge of the second label is at the same height as the top edge of the
media sensor plate.
4.
Close the RD Roll compartment cover. Make sure the label peeler is on
top of the cover.
5.
In order to remove any slack in the roll, lightly pull on the paper fed out
of the paper outlet until no more can be pulled out.
6.
Push both sides of the (
) label peeler until it clicks into place.
1.
Push the cover open lever, and then open the RD Roll compartment
cover.
2.
While pushing the roll release lever, tilt the roll guide slightly, and then
remove the roll. The roll can be removed without changing the position
of the roll guide.
Do not forcefully tilt the roll guide too far. Otherwise, the roll guide could
break.
When using the printer outside the office, you can attach the included belt clip
to the printer and secure the belt clip to your belt.
1.
Secure the Phillips-head screws to the rear of the printer as shown.
2.
Attach the clip to your belt.
Please install the printer driver and P-touch Editor software before using the
printer.
1.
Visit our website (install.brother) and download the installer for the
software and documents.
2.
Double-click the downloaded .exe file and follow the on-screen
instructions to proceed with the installation. In the dialog box for
selecting which items to install, select the necessary software.
Inserting the RD Roll (cont’d)
1
Media sensor
IMPORTANT
Make sure that the labels are not pinched by the peeler rollers. The
backing paper of the labels may not be peeled off.
NOTE
To open the RD Roll compartment cover when the label peeler is set up,
first release the peeler latches on both sides of the printer before pushing
the cover open lever.
Removing the RD Roll
NOTE
When you use the label peeler, first release the peeler latches on both
sides of the printer before pushing the cover open lever.
1
Peeler latch
1
...
1
1
Roll release lever
NOTE
When you use the label peeler, make sure that the backing paper does
not become caught when removing the RD roll.
Attaching the Belt Clip
1
Belt clip
2
Phillips screw
IMPORTANT
• Make sure that the belt clip is attached securely to the printer. There
is a risk of injury if the belt clip is not attached securely and the printer
falls.
• Make sure that the belt clip is attached securely to the wearer's belt.
There is a risk of injury if the belt clip is not attached securely and the
printer falls.
Installing the Drivers
1
1
2
2
1


