


27
Tutorial
Tu
tor
ia
l
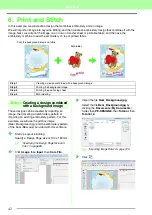
Cross Stitch Function
Cross Stitch embroidery patterns can be created from images. For example, clip art image can be used.
Step 1
Importing image data into
Layout & Editing
Refer to “Importing image data into Layout &
Editing” on page 20. Select the
Tutorial_2
folder,
and then select
tulip.bmp
as the image.
Step 2
Automatically converting an
image to a cross-stitch pattern
Next, the image will automatically be converted to
an embroidery pattern.
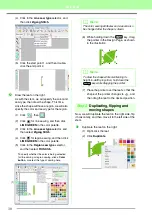
Click
Image
, then
Image to Stitch Wizard
.
Select
Cross Stitch
, then
Color
, and then
click
Next
.
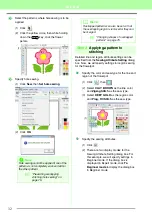
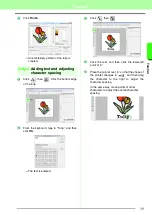
Click
Next
.
In this dialog box, the cross size and the
number of colors can be specified. For this
example, we will use the default settings.
Step 1
Importing image data into Layout & Editing
Step 2
Automatically converting an image to a cross-stitch pattern
1
b
Memo:
The Sepia choice means you can create sepia
tone or grayscale tone embroidery.
c
“If Cross Stitch (Sepia) is
selected” on page 136.
2
3
Содержание PE-Design 8
Страница 1: ...Instruction Manual ...
Страница 146: ...144 Arranging Embroidery Designs Layout Editing ...
Страница 200: ...198 Managing Embroidery Design Files Design Database ...
Страница 218: ...216 Creating Custom Stitch Patterns Programmable Stitch Creator ...
Страница 244: ...242 Tips and Techniques ...
Страница 269: ...English ...


