background image

Other Functions 

51

6

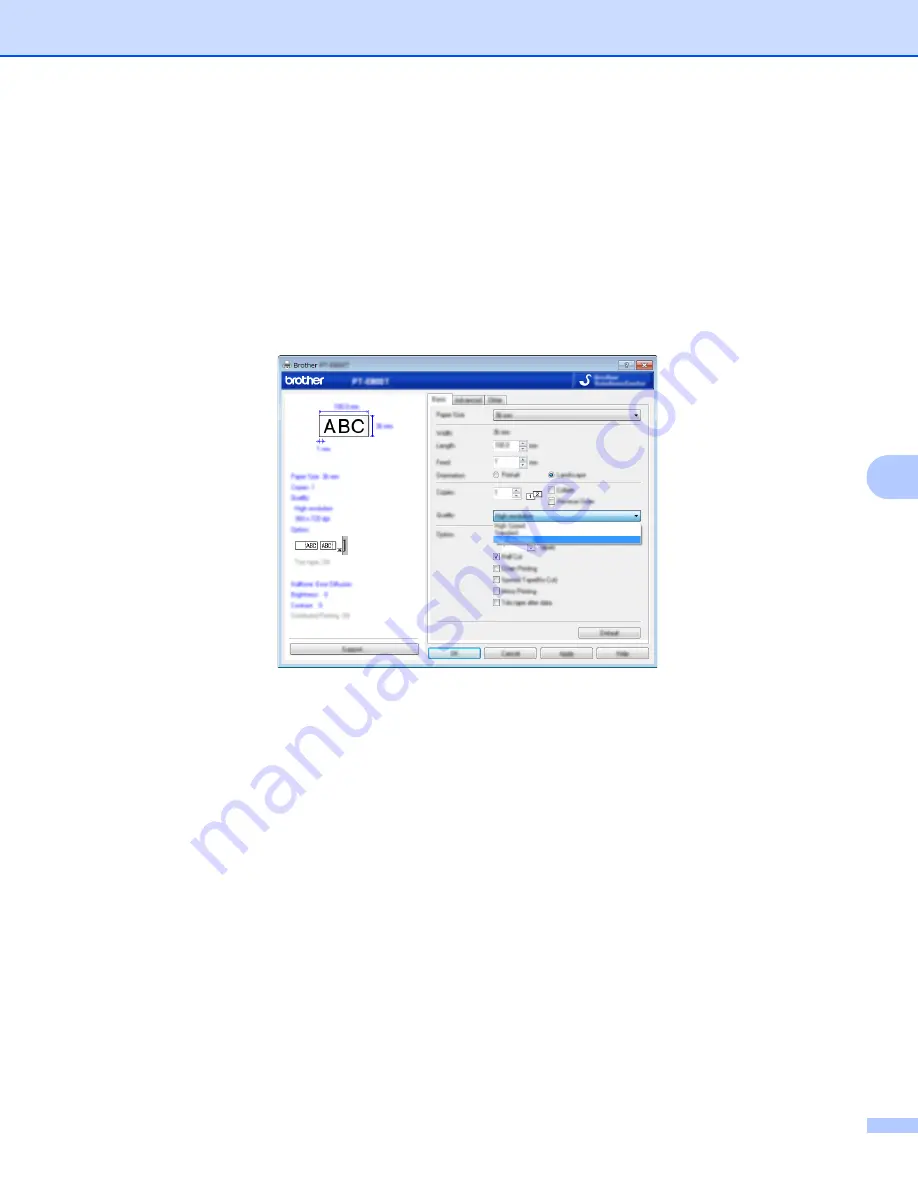
Printing Labels in High Resolution Mode

6

High resolution printing can be used if the AC adapter is connected, and TZe and HGe laminated tape with 
black ink is installed. Use the printer driver to select the high resolution mode when printing the labels. You 
cannot use this function for TZe-FX**1 tape.

a

From the [

File

] menu in P-touch Editor, click [

Print

].

b

Click [

Properties…

].

c

On the [

Basic

] tab, select [

High resolution

] from the [

Quality

] drop-down list.


d

Click [

OK

].

Содержание P-touch PT-P900

Страница 1: ...User s Guide PT P900 Read the whole guide before using your product and keep it for later reference Version A US ENG ...

Страница 2: ...proper operation The P touch Label Printer shown in the illustrations may be different from P touch Label Printer Not all options and the consumables such as TZe HGe tape FLe label and HSe tube cassettes are available in all countries The available options and supplies may vary depending on the country Available Manuals Visit the Brother Solutions Center at support brother com and click Manuals on...

Страница 3: ...you must follow to avoid minor personal injury or damage to the P touch Label Printer Important Indicates information or directions that should be followed Ignoring them may result in damage or failed operations Note Indicates notes that provide information or directions that can help you better understand and use the product more efficiently WARNING CAUTION ...

Страница 4: ...n this document represents all editions of Windows 7 Windows 8 in this document represents all editions of Windows 8 Windows 8 1 in this document represents all editions of Windows 8 1 Windows 10 in this document represents Windows 10 Home Windows 10 Pro Windows 10 Enterprise and Windows 10 Education Windows 10 in this document does not represent Windows 10 Mobile Windows 10 Mobile Enterprise or W...

Страница 5: ... 13 3 Using the Serial Interface 14 Installing the Printer Driver and Software 14 Transferring the Template to P touch Transfer Manager 14 Transferring Templates from the Computer to the P touch Label Printer 14 Connecting Using the Serial Adapter Optional PA SCA 001 15 Serial RS 232C Cable 16 Serial Interface Settings 16 4 Changing the P touch Label Printer Settings 17 Printer Setting Tool 17 Bef...

Страница 6: ...ouch Label Printer Settings 46 Distributed Printing 47 Printing Labels in High Resolution Mode 51 Printing Labels in High Speed Mode 52 Printing Labels in High Quality Mode 53 Section II Application 7 How to Use Cable Label Tool 55 Starting Cable Label Tool 55 Creating a Cable Label 57 Faceplate 57 Cable Wrap 58 Cable Flag 59 Patch Panel 60 Punch Down Block 60 Die cut Flag 61 Heat Shrink Tube 61 L...

Страница 7: ...he Template as a Transfer Package File pdz 88 Distributing the Transfer Package File pdz and P touch Transfer Express to the User 90 Transferring the Transfer Package File pdz to Your P touch Label Printer 91 11 How to Update P touch Software 94 Updating Cable Label Tool and P touch Editor 94 Updating the Firmware 96 Section III Appendix 12 Resetting the P touch Label Printer 100 Resetting All Set...

Страница 8: ...unction 120 General Procedure for the P touch Template Function 120 List of Barcodes for Specifying Settings 121 18 Using the Rechargeable Li ion Battery Battery Bagse Optional PA BT 4000LI PA BB 002 124 Installing the Rechargeable Li ion Battery 124 Removing the Rechargeable Li ion Battery 125 Charging the Rechargeable Li ion Battery 126 Stopping Rechargeable Li ion Battery Charging 126 Notes on ...

Страница 9: ...perations I Setting Up the P touch Label Printer 2 Printing Using the Computer 8 Using the Serial Interface 14 Changing the P touch Label Printer Settings 17 Printing Labels Using P touch Template 30 Other Functions 46 ...

Страница 10: ...ral Description 1 Front 1 1 Tape compartment cover 2 Tape exit slot 3 Cover open button 4 Status indicator 5 Battery indicator 6 Power button 7 Feed Cut button Setting Up the P touch Label Printer 1 3 1 2 4 5 6 7 ...

Страница 11: ...ort for Computer Important Before using the P touch Label Printer make sure you remove the protective material according to the following procedure 1 Press the cover open button to open the tape compartment cover 2 Pull the tape to remove the tape together with the protective material 3 1 2 ...

Страница 12: ...C adapter 2 Power supply cord c Insert the power supply plug into a standard AC power outlet Important Turn off the P touch Label Printer before disconnecting the AC adapter Do not pull or bend the AC adapter cord and power supply cord After the power supply plug is inserted into the AC power outlet it may take a few seconds until the Power button is enabled Note To safeguard and back up the P tou...

Страница 13: ...bent and that it passes through the tape guides If it does not pass it through the tape guides as shown in the illustration 1 End of tape 2 Tape guides The actual shape may be different depending on the tape width b Press the cover open button to open the tape compartment cover c Carefully insert the tape cassette into the tape cassette compartment with the end of the tape facing the P touch Label...

Страница 14: ...d causing the tape to jam To fix the slack in the tape refer to the illustration in step a and pull the tape outside of the tape guide When removing the tape cassette make sure that the tape does not catch on the protrusion 2 d Close the tape compartment cover Important Store tape cassettes in a cool dark location away from direct sunlight and high temperature high humidity or dusty locations Afte...

Страница 15: ...range Power indicator turns off Feeding Tape 1 Important Be sure to feed tape to remove any slack in the tape and ink ribbon after inserting the tape cassette Do not pull the label when the P touch Label Printer is ejecting it from the tape exit slot Doing so will cause the ink ribbon to be discharged with the tape The tape may no longer be functional after the ink ribbon discharges Do not block t...

Страница 16: ...ns a Visit our website install brother and download the installer for the latest software and manuals b Double click the downloaded file and follow the on screen instructions to proceed with the installation Note After the installation starts you can select which items to install c Close the dialog box when the installation is complete Printing Using the Computer 2 ...

Страница 17: ... Before connecting the USB cable make sure that the P touch Label Printer is turned off b Connect the P touch Label Printer end of the USB cable to the USB port on the back of the P touch Label Printer c Connect the other end of the USB cable to the USB port on the computer d Turn on the P touch Label Printer ...

Страница 18: ...ackups of your data on the computer This application is installed with P touch Editor P touch Library Manage and print P touch Editor templates You can use P touch Library to print templates This application is installed with P touch Editor P touch Update Software Update software to the latest version Printer Setting Tool Specify the printer s device settings from a computer BRAdmin Light Finds th...

Страница 19: ...l design c Check the cutting options See Cutting Options on page 11 d Select File then Print from the menu bar or by clicking the Print icon Cutting Options 2 The cutting options allow you to specify how the item is fed and cut when it is printed Use the printer driver to select the cutting option when printing from the computer using the application See the following table for a list of all avail...

Страница 20: ...he Computer 12 2 No Yes Yes Yes Yes Yes No No Yes Yes No Yes Special tape No FLe Label Yes FLe Label Tape Cut Option Table Auto Cut Half Cut Chain Printing Image ABC ABC ABC ABC ABC ABC ABC ABC ABC ABC ABC ABC ABC ABC ...

Страница 21: ...your finger to attach the label Note The backing of some types of tapes may be pre cut to make it easier to peel the backing To remove the backing simply fold the label lengthwise with the text facing inwards to expose the inside edges of the backing Next peel off the backing one piece at a time Labels may be difficult to attach to surfaces that are wet dirty or uneven The labels may peel off easi...

Страница 22: ...e Printer Driver and Software on page 8 Transferring the Template to P touch Transfer Manager 3 Create the template using P touch Editor and then transfer the template to P touch Transfer Manager For more information see Transferring the Template to P touch Transfer Manager on page 70 Transferring Templates from the Computer to the P touch Label Printer 3 Transfer the template to the printer using...

Страница 23: ...r scale Note The serial interface is not compatible with the Windows printer drivers and is only used for template mode The default communication settings are as follows Baud rate 9600 bps Parity None Bit length 8 bits Busy Control DTR To change the communication settings use P touch Template Settings in the Printer Setting Tool For more information on setting the P touch Label Printer baud rate d...

Страница 24: ...ings 3 Use the following steps to change or confirm the port and the baud rate settings on the barcode scanner or scale and the P touch Label Printer Setting the Barcode Scanner or Scale Baud Rate 3 For more information on setting the baud rate see the instruction manual for the barcode scanner or scale Setting the P touch Label Printer Baud Rate 3 To set the P touch Label Printer baud rate see Pr...

Страница 25: ...mation see Installing the Printer Driver and Software on page 8 Important The Printer Setting Tool is available only with compatible Brother printers Before Using the Printer Setting Tool 4 Make sure the AC adapter is connected to the printer and to an AC power outlet or a fully charged battery is installed Make sure the printer driver has been installed correctly and you can print Connect this P ...

Страница 26: ...l icon on the Apps screen For Windows 10 From the Start button select All apps and then click Brother Label Mobile Printer Printer Setting Tool The main window appears 1 Printer Lists the connected printers 2 Device Settings Specifies printer device settings such as power settings and printer settings 3 P touch Template Settings Specifies P touch Template settings For more information on P touch T...

Страница 27: ...e d Select the setting you want to change and then specify or change the settings in the dialog box For more information on the settings dialog boxes see P touch Template Settings on page 27 e Click Apply Exit in the settings dialog box to apply the settings to the P touch Label Printer f Click Exit in the main window to finish specifying settings Important Use the Printer Setting Tool to configur...

Страница 28: ...d If the current settings could not be retrieved the previous settings are displayed If the current settings could not be retrieved and previous settings have not been specified this tool s factory settings are displayed Settings Dialog Box 4 1 Menu Bar Select a command contained in each menu from the list 2 Printer Specifies the printer whose device settings are to be configured If only one print...

Страница 29: ... longer be specified or changed Settings in a tab where appears will not be applied to the printer even if Apply is clicked In addition the settings in the tab will not be saved or exported when the Save in Command File or Export command is executed 6 Parameters Displays the current settings 7 Exit Exits Device Settings and returns to the main window of the Printer Setting Tool 8 Apply Applies the...

Страница 30: ...ly is clicked 2 Save Settings in Command File Saves the specified settings in a command file Performs the same operation as when Save in Command File is selected from the Apply drop down list 3 Import Imports the exported file 4 Export Saves the current settings in a file 5 Save Print Log in File Saves the print log in a file in the CSV format 5 6 7 10 11 8 9 1 2 3 4 ...

Страница 31: ...nt this report use 0 94 24 mm or 1 4 36 mm tape 7 Factory Reset Resets all printer settings to factory settings 8 Delete Template and Database Deletes the templates and databases stored in the printer 9 Delete Print Log Deletes the print log stored in the printer 10 Option Settings If the Do not display an error message if the current settings cannot be retrieved at startup check box is selected a...

Страница 32: ...Off Li ion Specifies the period of time that passes before the printer turns off automatically when powered by the rechargeable Li ion battery Available settings None 10 20 30 40 50 Minutes 1 hour 4 Command Mode Specifies the printer s command format Available settings Raster ESC P P touch Template 5 Contents Specifies the printer information that will be printed Available settings All Usage Log P...

Страница 33: ...yed on the computer Available settings 4 to 4 1 increments 2 Full Cut Margin Adjustment Adjusts the margin length when fully cutting labels Available settings 2 to 2 1 increments 3 Half Cut Margin Adjustment Adjusts the margin length when half cutting labels Available settings 2 to 2 1 increments 4 Test Print Prints a test label to check the results of each adjustment 1 2 3 4 ...

Страница 34: ...he newly connected printer from the Printer drop down list c Click Apply The same settings that were applied to the first printer are applied to the second printer d Repeat steps a c for all printers whose settings you want to change Note To save the current settings in a file click File Export The same settings can be applied to another printer by clicking File Import and then selecting the expor...

Страница 35: ...Template Settings in the Printer Setting Tool settings for using the P touch Template functions can be specified or changed Note P touch template mode is also compatible with other input devices like a scale testing machine controller or a programmable logic device For more information on P touch Template download the P touch Template Manual Command Reference English only from the Brother Solution...

Страница 36: ...s of data in a file Between 1 and 20 characters can be specified 4 Trigger for P touch Template Printing You can specify a trigger to begin printing from a number of options Command Character Printing starts when the command character specified here is received Data Insertion into All the Objects Printing starts when the delimiter for the last object is received Received Data Size Printing starts ...

Страница 37: ...ify 1 to 20 characters 9 Available Return Code The line feed code is used when feeding data to indicate that the following data should be moved to the next line in a text object One of the following four line feed codes can be selected or 1 to 20 characters can be specified as the line feed code Available settings CR 0D 0A 0A 0D 10 Number of Copies Sets the number of copies A number between 1 and ...

Страница 38: ...looking label Database Lookup Printing See page 40 Download a database linked to a template and scan a barcode to find a record to insert into the template and print it out Advanced Features 5 Numbering Serialized Number Printing See page 43 Automatically increment a text or barcode in any downloaded template while printing Note P touch template mode is also compatible with other input devices lik...

Страница 39: ...nter and the computer with a USB cable and then turn on the P touch Label Printer b Start the Printer Setting Tool For Windows Vista Windows 7 From the Start button click All Programs Brother Label Mobile Printer Printer Setting Tool For Windows 8 Windows 8 1 Click the Printer Setting Tool icon on the Apps screen For Windows 10 From the Start button select All apps and then click Brother Label Mob...

Страница 40: ... Size is selected with the number of bytes setting the template will automatically print out after the specified number of bytes have been scanned in Because the print mode setting will return to raster mode each time you print from the computer you must change the setting to template mode again If you turn off the P touch Label Printer and then turn it on again the printer starts up in template m...

Страница 41: ...ge the communication settings in the P touch Label Printer because many barcode scanners are more difficult to program The factory communication settings for the P touch Label Printer are shown below a Click Communication Settings B shown in the previous step d Specifying settings in the P touch Template Settings tool b Change the settings as necessary and then click Set Note Making the proper com...

Страница 42: ... from a computer to the P touch Label Printer using P touch Transfer Manager See How to Use P touch Transfer Manager and P touch Library on page 70 for more information The barcode scanner should be programmed to use the English keyboard For beginners the barcode scanner should be programmed to scan data with no prefix or suffix characters For advanced users the prefix and or suffix characters can...

Страница 43: ... is converted back to text that can be edited b When you transfer data to Configurations in P touch Transfer Manager select the folder containing the data you want to transfer Note When a template is transferred to Configurations in P touch Transfer Manager the Key Assign number is automatically assigned You can specify a Key Assign number between 1 and 10 for any downloaded templates into the P t...

Страница 44: ...rned On For more information on P touch Template Settings download P touch Template Manual Command Reference English only from the Brother Solutions Center at support brother com Select your region country Manuals Choose your product To specify the number of copies you want scan the Number of copies barcode and then scan the barcodes under For entering numbers to specify a three digit number Examp...

Страница 45: ...Label Printer See How to Use P touch Transfer Manager and P touch Library on page 70 Important It is important to design a template to meet the barcode symbology or protocol requirements especially for the label size and barcode position in the label to fit the maximum number and type of characters being inserted from the barcode scanner A barcode in the template cannot be created or be scannable ...

Страница 46: ...Solutions Center at support brother com Select your region country Manuals Choose your product To specify the number of copies you want scan the Number of copies barcode and then scan the barcodes under For entering numbers to specify a three digit number The setting is automatically applied when three digits have been specified Example Specify numbers by scanning the following barcodes 7i 0 0 7 1...

Страница 47: ...ou want inserted into the barcode object in the selected downloaded template from step f Example h Scan the Begin printing barcode to send the command to start printing i The barcode in the printed template will contain the data from the barcode scanned in step g Example CODE128 9 digit ...

Страница 48: ... with two or more lines of data in the leftmost column field A For more information on the barcodes that can be scanned using various settings see List of Barcodes for the P touch Template Function on page 120 a Use P touch Editor to create a template and connect to a database file You can link as many columns to a text and barcode object in the template as needed Note It is not necessary to link ...

Страница 49: ...single copy with Auto cut turned On For more information on P touch Template Setting Tool download P touch Template Manual Command Reference English only from the Brother Solutions Center at support brother com Select your region country Manuals Choose your product To specify the number of copies to be printed scan the Number of copies barcode and then scan the barcodes under For entering numbers ...

Страница 50: ...an the Delimiter barcode to send the command to start searching the downloaded database for the key word that was scanned in j Scan the Begin printing barcode to send the command to start printing Note You can use P touch Editor to create and print a label with a single barcode for steps i and j Example k The P touch Label Printer will print the template with the data inserted from the database re...

Страница 51: ...at will simultaneously be incremented while printing Text and barcode objects linked to a database file can not be incremented Text Numbering Serializing 5 Procedure a Use P touch Editor to create or open a template and select a text object that you want to automatically increment while printing Example b Highlight or drag the cursor over a group of numbers and letters within the text object that ...

Страница 52: ...ally increment while printing b With the cursor over a selected barcode object right click and select Properties Example c Click on the Input tab and highlight or drag the cursor over a group of numbers and letters within the barcode object that you want to increment Numbering field Example Note The Numbering button will become un grayed after a group of numbers and letters are highlighted ...

Страница 53: ...er See List of Barcodes for the P touch Template Function on page 120 Scan the Number of serialized copies barcode and then scan the barcodes under For entering numbers with the number of copies to be printed three digits Example For five copies specify the three digit numbers by scanning barcodes for 0 0 5 Note Follow P touch Template mode basic operation procedures from Standard Template Printin...

Страница 54: ...ing information The firmware version device setting information and serial number a Turn on the P touch Label Printer b Press and hold the Feed Cut button for more than ten seconds to print the report Note When you print this report use 0 94 24 mm or 1 4 36 mm tape This operation can also be performed using the Printer Setting Tool see Changing the P touch Label Printer Settings on page 17 Other F...

Страница 55: ...d Note Printing can be distributed to printers connected via a USB The number of pages is automatically divided among the selected printers If the specified number of pages cannot be evenly divided among the printers it will be divided in the order of the printers listed in the dialog box when the print settings are specified in step d a From the File menu in P touch Editor click Print b Click Pro...

Страница 56: ...ributed printing 1 Click Detect Current Paper Information 2 The current printer information that was detected appears below Current Width and Paper Type 3 Select the check box next to the Printer Name you want Note If the selected tape width is different from that displayed beside Current Width appears beside the setting below Current Width Load the printer with tape of the width specified Set Wid...

Страница 57: ...n displayed in the Distributed Printing Settings dialog box from step d can be entered in the Notes text box B If multiple printers have been selected In the Distributed Printing Settings dialog box from step d select the printers whose settings you want to specify right click them and then click Settings From the Set Width drop down list select the tape width The same tape width setting is applie...

Страница 58: ... Note It may not be possible for information to be detected for a printer connected using a USB hub Before printing enter the settings manually and check if the printer can be used for printing We recommend performing a connection test for your operating environment Contact your information technology manager or administrator for assistance ...

Страница 59: ...Ze and HGe laminated tape with black ink is installed Use the printer driver to select the high resolution mode when printing the labels You cannot use this function for TZe FX 1 tape a From the File menu in P touch Editor click Print b Click Properties c On the Basic tab select High resolution from the Quality drop down list d Click OK ...

Страница 60: ...Ze and HGe laminated tape with black ink is installed Use the printer driver to select the high speed mode when printing the labels You cannot use this function for TZe FX 1 tape a From the File menu in P touch Editor click Print b Click Properties c On the Basic tab select High Speed from the Quality drop down list d Click OK ...

Страница 61: ...ditor click Print b Click Properties c On the Basic tab select High Quality from the Quality drop down list d Click OK Note You can select the high quality mode in P touch Editor Click File Print and then select the Priority to print quality check box under Options If you cannot select the high quality mode using the printer driver or P touch Editor you must update the printer driver or firmware D...

Страница 62: ...cation II How to Use Cable Label Tool 55 How to Use P touch Editor 65 How to Use P touch Transfer Manager and P touch Library70 Transferring Templates with P touch Transfer Express 86 How to Update P touch Software 94 ...

Страница 63: ...double click Cable Label Tool 1 0 shortcut icon on the desktop For Windows 8 Windows 8 1 Click Cable Label Tool 1 0 on the Apps screen or double click Cable Label Tool 1 0 on the desktop For Windows 10 From the Start button select All apps and click Cable Label Tool 1 0 under Brother P touch or double click Cable Label Tool 1 0 on the desktop How to Use Cable Label Tool 7 ...

Страница 64: ...How to Use Cable Label Tool 56 7 b Click the button for the cable label type you want ...

Страница 65: ...How to Use Cable Label Tool 57 7 Creating a Cable Label 7 Faceplate 7 Labels of this type can be used to identify various faceplates Blocks of text are evenly spaced on each label ...

Страница 66: ...ed Note When using Flexible ID Tape We recommend using Flexible ID Tape for the Cable Wrap labels Labels made with Flexible ID Tape are not designed for use as electrical insulation When wrapping labels around cylindrical objects the diameter 1 of the object should be at least 0 12 3 mm The overlapping 2 ends of the label should be at least 0 2 5 mm 2 1 ...

Страница 67: ...els is printed on both ends of the label leaving a blank space in the middle that wraps around the cable Note The flag length 1 should be at least 0 2 5 mm Orientation We recommend using Flexible ID Tape for the Cable Flag labels Labels made with Flexible ID Tape are not designed for use as electrical insulation Horizontal Vertical 1 Flag length 2 Cable circumference 1 1 2 1 1 2 1 ...

Страница 68: ... of this type can be used to identify various types of panels Punch Down Block 7 Labels of this type can be used to identify a type of electrical connection often used in telecommunications You can enter up to eight lines for each block on a single label ...

Страница 69: ...n be printed on special die cut flag labels to create flag labels for cables and wires Use FLe tape cassettes for this type of application Heat Shrink Tube 7 Tubes of this type can be heated to shrink them to fit cables Use HSe tube cassettes for this type of application ...

Страница 70: ...Cable Label Tool 62 7 Linking a Database 7 You can link databases to templates a Click Database b Select a database c The database linked to the template appears Specify the data to print and the number of copies ...

Страница 71: ...zed labels a Highlight the text you want to serialize b Click Serialize c Specify the settings using the screen image as an example Printing with Cable Label Tool 7 You can print by selecting Print from the File menu or by clicking the Print button Configure the printing settings in the Print screen before printing ...

Страница 72: ... assignment key Note If the template or other data transferred to the printer has the same key number as another template already saved in the printer the new template will overwrite the old one d To transfer a template with a connected database select the Transfer with Database check box e Click Transfer The template or template with database is transferred to the printer Note Serialize settings ...

Страница 73: ... Start the P touch Editor For Windows Vista Windows 7 From the Start button click All Programs Brother P touch P touch Editor 5 1 or double click P touch Editor 5 1 shortcut icon on the desktop For Windows 8 Windows 8 1 Click P touch Editor 5 1 on the Apps screen or double click P touch Editor 5 1 on the desktop For Windows 10 From the Start button select All apps and click P touch Editor 5 1 unde...

Страница 74: ...al heading and then the setting you want in the Operations list box under Startup Settings The factory setting is Display New View c Select one of the displayed options 1 To create a new layout double click New Layout or click New Layout and then click 2 To create a new layout using a preset layout double click a category button or select a category button and then click 3 To connect a preset layo...

Страница 75: ...How to Use P touch Editor 67 8 5 To open the application for creating labels for electrical equipment management double click Cable Labelling Wizard or click Cable Labelling Wizard and then click ...

Страница 76: ...onfigure the printing settings in the Print screen before printing Professional mode This mode allows you to create layouts using a wide range of advanced tools and options You can print by selecting Print from File in the menu bar or by clicking the Print Setting icon A Configure the printing settings in the Print screen before printing In addition you can click the Print icon B to start printing...

Страница 77: ...d save it for future use a Click the Snap mode selection button The Description of Snap mode dialog box appears b Click OK The Snap mode palette appears Transferring Data to the P touch Label Printer 8 To transfer data to the P touch Label Printer you must use P touch Transfer Manager For more information see P touch Transfer Manager on page 70 ...

Страница 78: ... Template Transferring the Template to P touch Transfer Manager 9 To use P touch Transfer Manager you must first transfer templates created in P touch Editor to P touch Transfer Manager a In P touch Editor open the template to be transferred b Click File Transfer Template Transfer When P touch Transfer Manager starts the main window appears Note The following method can also be used to start the P...

Страница 79: ... transferred to When you select a P touch Label Printer only the data that can be sent to the selected P touch Label Printer appears in the data list 4 Folder view Displays a list of folders and printers When you select a folder the templates in the selected folder appear in the template list If you select a P touch Label Printer the current templates and other data stored in the P touch Label Pri...

Страница 80: ...e file type of the data to be transferred to other applications Select PDZ when transferring the data using TransferExpress Backup Only for P touch Transfer Manager Retrieves the templates and other data saved in the P touch Label Printer and saves it on the computer Open Opens the selected template Print Only for P touch Library Prints the selected template with the P touch Label Printer Search A...

Страница 81: ...r view If you select the P touch Label Printer in the folder view the current templates and other data stored in the printer appear Note If a P touch Label Printer is disconnected or offline it is not listed in the folder view Before transferring data check that the computer and the P touch Label Printer are correctly connected using a USB cable and that the P touch Label Printer is on b Select th...

Страница 82: ...r Transfer Function Specification Data type Maximum number of transferable items Restriction details Template 99 Each template can contain a maximum of 50 objects Each object can contain a maximum of 17 lines Database 99 Only csv files can be transferred Each csv file can contain a maximum of 256 fields and 65000 records Image transferred symbols 99 Only bmp files can be transferred Monochrome bmp...

Страница 83: ... available space that appears in ROM FREE byte may be different from the actual available space You can view the templates and other data by selecting The folder in the Configurations folder All Contents One of the categories under Filter such as Layouts When transferring multiple templates or other data drag all files you want to transfer and place them in the new folder Each file is assigned a k...

Страница 84: ...ill overwrite the old one You can confirm the templates key number assignments saved in the P touch Label Printer by backing up the templates or other data see Backing up Templates or Other Data Saved in the P touch Label Printer on page 78 If the P touch Label Printer memory is full remove one or more templates from the P touch Label Printer s memory see Backing up Templates or Other Data Saved i...

Страница 85: ... A confirmation message appears Note You can also transfer individual items to the P touch Label Printer without adding them to a folder Select the template or other data that you want to transfer and then click Transfer Multiple items and folders can be selected and transferred in one operation h Click OK The selected data are transferred to the P touch Label Printer ...

Страница 86: ... Label Printer model a Connect the computer and the P touch Label Printer and turn on the P touch Label Printer The P touch Label Printer model name appears next to a printer icon in the folder view If you select the P touch Label Printer in the folder view the current templates and other data stored in the P touch Label Printer appear b Select the P touch Label Printer to back up from and then cl...

Страница 87: ...e P touch Label Printer a Connect the computer and the P touch Label Printer and turn on the P touch Label Printer The P touch Label Printer model name appears next to a printer icon in the folder view b Right click the P touch Label Printer and then select Delete All A confirmation message appears c Click OK All templates and other data saved in the P touch Label Printer is deleted ...

Страница 88: ...P touch P touch Tools P touch Library 2 2 For Windows 8 Windows 8 1 Click P touch Library 2 2 on the Apps screen For Windows 10 From the Start button select All apps and then click P touch Library 2 2 under Brother P touch When P touch Library starts the main window appears Main window 9 1 Menu bar Provides access to all available commands which are grouped under each menu title File Edit View Too...

Страница 89: ... list of the templates in the selected folder 5 Preview Displays a preview of the templates selected in the templates list Explanations of the Toolbar Icons Icon Button name Function Open Opens the selected template Print Only for P touch Library Prints the selected template with the P touch Label Printer Search Allows you to search for templates registered to P touch Library Display Style Changes...

Страница 90: ...Transfer Manager and P touch Library 82 9 Opening and Editing Templates 9 Select the template you want to open or edit and then click Open The program associated with the template starts so that you can edit the template ...

Страница 91: ...How to Use P touch Transfer Manager and P touch Library 83 9 Printing Templates 9 Select the template you want to print and then click Print The connected P touch Label Printer prints the template ...

Страница 92: ...begins Settings Details Multiple Parameters Determines how the program searches when multiple criteria are specified If you select AND the program searches for files that satisfy all of the criteria If you select OR the program searches for files that satisfy any of the criteria Name Search for a template by specifying the file name Type Search for a template by specifying the file type Size Searc...

Страница 93: ...ragging and dropping them into the All Contents folder or to the folder list You can also configure P touch Editor to register templates to P touch Library automatically using the following procedure 1 From the P touch Editor menu select Tools Options 2 In the Options dialog box click Registration Settings in the General tab 3 Select the timing for registering templates created with P touch Editor...

Страница 94: ... used the existing template will be overwritten with the new one This function requires a USB connection Preparing P touch Transfer Express 10 The user must prepare P touch Transfer Express for transferring templates to a P touch Label Printer Important The printer driver must be installed before using Transfer Express P touch Transfer Express is available only in English a You can download the la...

Страница 95: ...ls P touch Transfer Manager 2 2 to start P touch Transfer Manager and then dragging the lbx file to the P touch Transfer Manager window For Windows 8 Windows 8 1 The template can also be transferred to P touch Transfer Manager by clicking P touch Transfer Manager 2 2 on the Apps screen to start P touch Transfer Manager and then dragging the lbx file to the P touch Transfer Manager window For Windo...

Страница 96: ...ving the Template as a Transfer Package File pdz 10 To create a file in a format that can be used by P touch Transfer Express save the template as a Transfer Package file pdz a In the folder view select Configurations b Select the templates you want to distribute ...

Страница 97: ...r is disconnected from the computer or offline Note If you click Save Transfer File after selecting Configurations or a created folder all templates in the folder are saved as the Transfer Package file pdz You can combine multiple templates into a single Transfer Package file pdz d Type in the name and then click Save The template is saved as a Transfer Package file pdz ...

Страница 98: ...touch Transfer Express downloaded it is not necessary for the administrator to send the Transfer Express folder to the user In this case the user can simply move the distributed Transfer Package file to the downloaded folder and then double click PtTrExp exe a Move the Transfer Package file pdz to the downloads folder b Distribute all files in the downloads folder to the user ...

Страница 99: ...fer Package file pdz to the P touch Label Printer Important Do not turn off the power when transferring templates a Turn on the P touch Label Printer b Using a USB cable connect the P touch Label Printer to the computer c Double click PtTrExp exe which was received from the administrator d 1 When there is a single Transfer Package file pdz within the folder containing PtTrExp exe click Transfer Th...

Страница 100: ...ch Transfer Express 92 10 2 When there are either multiple or no Transfer Package files pdz within the folder containing PtTrExp exe click Browse Select the Transfer Package file you want to transfer and then click Open Click Transfer ...

Страница 101: ...Transferring Templates with P touch Transfer Express 93 10 Click Yes The transfer of the Transfer Package file begins e Click OK The transfer of the Transfer Package file is completed ...

Страница 102: ...art the P touch Update Software For Windows Vista Windows 7 Double click the P touch Update Software icon Note The following method can also be used to start P touch Update Software Click the Start button and then select All Programs Brother P touch P touch Update Software For Windows 8 Windows 8 1 Click P touch Update Software on the Apps screen or double click P touch Update Software on the desk...

Страница 103: ...5 11 b Click the Computer software update icon c Select the Printer and Language select the check box next to Cable Label Tool and P touch Editor and then click Install d A message appears indicating that the installation has finished ...

Страница 104: ... Update Software For Windows Vista Windows 7 Double click the P touch Update Software icon Note The following method can also be used to start P touch Update Software Click the Start button and then select All Programs Brother P touch P touch Update Software For Windows 8 Windows 8 1 Click P touch Update Software on the Apps screen or double click P touch Update Software on the desktop For Windows...

Страница 105: ...How to Update P touch Software 97 11 c Click the Machine update icon d Select the Printer ensure that The machine is connected correctly appears and then click OK ...

Страница 106: ...and then click Transfer Important Do not turn off the P touch Label Printer or disconnect the cable during data transfer f Check the content to be updated and then click Start to begin the update The firmware update begins Important Do not turn off the P touch Label Printer or disconnect the cable during the update process ...

Страница 107: ...nter 100 Maintenance 101 Troubleshooting 104 Product Specifications 115 Notes on Using P touch Transfer Manager 118 List of Barcodes for the P touch Template Function 120 Using the Rechargeable Li ion Battery Battery Bagse Optional PA BT 4000LI PA BB 002 124 ...

Страница 108: ...onds The Status indicator flashes in green and the Power indicator lit in orange c While holding the Power button press the Feed Cut button six times to reset the device settings to the factory settings Also the transferred data from the computer is deleted d Release the Power button The Status indicator flashing three times in green and the Power indicator flashing three times in orange Resetting...

Страница 109: ...r benzene alcohol or any other organic solvent These may deform the case or damage the appearance of your P touch Label Printer Cleaning the Print Head and Head Roller 13 Streaks or poor quality characters on printed labels generally indicate that the print head and head roller are dirty Clean the print head using a dry cotton swab or the optional print head cleaning cassette TZe CL6 WARNING Do no...

Страница 110: ...Maintenance 102 13 Print Head 13 1 Cotton swab 2 Print head Head Roller 13 1 Cotton swab 2 Head roller 1 2 1 2 ...

Страница 111: ...r blades using a cotton swab Tape adhesive can build up on the cutter blade after repeated use taking the edge off the blade which may result in the tape jamming in the cutter WARNING Do not touch the cutter blade with your bare hands 1 Cutter blade 2 Cotton swab 3 Metal section 1 2 3 ...

Страница 112: ...ve all protective packaging from the P touch Label Printer Install and select the correct printer driver see Installing the Printer Driver and Software on page 8 Connect the P touch Label Printer to a computer or mobile device see Connecting the P touch Label Printer to a Computer on page 9 Close the tape compartment cover completely Insert a tape cassette correctly see Inserting a Tape Cassette o...

Страница 113: ...tte and reinstall it pressing it firmly until it locks into place If the print head is dirty clean it with a dry cotton swab see Cleaning the Print Head and Head Roller on page 101 or optional print head cleaning cassette TZe CL6 The ink ribbon is separated from the ink roller If the ink ribbon is broken replace the tape cassette If not leave the tape uncut and remove the tape cassette then wind t...

Страница 114: ...u cannot use this function for TZe FX 1 tape The high resolution or high speed printing setting was specified but an error occurred and printing could not be completed As conditions for high resolution or high speed printing the AC adapter must be connected and TZe and HGe laminated tape with black ink must be installed You cannot use this function for TZe FX 1 tape To clear the error cancel the p...

Страница 115: ...rties by clicking Control Panel in the Apps screen Hardware and Sound Devices and Printers right clicking the P touch Label Printer you want to set up and then clicking Printing Preferences Windows 10 To display the Quality options open the printer properties by clicking the Start button Settings Devices Devices and Printers right clicking the P touch Label Printer you want to set up and then clic...

Страница 116: ... using the chain printing feature may reduce the amount of blank space The label is not cut automatically Use P touch Editor to check the Auto Cut Chain Printing and Special Tape settings After printing remove the tape cassette from the P touch Label Printer and use scissors to cut the tape Be sure to read the instructions provided with tapes and observe all precautions noted in the instructions T...

Страница 117: ...turned on Make sure that the interface cable is connected correctly Make sure that the COM port where the printer is connected is the same COM port selected in the Change Baud Rate Wizard Many computers have more than one COM port and COM2 may have been selected in error in the Change Baud Rate Wizard Error 1 or Error 5 the serial port of the computer cannot be used When another serial connection ...

Страница 118: ... touch Label Printer on 2 Press and hold the Feed Cut button for more than 10 seconds to print the report Use 0 94 24 mm or 1 4 36 mm tape I want to confirm whether I am using the latest version of the software Use the P touch Update Software to confirm if you have the latest version or not See How to Update P touch Software on page 94 for more information about the P touch Update Software ...

Страница 119: ...t in the color shown or or Indicator is flashing in the color shown Indicator can be off lit or flashing in any color Indicator is off Status Power indicator Status Power Condition During the processing of the power off Idle mode Initializing mode Tape feed and cutting mode Printing mode 2 times in 1 8 seconds No media error Tape end error Cover open mode Cover open error when printing Receiving d...

Страница 120: ...ve the tape cassette and reinstall it correctly 2 times in 1 8 seconds Adapter error Adapter connection error When blinking alternately Cutter error When blinking simultaneously High temperature error 2 times in 1 8 seconds Non compliant tape error Wrong media error Check that the correct tape cassette is inserted 2 times in 1 8 seconds 2 times in 1 8 seconds Communication error Memory full error ...

Страница 121: ...lack mark not detected error Battery indicator Battery Power Condition Rechargeable battery power full Charging complete Charging 1 time in 4 seconds Rechargeable battery power half 2 times in 4 seconds Rechargeable battery power low Rechargeable battery error Rechargeable battery power empty Status Power indicator Status Power Condition ...

Страница 122: ...Printer must cool down because it overheated due to the type of tape cassette you are using or the contents of the label printing may take longer than usual Note This condition may occur more often when the P touch Label Printer is used at high altitude more than 10 000 ft 3 048 m due to a lower air density available to cool the P touch Label Printer P touch Label Printer is in boot mode To resolv...

Страница 123: ...ty mode 360 dpi 360 dpi 2 Printing speed AC Adapter max 2 36 sec 60 mm sec High resolution mode max 1 18 sec 30 mm sec 1 High speed mode max 3 14 sec 80 mm sec 1 High quality mode 0 78 sec 20 mm sec 2 Battery 0 78 sec 2 36 sec 20 mm sec 60 mm sec High quality mode 0 78 sec 20 mm sec 2 Actual print speed varies depending on the conditions Cassette Brother TZe tape cassette 0 13 3 5 mm 0 23 6 mm 0 3...

Страница 124: ...rom the Brother Solutions Center at support brother com Auto crack and peel cutter is available only when using laminated tape Interface USB port Version 2 0 Full Speed Peripheral Serial port RS232C The serial adapter optional is required Power Supply Adapter AC adapter AD9100ESA 24 V AC 120 V 60 Hz Battery Optional Li ion Battery PA BT 4000LI 14 4 V Auto Power off Li ion Battery PA BT 4000LI 30 m...

Страница 125: ...following information Software downloads Manuals Documents Frequently Asked Questions Troubleshooting Useful tips on using printer Consumable information Latest OS compatibility information The contents of this website are subject to change without notice Item Specification Operating System Windows Vista Windows 7 Windows 8 Windows 8 1 Windows 10 Memory Windows Vista 512 MB or more Windows 7 Windo...

Страница 126: ...les can be applied to a block of text only with the P touch Label Printer In addition some character styles are not available on the P touch Label Printer Backgrounds specified with P touch Editor are not compatible with the P touch Label Printer A P touch Editor layout that uses the split printing function enlarging the label and printing it on two or more labels cannot be transferred Only the po...

Страница 127: ...e csv file is transferred to update it the database may not link correctly with the template In addition the first line of data in the transferred file must be recognized by the P touch Label Printer as field names Logos symbols and graphics downloaded to the P touch Label Printer will automatically be scaled like the resident font or any of the resident symbol in the library ...

Страница 128: ...touch Label Printer c Scan the P touch template command barcode This allows the settings to be specified or clears the previous settings d Scan the Basic settings barcode Specify the number of copies e Specify the appropriate settings A B or C A Standard Template Printing 17 1 Scan the Preset template number barcode B Advanced Template Printing 17 1 Scan the Select template barcode and then scan t...

Страница 129: ...to the factory settings in the P touch Template Settings tool When printing barcodes that will be scanned for printing labels print the barcodes at a high resolution It is possible that these sample barcodes may not be read correctly depending on the quality of your printout P touch template command initialize begin specifying settings Basic settings Auto cut on 17 Auto cut off 17 Half cut on 17 H...

Страница 130: ...the P touch Template Function 122 17 For entering numbers 1 Preset template number 1 17 2 17 3 17 4 17 5 17 6 17 7 17 8 17 9 17 0 17 00 17 Preset template 1 17 Preset template 2 17 Preset template 3 17 Preset template 4 17 ...

Страница 131: ...its have been specified To change settings scan the Number of copies barcode again when changing the number of copies or scan the Select template barcode again when changing the template number and then scan the barcodes for the new three digit number Preset template 5 17 Preset template 6 17 Preset template 7 17 Preset template 8 17 Preset template 9 17 Preset template 10 17 Select template Numbe...

Страница 132: ...uch Label Printer Installing the Rechargeable Li ion Battery 18 a Disconnect the AC adapter and then attach the battery base optional PA BB 002 onto the P touch Label Printer For more information about attaching the battery base see its instruction manual b Open the battery cover on the bottom of the P touch Label Printer c Insert the battery into the battery compartment d Close the battery cover ...

Страница 133: ...Power button to turn off the P touch Label Printer Remove the battery cover and the battery and then reattach the battery cover CAUTION If it is difficult to remove the rechargeable battery turning the P touch Label Printer over with the battery cover removed may allow the rechargeable battery to fall out Be careful that this does not cause any injuries ...

Страница 134: ...charging the charging will continue until the battery is fully charged If the P touch Label Printer is turned on with the rechargeable Li ion battery installed and the AC adapter is connected to an AC power outlet the battery will be recharged However when the P touch Label Printer is turned on even after the rechargeable battery has been charged the battery charge will be used leaving the battery...

Страница 135: ...d charging may stop even if the battery is not fully charged Rechargeable Li ion Battery Characteristics 18 To ensure the highest performance and longest life from the battery Do not use or store the battery in a location exposed to extreme high or low temperatures as it may discharge more quickly This may happen when using a rechargeable Li ion battery with a high charge 90 charged or more in a l...

Страница 136: ...prox 2 92 W x 3 39 D x 1 26 H 74 mm W x 86 mm D x 32 mm H Weight approx 0 53 lb 0 240 kg Voltage 14 4 V Capacity 1800 mAh Charging discharging cycle approx 300 times Charging time approx three hours Battery Base 18 Size approx 4 65 W x 7 56 D x 3 07 H 118 mm W 192 mm D 78 mm H Weight approx 0 73 lb 0 332 kg Charging current 1000 mA Charging voltage 16 4 V ...

Страница 137: ......

Отзывы: