15
Ch. 2 Getting Started
Getting Star
ted
D
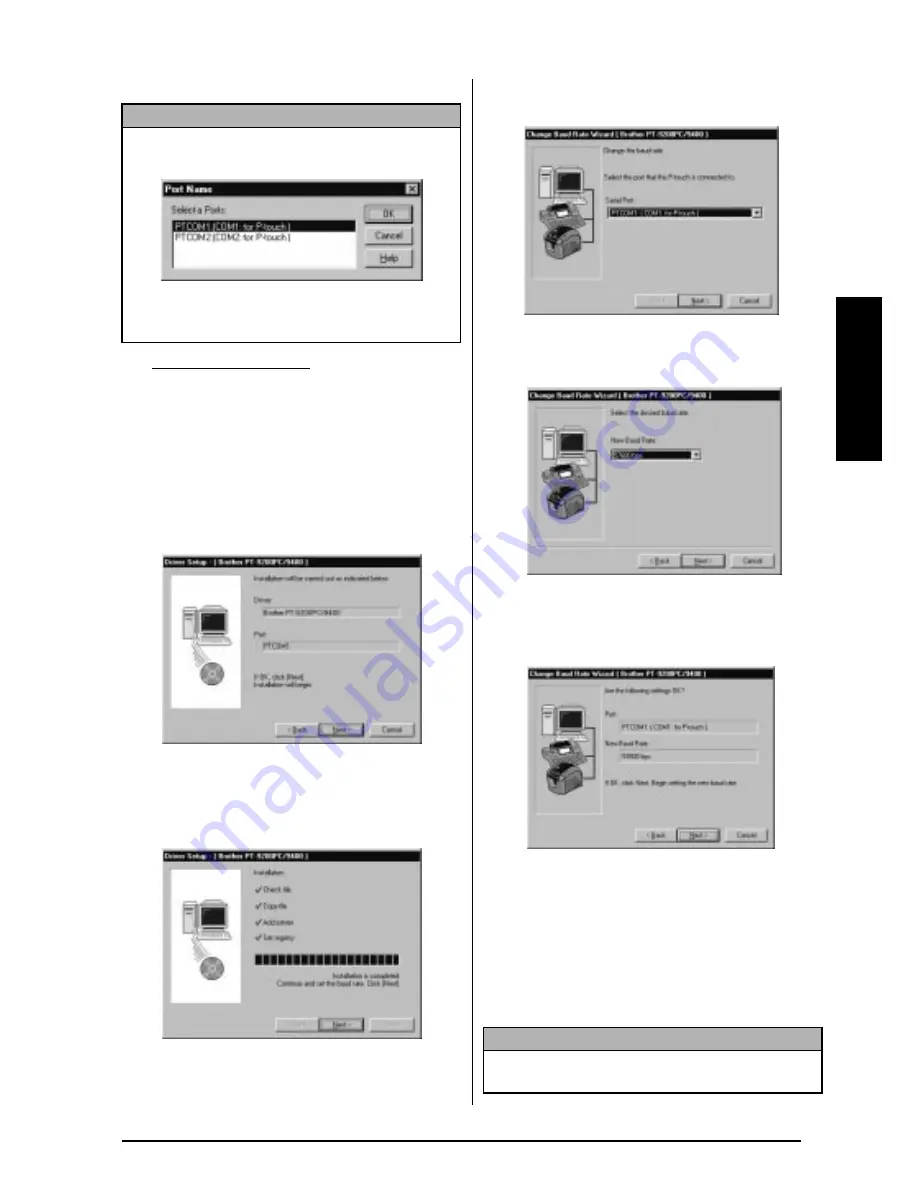
For Windows NT 4.0:
Clilck the Next button.
A dialogue box that allows you to select the
PTCOM port where the PT-9400 is con-
nected appears.
E
Select the PTCOM port that the PT-9400 is
connected, and then click the Next button.
A dialogue box confirming how the installa-
tion will be carried out appears.
F
Click the Next button. A dialogue box
showing that the printer driver has been
installed appears.
G
Click the Next button. The Change Baud
Rate Wizard starts up.
H
Select the serial port where the PT-9400 is
connected, and then click the Next button.
I
Select the desired baud rate, and then click
the Next button. A dialogue box confirming
the settings appears.
J
Click the Next button to enter the settings. A
dialogue box appears showing that the
baud rate has been set to the selected rate.
K
Click the Finish button. A dialogue box
appears showing that installation is com-
pleted.
L
Click the Finish button.
NOTE
If a PTCOM port is not installed
, one can be added
by clicking the Add button.
Select the port where the PT-9400 is connected,
and then click the OK button.
®
NOTE
If you installed only the driver
, be sure to select
“Yes, I want to restart my computer now.”
Содержание P-touch 9400
Страница 3: ......
Страница 10: ...1 Ch 1 Before You Start Before You Start Chapter 1 Before You Start ...
Страница 16: ...7 Ch 2 Getting Started Getting Started Chapter 2 Getting Started ...
Страница 31: ...22 Ch 2 Getting Started Getting Started ...
Страница 32: ...23 Ch 3 Functions Functions Chapter 3 Functions ...
Страница 84: ...75 Ch 4 Using Labels and Stamps Using Labels and Stamps Chapter 4 Using Labels and Stamps ...
Страница 101: ...92 MACHINE SPECIFICATIONS ...
Страница 102: ...93 Appendix Appendix Appendix ...
Страница 125: ...116 ...
Страница 126: ...Printed in Japan UT1533001 A ...


