


Photo 25
Photo 26
6
Brother DR-250 Technical Instructions
E-mail: [email protected]
Website:
www.futuregraphicsllc.com
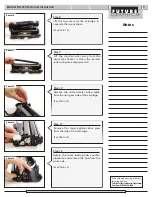
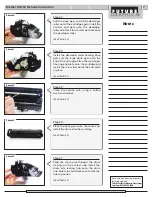
Step 23
Remove the bearing and spring from the
end of the developer roller.
(See Photo 26)
Clean the roller using a dry lint free cloth.
N
NO
OT
TE
E::
Visually inspect the developer
rollers. These rollers usually have a lot of
wear and maybe unusable for a second
cycle.
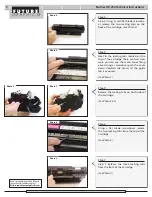
Step 22
Carefully remove the developer roller.
(See Photo 25)
Clean the cartridge using dry compressed
air or a vacuum.
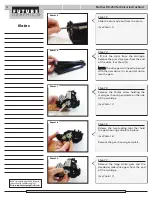
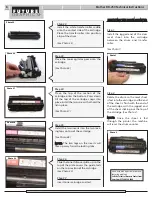
Step 24
Clean the doctor blade using a cotton
swab and Acetone.
(See Photo 27)
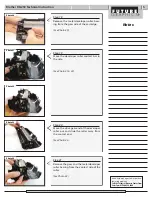
Step 25
Place the spring and bearing onto the
developer roller. Install the developer
roller back into the cartridge.
(See Photo 28)
Step 26
Install the developer roller bearing that’s
has the smaller ID and the small gear
onto the roller axle on the contact side.
(See Photo 29)
Photo 27
Photo 28
Photo 29
Notes


