NCR SelfServ Checkout 7350, Instructions Manual
Download the free user manual for NCR SelfServ Checkout 7350 and easily assemble your kit with step-by-step instructions. Explore the detailed manual at manualshive.com to understand the features and functionality of this innovative product and enjoy a hassle-free checkout experience.
Share
Download


Reviews:
No comments
Related manuals for SelfServ Checkout 7350

ImageCLASS MF4570dw
Brand: Canon Pages: 164

imagePRESS C800 Series
Brand: Canon Pages: 132

ImageCLASS MF5730
Brand: Canon Pages: 2

24
Brand: IBM Pages: 16

TRS-80
Brand: Radio Shack Pages: 57

Makerspace 91413
Brand: Mooreco Pages: 10

TCA3-SP
Brand: Nehoc Pages: 9

4250 - WorkCentre - Copier
Brand: Xerox Pages: 4

ML690
Brand: Oki Pages: 110

Micro 3D Printer
Brand: m3d Pages: 10

Elfin II
Brand: Xiamen Sojet Electronics Pages: 37
5700i - EPL B/W Laser Printer
Brand: Epson Pages: 33
2180 - LQ B/W Dot-matrix Printer
Brand: Epson Pages: 2

2190 - FX B/W Dot-matrix Printer
Brand: Epson Pages: 2

2200 - Stylus Photo Color Inkjet Printer
Brand: Epson Pages: 62
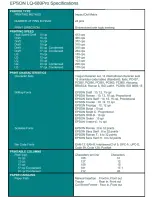
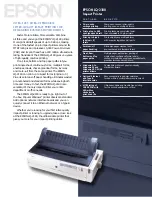
24-PIN DOT MATRIX PRINTER LQ-680PRO
Brand: Epson Pages: 3

221
Brand: Epson Pages: 2

2190 - FX B/W Dot-matrix Printer
Brand: Epson Pages: 48


