Replacing the Presser Foot
45
1
— — — — — — — — — — — — — — — — — — — — — — — — — — — — — — — — — — — — — — — — — — — — — — — — — — — —
Removing and attaching the
presser foot holder
Remove the presser foot holder when cleaning the
sewing machine or when installing a presser foot that
does not use the presser foot holder, such as the
embroidery foot, optional free-motion open toe
quilting foot "O" and optional walking foot. Use the
screwdriver to remove the presser foot holder.
CAUTION
a
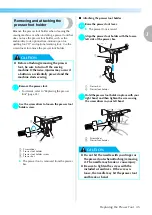
Remove the presser foot.
• For details, refer to "Replacing the presser
foot" (page 43).
b
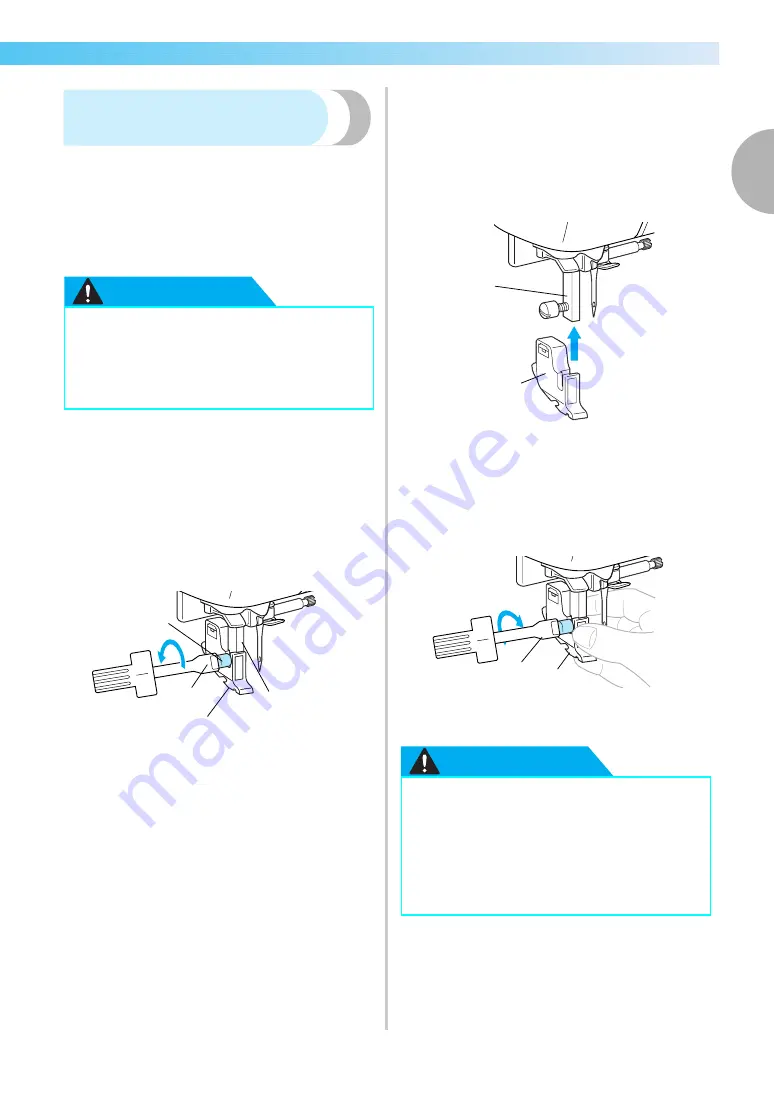
Use the screwdriver to loosen the presser foot
holder screw.
a
Screwdriver
b
Presser foot holder
c
Presser foot holder screw
d
Presser bar
X
The presser foot is removed from the presser
bar.
■
Attaching the presser foot holder
a
Raise the presser foot lever.
X
The presser foot is raised.
b
Align the presser foot holder with the lower-
left side of the presser bar.
a
Presser bar
b
Presser foot holder
c
Hold the presser foot holder in place with your
right hand, and then tighten the screw using
the screwdriver in your left hand.
a
Screwdriver
b
Presser foot holder
CAUTION
z
Before attaching/removing the presser
foot, be sure to turn off the sewing
machine. Otherwise, injuries may occur if
a button is accidentally pressed and the
machine starts sewing.
a
b
d
c
z
Do not hit the needle with your finger or
the presser foot when attaching/removing
it. The needle may break or cause injury.
z
Be sure to tighten the screw with the
included screwdriver. If the screw is
loose, the needle may hit the presser foot
and break or bend.
a
b
a
b
Содержание 885-V31
Страница 2: ......
Страница 16: ...14 ...
Страница 70: ...SEWING BASICS 68 ...
Страница 170: ......
Страница 171: ......

