background image

47

3

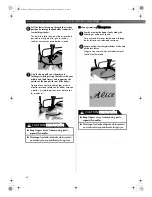
Sewing Elastic

/ Costura de gomas

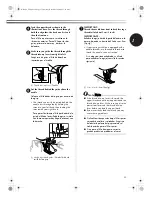
1

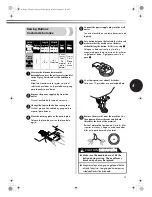
Place the elastic on the fabric.

Coloque la goma en la tela.

2

As you sew, stretch the elastic in front of and 
behind the presser foot.

A medida que cosa, vaya estirando la goma 
por delante y detrás del pie prensatela.

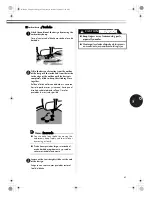
Joining Fabric

/ Unión de trozos de tela

You can use the Elastic Stitch to join two pieces of 
fabric together and it is very effective when 
sewing knitted fabrics. If you are using nylon 
thread, the stitch will not be visible.

La puntada elástica puede emplearse para unir dos 
trozos de tela y resulta muy eficaz a la hora de 
coser tejidos de punto. Si utiliza hilo de nylon, la 
puntada no se verá.

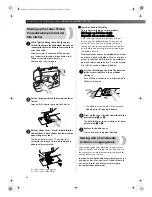
1

Put the edge of the two pieces of fabric together 
and center them under the presser foot.

Coloque juntos los bordes de los dos trozos de 
tela y céntrelos debajo del pie prensatela.

2

Sew them together using the Elastic Stitch. 
Make sure you keep the two fabric edges close 
together.

Cósalos utilizando la puntada elástica. Asegúrese 
de tener los dos bordes de tela muy juntos.

Double Action Stitching

Costura de doble acción

These stitches are used for joining two pieces of 
fabric, such as when making patchwork. Set the 
pattern selection dial to the Double Action Stitch, 
Bridging Stitch, or Rampart Stitch.

Estos tipos de puntadas se utilizan para unir dos 
trozos de tela, por ejemplo, en la costura de 
patchwork. Ajuste el selector de puntadas en la 
puntada de doble acción, la puntada de puente o la 
puntada de muralla.

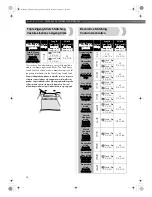
Stitch Name

Nombre de la 

puntada

Pattern

Dibujo

Length 

[mm (inch)]

Longitud 

[mm (pulg.)]

Width

[mm (inch)]

Anchura 

[mm (pulg.)]

Double Action 

Stitch

Puntada de 

doble acción

F-3

(1/64-1/8)

3-5

(1/8-3/16)

Bridging Stitch

Puntada de 

puente

F-3

(1/64-1/8)

3-5

(1/8-3/16)

Rampart Stitch

Puntada de 

muralla

F-3

(1/64-1/8)

3-5

(1/8-3/16)

XL2600_US-Sp.book  Page 47  Thursday, November 4, 2004  11:41 AM

Содержание 885-S25

Страница 1: ... Instrucciones SEWING BUTTONHOLES AND BUTTONS COSTURA DE OJALES Y BOTONES PUNTADAS DE COSTURA INCORPORADAS BUILT IN STITCHES ANEXO APPENDIX USING ATTACHMENTS AND APPLICATIONS USO DE ACCESORIOS Y APLICACIONES STRAIGHT AND ZIGZAG STITCHING COSTURA RECTA Y EN ZIG ZAG KNOWING YOUR SEWING MACHINE CONOZCA SU MÁQUINA DE COSER ...

Страница 2: ...the accumulation of lint dust and loose cloth 5 Never drop or insert any object into any opening 6 Do not use outdoors 7 Do not operate where aerosol spray products are being used or where oxygen is being administered 8 To disconnect turn the machine switch to the symbol position which represents off then remove plug from outlet 9 Do not unplug by pulling on cord To unplug grasp the plug not the c...

Страница 3: ... caigan objetos en ninguna de las aberturas ni inserte nada en las mismas 6 No la utilice en el exterior 7 No la use en lugares donde se utilicen productos con aerosoles atomizadores ni en sitios donde se esté administrando oxígeno 8 Para desconectarla coloque el interruptor de la máquina en la posición con el símbolo que indica apagado y a continuación desconecte el enchufe de la toma de corrient...

Страница 4: ...ng as marked on plug Always replace the fuse cover Never use plugs with the fuse cover omitted WARNING DO NOT CONNECT EITHER WIRE TO THE EARTH TERMINAL WHICH IS MARKED WITH THE LETTER E BY THE EARTH SYMBOL OR COLOURED GREEN OR GREEN AND YELLOW The wires in this main lead are coloured in accordance with the following code Blue Neutral Brown Live As the colours of the wiring in the main lead of this...

Страница 5: ...in the following circumstances When you have stopped using the machine When you are replacing or removing the needle or any other part If there is a power failure while you are using the machine If you are checking or cleaning the machine Leaving the machine unattended 3 Do not store anything on the foot controller 4 Plug the machine directly into the wall Do not use extension cords To give your m...

Страница 6: ...a del pedal 4 Enchufe la máquina directamente a la toma de corriente de la pared No utilice alargadores Para prolongar la duración de la máquina 1 No exponga la máquina a la luz solar directa ni la coloque en lugares con gran humedad No utilice o guarde la máquina cerca de una fuente de calor plancha lámpara halógena u otros objetos candentes 2 Utilice sólo detergentes o jabones suaves para limpia...

Страница 7: ...reading for models equipped with a quick set bobbin 30 Upper Threading 32 Using the Needle Threader for models equipped with a needle threader 34 Drawing up the Lower Thread 36 Sewing with a Twin Needle 36 Thread Tension 38 FABRIC THREAD AND NEEDLE COMBINATIONS 39 2 STRAIGHT AND ZIGZAG STITCHING 41 Please Read Before Sewing 41 Straight Stitching 41 Zigzag Stitching 43 3 BUILT IN STITCHES 45 Blind ...

Страница 8: ...9 OPTIONAL ACCESSORIES 62 Using the Walking Foot 62 Using the Quilting Foot 63 Using the 1 4 inch Quilting Foot 65 Using the Narrow Hemmer Foot 65 Using the Blind Stitch Foot 67 6 APPENDIX 69 MAINTENANCE 69 Changing the Light Bulb 69 Cleaning 70 Troubleshooting 72 INDEX 79 XL2600_US Sp book Page 7 Thursday November 4 2004 11 41 AM ...

Страница 9: ...rior para los modelos equipados con la bobina rápida 30 Enhebrado del hilo superior 32 Uso del enhebrador de aguja para los modelos equipados con el enhebrador de aguja 34 Procedimiento para tirar del hilo inferior 36 Costura con aguja gemela 36 Tensión del hilo 38 COMBINACIONES DE TELA HILO Y AGUJA 39 2 COSTURA RECTA Y EN ZIG ZAG 41 Lea lo siguiente antes de utilizar la máquina 41 Costura recta 4...

Страница 10: ...ilización del pie móvil 62 Utilización del pie para acolchados 63 Utilización del pie para acolchados de 1 4 pulgadas 65 Utilización del pie para dobladillos estrechos 65 Utilización del pie para puntada invisible 67 6 ANEXO 69 MANTENIMIENTO 69 Cambio de la bombilla 69 Limpieza 70 Solución de problemas 75 ÍNDICE 80 XL2600_US Sp book Page 9 Thursday November 4 2004 11 41 AM ...

Страница 11: ...tment page 19 B Presser foot page 18 C Reverse sewing lever page 25 You can push this to stitch in the reverse direction D Pattern selection dial page 20 You can turn this in either direction to choose the stitch you want E Stitch length dial page 24 This controls the stitch length F Buttonhole fine adjustment screw page 54 G Handwheel Used to manually raise and lower the needle H Main power and s...

Страница 12: ...prensatela página 18 C Pulsador de retroceso página 25 Con este pulsador puede hacer puntadas en reversa D Selector de puntadas página 20 Puede mover este selector en cualquier dirección para elegir el tipo de puntada que desee E Control de longitud de puntada página 24 Controla la longitud de las puntadas F Tornillo de ajuste fino de los ojales página 54 G Rueda Permite subir y bajar la aguja de ...

Страница 13: ...onhole Foot 1 pc X59369 321 2 Bobbin 3 pcs SA156 SFB XA5539 151 6 Button Sewing Foot 1 pc X59375 121 7 Extra Spool Pin 1 pc 130920 021 3 Needle Pack Regular Single Needle HAX130 3 pcs 129583 021 8 Screwdriver 1 pc X55467 021 4 Twin Needle 1 pc X57521 021 9 Darning Plate 1pc XC6063 021 Nº Nombre de la pieza Código de la pieza Nº Nombre de la pieza Código de la pieza EE UU Otros EE UU Otros 1 Pie pa...

Страница 14: ...r Foot SA127 F003N XC1945 002 5 Blind Stitch Foot SA134 F018N XC1976 052 Nº Nombre de la pieza Código de la pieza EE UU Otros 1 Pie móvil SA107 F034N XC2165 002 2 Pie para acolchados SA129 F005N XC1948 002 3 Pie para acolchados de 1 4 pulgadas SA125 F001N XC1944 002 4 Pie para dobladillos estrechos SA127 F003N XC1945 002 5 Pie para puntada invisible SA134 F018N XC1976 052 XL2600_US Sp book Page 13...

Страница 15: ...g to remove it from the outlet Pulling on the cord may damage the cord or lead to fire or electric shock Do not allow the power cord to be cut damaged modified forcefully bent pulled twisted or bundled Do not place heavy objects on the cord Do not subject the cord to heat These things may damage the cord and cause fire or electric shock If the cord or plug is damaged take the machine to your autho...

Страница 16: ...cir el riesgo de descarga eléctrica este enchufe está diseñado de forma que presenta una única posición de ajuste a una toma polarizada Si el enchufe no se ajusta perfectamente a la toma dele la vuelta Si el problema persiste póngase en contacto con un electricista cualificado para instalar una toma adecuada No realice modificaciones de ningún tipo en el enchufe Main Power and Sewing Light Switch ...

Страница 17: ...ver glass etc Superficie nivelada tapa de la bobina cristal etc Replacing the Needle Cambio de la aguja Do not allow pieces of cloth and dust to build up on the foot controller Doing so could cause a fire or an electric shock No deje que se acumulen trozos de tela ni polvo en el pedal Esto podría provocar un incendio o una descarga eléctrica CAUTION PRECAUCIÓN Turn the main power switch off before...

Страница 18: ...ojar o apretar el tornillo de la presilla de la aguja pues podría dañar algunas piezas de la máquina de coser 5 With the flat side of the needle toward the back of the machine insert the needle until it touches the needle stopper Next tighten the needle clamp using the screwdriver Con la parte plana hacia la parte trasera de la máquina inserte la aguja hasta que toque el tope para agujas A continu...

Страница 19: ...presser foot is in the correct place the bar should snap in Baje la palanca del pie prensatela y ajuste el pie en la lengüeta Si el pie prensatela está en el lugar correcto la varilla deberá ajustarse perfectamente 1 Shank Lengüeta Always turn off the power before you change the presser foot If you leave the power on and step on the controller the machine will start and you may be injured Always u...

Страница 20: ...rios no se guardan en una bolsa se podrían caer perder o dañar Using a Free arm Style Uso del estilo de brazo libre Free arm sewing is convenient for sewing tubular and hard to reach areas To change your machine to the free arm style lift out the flat bed attachment La costura de brazo libre es útil para zonas de costura tubular y de difícil acceso Para cambiar la máquina al estilo de brazo libre ...

Страница 21: ...gido 35 Stitches only available on certain models 35 Puntadas disponible sólo en ciertos modelos When you use the pattern selection dial to choose a pattern turn the handwheel toward you counterclockwise to set the needle in the highest position If the needle is in the down position when you turn the pattern selection dial the needle presser foot or fabric may be damaged Cuando utilice el selector...

Страница 22: ...ZIG ZAG 0 5 0 3 16 F 4 1 64 3 16 43 55 58 62 BLIND HEM STITCH COSTURA INVISIBLE PARA DOBLADILLO 3 5 1 8 3 16 F 2 1 64 1 16 45 SHELL TUCK STITCH PUNTADA DE CONCHA 3 5 1 8 3 16 F 3 1 64 1 8 46 ELASTIC STITCH PUNTADA ELÁSTICA 3 5 1 8 3 16 F 2 5 1 64 3 32 46 STRETCH BLIND HEM STITCH COSTURA INVISIBLE ELÁSTICA 3 5 1 8 3 16 F 1 5 1 64 1 16 45 STRETCH BLIND HEM STITCH COSTURA INVISIBLE ELÁSTICA 3 5 1 8 3...

Страница 23: ...ija 2 5 3 32 TRIPLE ZIGZAG STRETCH STITCH PUNTADA ELÁSTICA EN ZIG ZAG TRIPLE 3 5 1 8 3 16 Fixed Fija 2 5 3 32 50 Fixed Fija 2 5 3 32 STRETCH OVERLOCK STITCH PUNTADA OVERLOCK PESPUNTO 3 5 1 8 3 16 Fixed Fija 2 5 3 32 48 Fixed Fija 2 5 3 32 ELASTIC OVERLOCK STITCH PUNTADA OVERLOCK ELÁSTICA 3 5 1 8 3 16 Fixed Fija 2 5 3 32 48 Fixed Fija 2 5 3 32 FEATHER STITCH PUNTADA DE PLUMAS 3 5 1 8 3 16 Fixed Fij...

Страница 24: ... 50 STRETCH OVERLOCK STITCH PUNTADA OVERLOCK PESPUNTO 3 5 1 8 13 64 Fixed Fija 2 5 3 32 50 SMOCKING STITCH PUNTADA DE SMOCKING 3 5 1 8 13 64 Fixed Fija 2 5 3 32 48 COMB STITCH PUNTADA COMBINADA 3 5 1 8 3 16 Fixed Fija 2 5 3 32 48 COMB STITCH PUNTADA COMBINADA 3 5 1 8 3 16 Fixed Fija 2 5 3 32 48 DECORATIVE STITCH PUNTADA DECORATIVA 3 5 1 8 3 16 Fixed Fija 2 5 3 32 50 FAGOTING STITCH VAINICA 3 5 1 8...

Страница 25: ...pleada para realizar ojales y para costura decorativa La posición adecuada para la costura para satén varía según el material y el hilo que se utilicen A fin de determinar la posición exacta del control realice primero una prueba de la puntada y la longitud elegidas en un retal para observar el avance del material 1 Stitch length dial Control de longitud de puntada 2 Shorter Más corta 3 Longer Más...

Страница 26: ...uierda a derecha mediante el control de anchura de puntada Reverse Sewing Lever Pulsador de retroceso You can use reverse sewing for back tacking and reinforcing seams Con el pulsador de retroceso puede hilvanar en reversa y reforzar costuras To sew in reverse push the reverse sewing lever in as far as possible and hold it in that position while you lightly push the foot controller To sew forward ...

Страница 27: ...perly Only use the bobbin that comes with this machine or bobbins of the same type part code SA156 SFB XA5539 151 Utilice sólo bobinas código de pieza SA156 SFB XA5539 151 diseñadas para esta máquina de coser El uso de otras bobinas puede dañar la máquina Hemos diseñado la bobina que se proporciona con esta máquina Si utiliza bobinas de otros modelos la máquina no funcionará correctamente Utilice ...

Страница 28: ... la bobina unas cuantas veces Después pare la máquina 5 Trim the excess thread above the bobbin Recorte el hilo sobrante de la bobina 6 Press the foot controller to start Presione el pedal para comenzar 7 When the bobbin seems full and begins spinning slowly take your foot off the foot controller Cuando la bobina parece llena y empieza a girar despacio deje de pisar el pedal 8 Cut the thread slide...

Страница 29: ...er la aguja 1 Wound evenly Enrollado uniforme 2 Wound poorly Enrollado deficiente CAUTION PRECAUCIÓN CAUTION PRECAUCIÓN 1 2 Not winding the bobbin properly may cause the thread tension to loosen and may break the needle Un devanado incorrecto de la bobina puede disminuir la tensión del hilo y romper la aguja 1 Wound evenly Enrollado uniforme 2 Wound poorly Enrollado deficiente The bobbin was desig...

Страница 30: ...na Si no se ha introducido vuelva a intentarlo 1 Tension adjusting spring Resorte de ajuste de tensión 4 Hold the end of the thread push the bobbin down with your finger and then pass the thread through the slit as shown Sujete el extremo del hilo empuje hacia abajo la bobina con un dedo y pase el hilo por la ranura como se indica Make sure you turn the power off while threading the machine If you...

Страница 31: ...breaking the needle and resulting in injury Un devanado incorrecto de la bobina puede disminuir la tensión del hilo romper la aguja y causar lesiones 1 Wound evenly Enrollado uniforme 2 Wound poorly Enrollado deficiente 2 1 CAUTION PRECAUCIÓN 1 2 The bobbin was designed specifically for this sewing machine If bobbins from other models are used the machine will not operate correctly Use only the en...

Страница 32: ...t side see arrow 2 until the cover clicks into place Vuelva a colocar la tapa de la bobina Inserte la pestaña izquierda véase la flecha 1 y a continuación presione ligeramente el lado derecho véase la flecha 2 hasta encajar la tapa en su lugar You can begin sewing immediately without drawing up the bobbin thread If you want to draw up the bobbin thread before you start to sew follow the procedure ...

Страница 33: ...g machine can not be threaded Be sure to turn the handwheel so that the mark on the wheel points up before threading the sewing machine Si la aguja no está levantada correctamente la máquina no se podrá enhebrar Antes de enhebrar la máquina asegúrese de girar la rueda para que la marca señale hacia arriba 3 Pull up the spool pin and put a spool of thread on this pin Tire del portacarrete y coloque...

Страница 34: ...de Guía del hilo de la varilla de la aguja 7 IMPORTANT Thread the needle from front to back leaving a thread tail of about 5 cm 2 inch IMPORTANTE Enhebre la aguja desde la parte delantera a la trasera dejando un trocito de hilo de unos 5 cm 2 pulg If your sewing machine is equipped with a needle threader use the needle threader to thread the needle see next section Si su máquina tiene enhebrador u...

Страница 35: ...k may be damaged Cuando utilice el enhebrador asegúrese de que el soporte de la aguja está en la posición más alta de lo contrario el ganchillo podría dañarse 3 While lowering the needle threader lever hook the thread onto the guide Mientras baja la palanca del enhebrador de aguja enganche el hilo en la guía 1 Needle holder Soporte de la aguja 2 Needle threader lever Palanca del enhebrador de aguj...

Страница 36: ...ou can only use needles in the range of 90 14 100 16 You can not use the needle threader if you are using decorative threads or special needles such as the twin needle and wing needle When using these needles or threads you will need to thread the needle by hand Make sure the main power switch is off when threading El enhebrador sólo se puede utilizar con agujas de tamaño 75 11 100 16 para máquina...

Страница 37: ... thread by hand so that some thread will be left over Before you draw up the lower thread put the bobbin back in Puede comenzar a coser inmediatamente sin tener que tirar del hilo de la bobina Al coser zurcidos o pinzas puede tirar del hilo inferior manualmente para que sobre un poco de hilo Antes de tirar del hilo inferior vuelva a colocar la bobina 1 Pass the thread along the slit in the directi...

Страница 38: ...gh the needle bar thread guide El hilo de la aguja izquierda pasa a través de la guía del hilo de la varilla de la aguja 2 Right needle thread passes in front of the needle bar thread guide El hilo de la aguja derecha pasa delante de la guía del hilo de la varilla de la aguja 3 Needle bar thread guide Guía del hilo de la varilla de la aguja Note Nota Models Equipped with a Needle Threader You can ...

Страница 39: ... fabric Superficie de la tela 2 Back of fabric Revés de la tela 3 Upper thread Hilo superior 4 Lower thread Hilo inferior 5 Loops appear on surface of fabric Ondas en la superficie de la tela 6 Loops appear on back of fabric Ondas en el revés de la tela Upper Tension is too Tight El hilo superior está demasiado tenso Loops will appear on the surface of the fabric Aparecerán ondas en la superficie ...

Страница 40: ...golden colored 75 11 90 14 Tricot For top stitching Thread synthetic mercerized 30 90 14 100 16 Silk Tipo de tela Hilo Medida de la aguja Tipo Medida Telas medianas Paño Algodón 60 80 75 11 90 14 Tafetán Hilo sintético mercerizado Franela gabardina Seda o acabados de seda 50 80 Telas ligeras Lino Batista Algodón 60 80 65 9 75 11 Punto Georgette Hilo sintético mercerizado Challis satén Seda 50 80 T...

Страница 41: ...on such as heavyweight fabric like denim with a small needle 65 9 75 11 may bend or break the needle The wrong combination may also cause the seam to be uneven the fabric to pucker or the machine to skip stitches Asegúrese de seguir las combinaciones de aguja hilo y tela que se indican en la tabla El uso de una combinación incorrecta por ejemplo una aguja pequeña entre 65 9 y 75 11 para una tela p...

Страница 42: ...u turn the handwheel by hand always turn it toward you counterclockwise Turning it the other way may cause the thread to tangle and damage the needle or fabric and you may be injured Para evitar lesiones observe con atención la aguja mientras utiliza la máquina Mantenga las manos alejadas de las piezas en movimiento No estire ni empuje la tela durante la costura pues la aguja podría dañarse y prod...

Страница 43: ...ble y a continuación pise el pedal para comenzar la costura en reversa Suelte el pedal para dejar de coser 7 Release the reverse sewing lever and start sewing in the forward direction by pressing the foot controller Suelte el pulsador de retroceso y pise el pedal para comenzar a coser hacia delante You can use reverse sewing for locking the end of seams and to strengthen a stitch Puede utilizar la...

Страница 44: ... los dos hilos con el cortador de hilo situado en la parte izquierda de la máquina 1 Thread cutter Cortador de hilo 4 To prepare the machine for the next seam pull about 10 cm 4 inch of thread through the toes of the presser foot toward the back of the machine Para preparar la máquina para la siguiente costura pase el hilo unos 10 cm 4 pulg por la punta del pie prensatela hacia la parte trasera de...

Страница 45: ...tch The Satin Stitch can be used for making buttonholes and decorative stitches Set the pattern selection dial to the Zigzag Stitch set the stitch length in the F range and set the stitch width dial between 0 and 5 El ajuste de la longitud de la puntada en zig zag en el intervalo F produce una puntada para satén puntada en zig zag pequeña La costura para satén se puede utilizar para realizar ojale...

Страница 46: ...ulg en el borde 3 Set the pattern selection dial to the Blind Hem Stitch or Stretch Blind Hem Stitch and then set the stitch length Coloque el selector de puntadas en la puntada invisible o la puntada invisible elástica y luego ajuste la longitud de puntada 4 Sew on the fold as in Fig C Cosa en el pliegue como se indica en la figura C 5 When the fabric is unfolded you will have a Blind Hem Stitch ...

Страница 47: ... Costura elástica You can use the Elastic Stitch for mending sewing elastic or joining fabric Each is explained below Set the pattern selection dial to the Elastic Stitch La puntada elástica puede utilizarse para zurcir coser gomas o unir trozos de tela A continuación se explica cada opción Ajuste el selector de puntadas en la puntada elástica Mending Zurcido 1 Set the stitch length dial between F...

Страница 48: ...el pie prensatela 2 Sew them together using the Elastic Stitch Make sure you keep the two fabric edges close together Cósalos utilizando la puntada elástica Asegúrese de tener los dos bordes de tela muy juntos Double Action Stitching Costura de doble acción These stitches are used for joining two pieces of fabric such as when making patchwork Set the pattern selection dial to the Double Action Sti...

Страница 49: ... of the seams Cuando haya terminado la costura quite el hilvanado y el papel Para finalizar haga nudos en el revés al principio y al final de las costuras 1 First needle drop Primera entrada de la aguja Overedge Stitching Costura de sobreorilla Stitch Name Nombre de la puntada Pattern Dibujo Length mm inch Longitud mm pulg Width mm inch Anchura mm pulg Smocking Stitch Puntada de smoking Fixed Fija...

Страница 50: ...quede por encima del borde de corte de la tela 3 If the seam allowance is wider than the stitch pattern trim away any excess fabric after stitching Si el margen de costura tiene una anchura superior al dibujo de la puntada corte y quite toda la tela sobrante después de la costura A finished Elastic Overlock Stitch is shown in the illustration below En la ilustración siguiente se muestra una puntad...

Страница 51: ... 32 3 5 1 8 3 16 Fixed Fixed 2 5 3 32 Stitch Name Nombre de la puntada Pattern Dibujo Length mm inch Longitud mm pulg Width mm inch Anchura mm pulg Triangle Stitch Puntada triangular F 1 5 1 64 1 16 3 5 1 8 3 16 Decorative Stitch Puntada decorativa Fixed Fija 2 5 3 32 3 5 1 8 3 16 Fixed Fija 2 5 3 32 Leaf Stitch Puntada de hoja Fixed Fija 2 5 3 32 3 5 1 8 3 16 Fixed Fija 2 5 3 32 Tree Stitch Punta...

Страница 52: ...n selection dial to the Triangle Stitch Leaf Stitch etc Estos tipos de puntadas se pueden emplear para costura sobrepuesta decorativa y costura de smocking Ajuste el selector de puntadas en la puntada triangular la puntada de hoja etc XL2600_US Sp book Page 51 Thursday November 4 2004 11 41 AM ...

Страница 53: ...a que haga tope con la pieza de plástico situada delante del bastidor 3 You need to sew the front bar tack first Line the bar tack mark under the center of the presser foot and match it up to the two lines on the presser foot Primero tiene que coser la barra de remate delantera Alinee la marca de la barra de remate debajo del centro del pie prensatela y hágala coincidir con las dos líneas del pie ...

Страница 54: ... puntadas y a continuación levante la aguja del material Step 2 Left side Paso 2 Lado izquierdo 1 Turn the pattern selection dial to b 2 Sew the length of the tailor s chalk line 3 Stop the machine when the needle is at the left side of the stitch and then raise the needle 1 Coloque el selector de puntadas en b 2 Cosa a lo largo de la línea de tiza 3 Detenga la máquina cuando la aguja esté en el l...

Страница 55: ...n el lado derecho cosa el ojal y observe el avance 4 If the left side is too coarse or fine compared with the right side adjust the buttonhole fine adjustment screw as described below Si el lado izquierdo es demasiado grueso o fino en comparación con el lado derecho ajuste el tornillo de ajuste fino para ojales como se indica a continuación If the left side is too coarse turn the buttonhole fine a...

Страница 56: ...oque un botón entre el pie y la tela y asegúrese de que la aguja entra en los orificios sin golpear el botón Si golpeara consulte el paso 1 7 At a slow speed sew about 10 stitches Cosa unas 10 puntadas a una velocidad baja 8 Remove the material from the machine Cut the upper and lower threads and tie both threads at the back of the material Retire el material de la máquina Corte los hilos superior...

Страница 57: ...Ajuste el selector de puntadas en la puntada recta Ajuste la longitud de la puntada entre 2 1 16 pulg y 3 1 8 pulg Ajuste la anchura de la puntada en 2 5 3 32 pulg 2 Lower the presser foot lever and fix either the left or right pin of the zipper foot onto the shank Baje la palanca del pie prensatela y coloque la patilla izquierda o derecha del pie para cremalleras en la lengüeta 3 Fold the edge of...

Страница 58: ...ado de la cremallera Continúe cosiendo utilizando la muesca de ese lado Gathering Fruncidos 1 Set the pattern selection dial to Straight Stitch Ajuste el selector de puntadas en la puntada recta 2 Loosen the tension of the upper thread so that the lower thread lies on the underside of the material Afloje la tensión del hilo superior de forma que el hilo inferior descanse sobre la cara inferior del...

Страница 59: ... this motion until the darn section is filled with parallel lines of stitching Repita este movimiento hasta que la zona para zurcir quede rellenada de líneas paralelas de puntadas Appliqués Aplicaciones You can create an applique by cutting a different piece of fabric into a shape and using it as a decoration Puede crear una aplicación si corta un trozo diferente de tela con forma y lo utiliza com...

Страница 60: ... monogramming or design for embroidering on the surface of the fabric Dibuje las letras para el monograma o el diseño para el bordado en la superficie de la tela 4 Stretch the fabric between embroidery hoops as firmly as possible with the underside of the fabric on the bottom of the inside hoop Estire la tela entre los aros de bordado lo más firmemente posible con la cara inferior de la tela coloc...

Страница 61: ...n los dedos corazón y anular y sujeta la parte exterior del aro con los meñiques Monogramming Monogramas 1 Sew by moving the hoop slowly along the lettering at a constant speed Cosa moviendo los aros lentamente a lo largo de las letras a una velocidad constante 2 Secure with a few straight stitches at the end of the last letter Asegure con unas cuantas puntadas rectas al final de la última letra K...

Страница 62: ...e el diseño quede totalmente relleno Cosa las puntadas lo más juntas posible Memo Recuerde You can make long stitches by moving the embroidery hoop rapidly and short stitches by moving it slowly Puede hacer puntadas largas moviendo el aro de bordado rápidamente y puntadas cortas moviéndolo lentamente 3 Secure with a few straight stitches at the end of the design Asegure con unas cuantas puntadas r...

Страница 63: ...coser puntas en reversa con el pie móvil 1 Remove the power supply plug from the outlet Quite el enchufe de la toma de corriente 2 Raise the needle and the presser foot Levante la aguja y el pie prensatela 3 Loosen the presser foot screw to remove the presser foot holder Afloje el tornillo del pie prensatela para retirar el soporte del pie 1 Screwdriver Destornillador 2 Presser foot holder Soporte...

Страница 64: ...dor 2 Presser foot holder Soporte del pie prensatela 3 Presser foot screw Tornillo del pie prensatela Use a screwdriver to tighten the screw securely If the screw is loose the needle may hit the presser foot and you may be injured Before you start sewing make sure you turn the handwheel toward you counterclockwise to check that the needle does not hit the presser foot Be careful not to touch the n...

Страница 65: ...to keep the fabric firmly stretched and move the fabric to sew over the drawn design Utilice las dos manos para mantener la tela bien estirada y muévala para coser sobre el diseño dibujado 1 Quilting design Diseño de acolchado 8 The length of the stitch depends on how quickly you move the fabric and on the machine s sewing speed Sew while moving the fabric slowly La longitud de la puntada depende ...

Страница 66: ...lowance Cómo conseguir un margen de costura preciso 1 Beginning of stitching Comienzo de la costura 2 Align this mark with the edge of the fabric Alinee esta marca con el borde de la tela 3 End of stitching Final de la costura 4 Align this mark with the edge of the fabric Alinee esta marca con el borde de la tela Quickly Stitch Together a Quilt Cosa rápidamente un acolchado 1 Top of fabric Parta s...

Страница 67: ... se salgan de la tela y después tire de ella desde la parte delantera del pie 6 Holding both threads pass them through the curled part of the presser foot and pull them toward the back of the presser foot Wrap the fabric around the curled part of the presser foot in the same way Position the edge of the fabric just behind the needle and lower the presser foot Sujetando ambos hilos páselos por la p...

Страница 68: ...o tiempo guíe con cuidado la tela que sobra hacia la izquierda con la mano izquierda Using the Blind Stitch Foot Utilización del pie para puntada invisible This foot comes in handy not only for blind hem stitching but also for sewing fabric edges and seams Este pie resulta útil no sólo para la costura invisible para dobladillo también para coser bordes de tela y costuras When Edge Stitching Para c...

Страница 69: ...tada de zig zag 5 Place the fabric under the foot so the foot guide is aligned between both edges of the fabric Coloque la tela debajo del pie de manera que la guía del pie quede alineada entre ambos bordes de la tela 6 Lower the presser foot and begin sewing Baje el pie prensatela y comience a coser When Blind Hem Stitching Para coser costuras invisibles para dobladillo 1 With medium weight fabri...

Страница 70: ...ombilla y apriete el tornillo Turn off the main power switch and unplug the machine before you change the light bulb If the main power switch is on when you change the light bulb you may get an electric shock If the machine is on and you step on the foot controller you may be injured To avoid burns let the light bulb cool down before you change it Apague el interruptor de la alimentación y desench...

Страница 71: ...te los dos tornillos con una moneda Levante la placa de la aguja como se indica en la ilustración y a continuación deslícela hacia la izquierda para extraerla 1 Use a coin or screwdriver Utilice una moneda o un destornillador 6 Grasp the bobbin case and then lift it out to the left Coja la caja de la bobina y tire de ella hacia la izquierda 7 Use the cleaning brush or a vacuum cleaner to remove an...

Страница 72: ...e notches in the needle plate and then slide the cover back into position Introduzca las pestañas de la cubierta de la placa de la aguja en las muescas de la placa de la aguja y a continuación vuelva a colocar la cubierta 3 Never use a bobbin case that is scratched otherwise the upper thread may become tangled the needle may break or sewing performance may suffer For a new bobbin case part code XC...

Страница 73: ...ly guide the fabric You have not fitted the spool properly Fit the spool properly page 32 37 The area around the hole in the nee dle plate is scratched Replace the needle plate Contact your retailer or the nearest authorized service center The area around the hole in the presser foot is scratched Replace the presser foot Contact your retailer or the nearest authorized service center The bobbin cas...

Страница 74: ...er threading page 32 You have not wound the bobbin thread properly Wind the bobbin thread properly page 26 You have not threaded the right combination of thread and needle for the fabric you are using Choose a thread and needle that are appropriate for the type of fabric page 39 You have not attached the presser foot holder properly Attach the presser foot holder prop erly The thread tension is in...

Страница 75: ... used You have not moved the needle holder to its highest position Turn the handwheel toward you counterclockwise to raise the nee dle holder to the highest position page 34 You have not inserted the needle properly Insert the needle properly page 16 The stitch is not sewn correctly The presser foot that you are using is not correct for the type of stitch Attach the presser foot that is correct fo...

Страница 76: ...ta de tela hilo y aguja Elija un hilo y una aguja que sean adecuados para el tipo de tela página 39 El pie prensatela que utiliza no es adecuado para el tipo de costura que desea realizar Coloque el pie prensatela adecuado para el tipo de costura que desea realizar El hilo superior está demasiado tenso Afloje la tensión del hilo superior página 38 Está tirando demasiado de la tela Guíe la tela con...

Страница 77: ...zado más cercano La zona alrededor del orificio en el pie prensatela está rayada Cambie el pie prensatela Póngase en contacto con su proveedor o con el servicio de reparaciones autorizado más cercano La caja de la bobina está rayada o tiene pelusa Cambie la caja de la bobina Póngase en contacto con su proveedor o con el servicio de reparaciones autorizado más cercano No ha utilizado una bobina dis...

Страница 78: ...o poco afilada Cambie la aguja página 16 Si se están cosiendo telas finas la puntada es demasiado gruesa Cosa utilizando un material estabilizador debajo de la tela La tensión del hilo no es correcta Ajuste la tensión del hilo superior página 38 Las puntadas quedan sueltas No ha enhebrado el hilo superior correctamente Corrija el enhebrado del hilo superior página 32 No ha utilizado la combinación...

Страница 79: ...ior página 38 El hilo está enganchado Retire el hilo enganchado Si el hilo está enganchado en la caja de la bobina limpie la caja página 70 La tela no se desliza bien Las puntadas son demasiado finas Alargue la longitud de las puntadas La placa de zurcir está colocada en la placa de la aguja Retire la placa de zurcir No ha utilizado la combinación correcta de tela hilo y aguja Elija un hilo y una ...

Страница 80: ... 59 N Narrow hemmer foot 65 Needle checking 16 combinations with fabric and thread 39 replacing 16 Needle threader 34 O Overedge stitching 48 P Patchworking 48 Pattern selection dial 20 Patterns 21 Presser foot changing 18 Q Quick set bobbin 30 36 Quilting foot 63 R Race cleaning 70 Repacking instructions 4 Reverse sewing lever 25 S Satin stitch 44 Shell tuck stitching 46 Solución de problemas 75 ...

Страница 81: ...E Enhebrado aguja gemela 37 enhebrador de aguja 34 hilo inferior 28 30 hilo superior 32 Enhebrado del hilo inferior 28 bobina rápida 30 36 Enhebrado del hilo superior 32 Enhebrador de aguja 34 Estilo de brazo libre 19 F Fruncidos 57 I Instrucciones para el desembalaje 4 Instrucciones para el reembalaje 4 Interruptor de luz 15 L Limpieza 70 M Mantenimiento 69 Monogramming 59 O Ojal ajuste 54 creaci...

Отзывы: