background image

QUICK-DIAL NUMBERS AND DIALING OPTIONS   

7 - 4

Setting up Groups for Broadcasting

Groups allow you to send the same fax message to many fax numbers by pressing 
only one One-Touch key (Broadcasting). 

First

, you’ll need to store each fax number 

as a One-Touch or Speed-Dial number. 

Then

, you can combine them into a Group. 

Each Group uses up a One-Touch key

Finally

, you can have up to four small 

Groups, or you can assign up to 103 numbers to one large Group. (See 

Storing 

One-Touch Dial numbers

 on page 7-1, 

Storing Speed-Dial numbers

, page 7-2 and 

Broadcasting

 on page 6-10.)

1

Press 

Menu/Set

6

3

.

2

Select a One-Touch key where you wish to 
store the number. (For example, press 
One-Touch key 

2

 to store a Group.)

3

Use the dial pad to enter the Group number 
and press 

Menu/Set

.

(For example, press 

1

 for Group 1.)

4

To include One-Touch or Speed-Dial 
numbers in the Group, enter them as if you were dialing. For example, for 
One-Touch key 3, press One-Touch key 

3

. For Speed-Dial location 09, press 

Search/Speed Dial

, then press 

0

9

 on the dial pad.

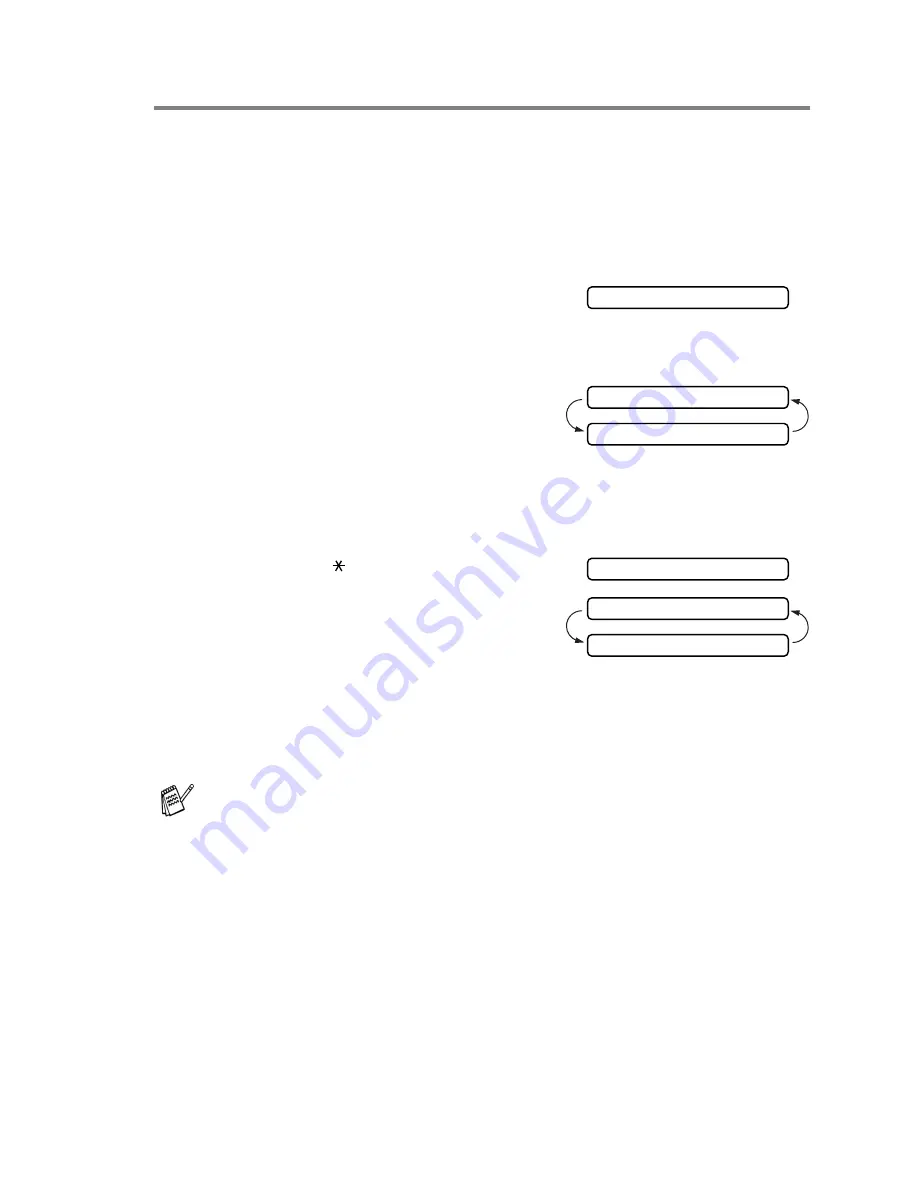
The LCD shows 

03

#09

.

5

Press 

Menu/Set

 to accept the numbers for 

this group.

6

Use the dial pad to enter a name for the 
group and press 

Menu/Set

.

(For example, NEW CLIENTS)

(See 

Entering text

 on page 4-2.)

7

Press 

Stop/Exit

.

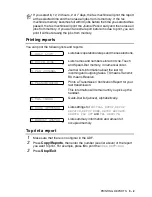
You can print a list of all One-Touch and Speed-Dial numbers. (See 

Printing 

reports

 on page 9-1.)

3.SETUP GROUPS

SETUP GROUP:G0

ENTER & SET

G01:*03#09

NAME:

ENTER & SET

Содержание 565

Страница 1: ...U S E R S G U I D E FAX 565 version A ...

Страница 2: ...d Register your product on line at www registermybrother com By registering your product with Brother International Corporation you will be recorded as the original owner of the product Your registration with Brother may serve as confirmation of the purchase date of your product should you lose your receipt may support an insurance claim by you in the event of product loss covered by insurance and...

Страница 3: ...duct register on line at Frequently Asked Questions FAQs You can find more information about Brother products on the World Wide Web From product specification sheets to Frequently Asked Questions FAQs it is all there Visit us at For Customer Service Service Center Locator USA only For the location of a Brother authorized service center call 1 800 284 4357 Service Center Locations Canada only For t...

Страница 4: ...sterCard Discover or American Express credit card you can order accessories directly from Brother In the USA you can visit us online for a complete selection of the Brother accessories and supplies that are available for purchase In USA only 1 800 521 2846 In USA 1 888 879 3232 voice 1 800 947 1445 fax In Canada 1 877 BROTHER voice DESCRIPTION ITEM Printing Cartridge and a Refill 1 set per box PC ...

Страница 5: ...THE USE OR INABILITY TO USE THE SOFTWARE EVEN IF BROTHER S LICENSOR HAS BEEN ADVISED OF THE POSSIBILITY OF SUCH DAMAGES BECAUSE SOME STATES IN THE USA AND SOME PROVINCES IN CANADA DO NOT ALLOW THE EXCLUSION OR LIMITATION OF LIABILITY FOR CONSEQUENTIAL OR INCIDENTAL DAMAGES THE ABOVE LIMITATIONS MAY NOT APPLY TO YOU IN ANY EVENT BROTHER S LICENSOR S LIABILITY TO YOU FOR ACTUAL DAMAGES FROM ANY CAUS...

Страница 6: ...e used with this Product including but not limited to damage resulting from use of non Brother brand parts and Consumable and Accessory Items 4 Consumable and Accessory Items that expired in accordance with a rated life and 5 Problems arising from other than defects in materials or workmanship 6 Normal Periodic Maintenance Items such as Paper Feeding Kit Fuser and Laser Units This limited warranty...

Страница 7: ...do not return your original Product to Brother within five 5 business days ii the problems with your original Product are not covered by the limited warranty iii the proper packaging instructions are not followed and has caused damage to the product or iv the warranty period on your original Product has expired or has not been sufficiently validated with a copy of the proof of purchase bill of sal...

Страница 8: ...mage to your print head resulting from packing without the ink cartridges will VOID your warranty Refer to your User s Guide for proper packaging BROTHER DISCLAIMS ALL OTHER WARRANTIES EXPRESSED OR IMPLIED INCLUDING WITHOUT LIMITATION ANY IMPLIED WARRANTIES OF MERCHANTABILITY OR FITNESS FOR A PARTICULAR PURPOSE EXCEPT TO THE EXTENT THAT ANY WARRANTIES IMPLIED BY LAW CANNOT BE VALIDLY WAIVED No ora...

Страница 9: ... outlet socket that is easily accessible To reduce the risk of shock or fire use only a No 26 AWG or larger telecommunication line cord Do not use a telephone in the vicinity of gas leak to report leak There are high voltage electrodes inside the fax machine Before you clean the fax machine or clear a paper jam make sure you have unplugged the power cord from the power outlet Do not handle the plu...

Страница 10: ... fax machine near a telephone jack and a standard grounded power outlet Choose a location where the temperature remains between 50 F and 95 F 10 35 C Caution Avoid placing the fax machine in a high traffic area Do not place near heaters air conditioners water chemicals or refrigerators Do not expose the fax machine to direct sunlight excessive heat moisture or dust Do not connect the fax machine t...

Страница 11: ... Storing numbers Storing One Touch Dial numbers 1 Press Menu Set 6 1 2 Press a One Touch key where you want to store a number 3 Enter a number up to 20 digits and then press Menu Set 4 Enter a name up to 15 characters or leave it blank and then press Menu Set 5 Press or to select the type of number and press Menu Set 6 Press Stop Exit Storing Speed Dial numbers 1 Press Menu Set 6 2 2 Enter a two d...

Страница 12: ...e memory 4 Press Fax Start when the LCD shows the name you want to call Making copies Making a single copy 1 Insert the original face down in the ADF 2 Press Copy Reports twice Sorting multiple copies 1 Insert the original face down in the ADF 2 Press Copy Reports 3 Enter the number of copies you want up to 99 4 Press Menu Set 5 Press or to select SORT and then press Copy Reports Brother fax back ...

Страница 13: ...elephone 1 8 Connecting an external telephone answering device TAD 1 9 Sequence 1 9 Connections 1 10 Recording outgoing message OGM on an external TAD 1 11 Special line considerations 1 12 Roll Over phone lines 1 12 Two Line phone system 1 12 Converting telephone wall outlets 1 12 Installing fax machine external two line TAD and two line telephone 1 13 Multi Line Connections PBX 1 14 If you are In...

Страница 14: ...ling mode Canada Only 4 6 Setting up your area code USA only 4 6 5 Setup Receive 5 1 Basic receiving operations 5 1 Choosing the Receive Mode 5 1 To select or change your Receive Mode 5 2 Setting the Ring Delay 5 2 Setting the F T Ring Time FAX TEL mode only 5 3 Easy Receive 5 3 Printing a reduced incoming fax 5 4 Recommended Reductions 5 4 Setting Paper Size 5 4 Receiving a fax at the end of a co...

Страница 15: ...eed dialing 6 1 Search 6 1 How to fax 6 2 Automatic transmission 6 2 Out of memory message 6 3 Manual transmission 6 3 Sending a fax at the end of a conversation 6 3 Basic sending operations 6 4 Sending faxes using multiple settings 6 4 Contrast 6 4 Fax resolution 6 5 Multiple Resolution Transmission 6 5 Manual and automatic fax redial 6 6 Canceling a job while scanning dialing and sending the ori...

Страница 16: ...8 Remote Fax Options 8 1 Fax Forwarding Paging 8 1 Programming a Fax Forwarding number 8 1 Programming your pager number 8 1 Setting Fax Storage 8 2 Backup Print 8 2 Setting your remote access code 8 3 Remote Retrieval 8 3 Using your remote access code 8 3 Remote commands 8 4 Retrieving fax messages 8 5 Changing your Fax Forwarding number 8 5 9 Printing reports 9 1 FAX settings and activity 9 1 Cu...

Страница 17: ...ting and routine maintenance 12 1 Troubleshooting 12 1 Error messages 12 1 Printer Jam or Paper Jam 12 2 Original Jam 12 2 Paper Jam 12 2 If you are having difficulty with the fax machine 12 4 How to improve print quality 12 6 Cleaning the print head 12 6 Clean the print head when you want to improve the print quality and also as part of your routine maintenance 12 6 Packing and shipping the fax m...

Страница 18: ...ortant warnings notes and actions To make things clearer and to help you press the correct keys we used special fonts and added some of the messages that will appear in the LCD Introduction Bold Bold typeface identifies specific keys on the fax machine control panel Italics Italicized typeface emphasizes an important point or refers you to a related topic Warnings inform you what to do to avoid po...

Страница 19: ...ystem as your first transmission This will check that your fax machine is working properly To get a response you must have set up your Station ID See Setting the Station ID on page 4 2 In USA only 1 877 268 9575 fax When your Test Sheet is received a Confirmation Sheet and Product Registration form will be sent back to your fax machine Please fill in the form and return it to complete your registr...

Страница 20: ...Tray Load paper here 6 Paper Guides Press and slide it to fit the original width 7 Control Panel Use the keys and display to control the fax machine No Name Description 8 External Telephone Line Jack Plug in the modular plug on the external telephone line here 9 Telephone Line Jack Plug in the modular plug on the telephone line here 7 Control Panel 2 Telephone Handset 1 Handset Curled Cord 4 Paper...

Страница 21: ...e to select how your machine will handle incoming calls 5 Redial Pause Re dials the last number called Also inserts a pause in quick dial numbers 6 Hook Lets you dial telephone and fax numbers without lifting the handset 7 Hold Caller ID Lets you place calls on hold Also lets you view or print the Caller ID list 8 Resolution Sets the resolution when you send a fax or make a copy 9 Stop Exit Stops ...

Страница 22: ... you access the menu and programming mode and stores your settings in your machine or Press to scroll forward or backward to set a menu selection You can also use these keys to do an alphabetical search for the names of stored numbers or Press to scroll through the menus and options OR You can press these keys to adjust the beeper ring or speaker volume ...

Страница 23: ... the fax machine is set to answer after four your Voice Mail will stop the fax machine from receiving faxes If you set Voice Mail and the Brother machine to answer after the same number of rings there is no way of knowing which one will answer first It is important to remember that neither Voice Mail nor the fax machine can pass the call back to the other after the call has been answered How can y...

Страница 24: ...and the LCD continues to show RECEIVE To cancel the receiving press Stop Exit The fax handshake is the time in which the sending machine s CNG tones and the receiving machines chirps overlap This must be for at least 2 to 4 seconds so the fax machines can understand how each is sending and receiving the fax The handshake cannot begin until the call is answered and the CNG tones only last for about...

Страница 25: ...vice directly to the fax machine Connect the modular plug on the telephone s line cord to the jack labeled EXT on the back side of the fax machine Whenever this external phone or TAD is in use the screen displays EXT TEL IN USE and if the fax handset is lifted an alarm sounds To disconnect the call on the external phone and switch to the fax lift the handset and press Hook Extension Telephone Exte...

Страница 26: ...ctions in this manual for recording your outgoing message We do not recommend using the toll saver feature on your external answering machine if it exceeds four rings If you do not receive all your faxes you must reset the setting on your external TAD to four rings or less If You Subscribe to your Telephone Company s Distinctive Ring Service You may connect an external TAD to a separate wall jack ...

Страница 27: ... line cord from your external TAD into the back side of the fax machine in the jack labeled EXT Make sure this cord is connected to the TAD at the TAD s telephone line jack and not its telephone set jack 3 Set your external TAD to four rings or less The fax machine s Ring Delay setting does not apply 4 Record the outgoing message on your external TAD 5 Set the TAD to answer calls 6 Set the Receive...

Страница 28: ...will be received automatically if they come from a machine that sends standard Calling tones CNG We recommend beginning your OGM with an initial 5 second silence because the fax machine cannot hear fax tones over a resonant or loud voice You may try omitting this pause but if the fax machine has trouble receiving then you must rerecord the OGM to include it Incoming Call The call is picked up by t...

Страница 29: ...d into one jack RJ14 Your machine must be plugged into an RJ11 jack RJ11 and RJ14 jacks may be equal in size and appearance and both may contain four wires black red green yellow To test the type of jack plug in a two line phone and see if it can access both lines If it can you must separate the line for the fax machine See Easy Receive on page 5 3 Converting telephone wall outlets There are three...

Страница 30: ...xt to the fax machine 2 Plug one end of the telephone line cord for the fax machine into the L2 jack of the triplex adapter Plug the other end into the LINE jack on the back side of the fax machine 3 Plug one end of the first telephone line cord for your TAD into the L1 jack of the triplex adapter Plug the other end into the L1 or L1 L2 jack of the two line TAD 4 Plug one end of the second telepho...

Страница 31: ...x machine to Work with a PBX 1 It is not guaranteed that the unit will operate correctly under all circumstances with a PBX Any cases of difficulty should be reported first to the company that handles your PBX 2 If all incoming calls will be answered by a switchboard operator it is recommended that the Receive Mode be set to MANUAL All incoming calls should initially be regarded as telephone calls...

Страница 32: ...30 Weight 17 to 23 4 lb 64 to 90 g m2 Thickness 0 003 to 0 0039 in 0 08 to 0 10 mm The fax machine can only scan an image 8 2 in 208 mm wide regardless of how wide the paper is Do not use paper that are extremely shiny or highly textured that were previously printed by a printer that cannot be arranged uniformly when stacked that are made with a short grain that are curled wrinkled paper folded ri...

Страница 33: ... paper To load paper 1 Fan the stack of paper well to avoid paper jams and mis feeds 2 Gently insert the paper The side to be printed on must be face down Tap the stack of paper so the edges are even P r i n t S i d e Paper ...

Страница 34: ...u selections and programming options Menu table You can probably program the fax machine without the User s Guide But to help you understand the menu selections and options that are found in the fax machine programs use the Menu table on page 3 3 Memory Storage If there is a power failure you will not lose your menu settings because they are stored permanently Temporary settings such as Contrast O...

Страница 35: ...ressing the arrow for the direction you want on or Then set an option by pressing Menu Set when that option appears on the LCD Then the LCD shows the next menu level Press or to scroll to your next menu selection Press Menu Set When you finish setting an option the LCD shows ACCEPTED Access the menu Go to the next menu level Accept an option Scroll through the current menu level Go back to the pre...

Страница 36: ... For the hearing impaired you can set the volume to the VOL AMPLIFY ON setting on a permanent or temporary basis 4 5 5 TONE PULSE For Canada Only TONE PULSE Selects the dialing mode 4 6 6 LOCAL LANGUAGE For Canada Only ENGLISH FRENCH Allows you to change the LCD Language to French See French manual 2 SETUP RECEIVE 1 RING DELAY 04 03 02 01 00 Sets the number of rings before your fax machine answers...

Страница 37: ...ine to poll another fax machine 5 7 3 SETUP SEND 1 COVERPG SETUP NEXT FAX ONLY ON OFF PRINT SAMPLE Automatically sends a programmable cover page or prints a sample coverpage 6 7 2 COVERPAGE MSG Program a customized message for fax cover page 6 7 3 CONTRAST AUTO S LIGHT S DARK Change the lightness or darkness of the faxes you send 6 4 4 RESOLUTION STANDARD FINE S FINE PHOTO Allows you to change res...

Страница 38: ...ERRUPT Send a fax now even if you have your fax machine set to send a fax later or if you have it set for Polling 6 14 6 SET QUICK DIAL 1 ONE TOUCH DIAL Dial numbers stored in memory by pressing only one key 7 1 2 SPEED DIAL Dial numbers stored in memory by pressing only four keys 7 2 3 SETUP GROUPS Set up a Group number for Broadcasting 7 4 7 SETUP REPORTS 1 TRANSMISSION ON OFF Initial setup for ...

Страница 39: ...xes in memory for Fax Forwarding and Remote Retrieval 8 2 3 REMOTE ACCESS Set code for retrieving faxes 8 3 4 PRINT FAX Print incoming faxes stored in the memory 5 6 0 TEL SERVICE 1 DISTINCTIVE ON OFF SET Use with phone company Distinctive Ring service to register the ring pattern with your fax machine 5 8 2 CALLER ID Register your AREA CODE to dial from the Caller ID log 5 11 The factory setting ...

Страница 40: ...affected 1 Press Menu Set 1 1 2 Enter the last two digits of the year Press Menu Set 3 Enter two digits for the month Press Menu Set For example enter 09 for September or 10 for October 4 Enter two digits for the day Press Menu Set For example enter 06 5 Enter the time in 24 Hour format Press Menu Set For example enter 15 25 for 3 25 P M 6 Press Stop Exit The LCD now shows the date and time you se...

Страница 41: ...e date and time Entering text When you are setting certain menu selections such as the Station ID you may need to type text into the fax machine Most number keys have three or four letters printed below them The keys for 0 and do not have printed letters because they are used for special characters By pressing the appropriate number key repeatedly you can access the character you want If you do no...

Страница 42: ...riginal setting is LOW When the beeper is on the fax machine beeps every time you press a key or make a mistake and when a fax is being sent or received 1 Press Menu Set 1 3 LOW HIGH or OFF 2 Press or to select your option 3 When the LCD shows the option you want Press Menu Set 4 Press Stop Exit Press for space Press for _ Press 0 for É À È Ê Î Ç Ë Ö 0 NOTICE The Telephone Consumer Protection Act ...

Страница 43: ...is replaced the handset volume will remain until you change it again VOLUME AMPLIFY ON TEMPORARY This setting is appropriate if some of the users are hearing impaired During a conversation users can press or on the control panel to adjust the volume to LOW HIGH or AMPLIFY When the handset is replaced the handset volume returns to the default setting of LOW VOLUME AMPLIFY ON PERMANENT Choose VOL AM...

Страница 44: ...an select a ring volume level or press until the ring is off Press or to adjust the volume level With each key press your machine rings so you can hear the current setting and the screen displays the setting you are choosing Each key press changes the volume to the next setting The new setting will remain until you change it again Memory Storage In the event of a power failure all settings in the ...

Страница 45: ...TONE Press Menu Set 3 Press Stop Exit Setting up your area code USA only If you must dial the area code to call within your area code do not enter this setting 1 Press Menu Set 0 2 2 Use the dial pad to enter your area code and then press Menu Set 3 Press Stop Exit 5 TONE PULSE 2 CALLER ID AREA CODE 000 AREA CODE 908 ...

Страница 46: ...ve lots of fax messages and few telephone calls You cannot have an answering machine on the same line even if it is on a separate wall jack phone socket on the same line You cannot use the telephone company s Voice Mail in this mode TAD ANSWER MACH with an external answering machine The external answering device TAD automatically answers every call Voice messages are stored on the external TAD Fax...

Страница 47: ...the same line as the fax machine or subscribe to the telephone company s Distinctive Ring service keep the Ring Delay setting of 4 See Easy Receive on page 5 3 and Operation from extension telephones on page 5 5 1 Press Menu Set 2 1 2 Press or to select how many times the line rings before the fax machine answers 00 04 Press Menu Set If you select 00 the line won t ring at all 3 Press Stop Exit If...

Страница 48: ...l Selecting ON allows the fax machine to receive fax calls automatically even if you lift the handset of an extension or external phone When you see RECEIVE on the LCD or when you hear chirps through the handset of an extension phone connected to another wall jack phone socket just replace the handset and the fax machine will do the rest SEMI lets the fax machine receive the call only if you ve an...

Страница 49: ...size select 75 If your paper is legal size 8 5 14 and the incoming fax is letter size select 100 A4 select 100 legal size select 93 Setting Paper Size You can use three sizes of paper for printing your faxes letter legal and A4 When you change the kind of paper in the paper tray you will need to change the setting for paper size so your machine will know how to fit the incoming fax on the page You...

Страница 50: ...and pseudo double rings for you to take over use the Telephone Answer Code 5 1 to take the call at an extension phone See Setting the F T Ring Time FAX TEL mode only on page 5 3 If you answer a call and no one is on the line you should assume that you re receiving a manual fax At an extension phone on a separate telephone wall jack socket press 5 1 wait for fax receiving tones chirps and then hang...

Страница 51: ...Fax Receive Code is 5 1 The preset Telephone Answer Code is 5 1 1 Press Menu Set 2 4 2 Press or to select ON or OFF Press Menu Set 3 If you want to enter a new Fax Receive Code Press Menu Set 4 If you want to enter a new Telephone Answer Code Press Menu Set 5 Press Stop Exit Printing a fax from the memory If you set Fax Storage to ON for Remote Retrieval you can still print a fax from the memory w...

Страница 52: ...2 Enter the fax number you are polling 3 Press Fax Start The LCD shows DIALING Setting up Sequential Polling Receive The fax machine can ask for faxes from several fax units in a single operation Sequential Polling Receive Afterwards a Sequential Polling Report will be printed 1 Press Menu Set 2 7 2 Enter the fax machines you want to poll You must press Menu Set between each fax number 3 Press Fax...

Страница 53: ...ine on there is a strong possibility that Voice Mail and the fax machine will conflict with each other while receiving incoming calls However this Distinctive Ring feature allows you to use more than one number on your line so both Voice Mail and the fax machine can work together without any problems If each one has a separate phone number neither will interfere with the other s operations If you ...

Страница 54: ...ax machine This is because the fax must listen to the ring pattern to compare it to the pattern that was registered Other telephones on the same line will ring If you program the fax machine properly it will recognize the registered ring pattern of the fax number within 2 ring patterns and then answer with a fax tone When the voice number is called the fax machine will not answer Ring Pattern Ring...

Страница 55: ...eceive mode to the other mode while the Distinctive Ring is set to on 1 Press Menu Set 0 1 2 Press or to select SET Press Menu Set 3 Press or to select the stored ring pattern you want to use Press Menu Set You will hear each pattern as you scroll through the four patterns Make sure you choose the pattern that the telephone company gave you 4 Press Stop Exit Distinctive Ring is now set to on Turni...

Страница 56: ...call is erased You can print the report or scroll through Caller ID information to review those calls made to your machine Printing the Caller ID Log 1 Press Hold Caller ID 2 To print the Caller ID Log press Fax Start Viewing the Caller ID Log 1 Press Hold Caller ID 2 After two seconds press or to scroll through the Caller ID Log 3 When you want to see detailed information for a displayed ID phone...

Страница 57: ...ch key where you want the number to be stored OR To register the caller as a Speed Dial number press Search Speed Dial and use the dial pad to press the two digit location code 00 99 and then press Menu Set 4 Enter the caller s name and then press Menu Set This feature may not be available in certain areas of the USA and Canada If your dialing plan does not follow the standard 1 area code 7 digit ...

Страница 58: ...of Call Waiting callers on your machine s LCD 1 To answer a Call Waiting signal while you re talking on the phone ask the other party if you can put them on Hold to catch the other call The LCD shows the Caller ID 2 Press Search Speed Dial to switch to the second call 3 To switch back to the first call press Search Speed Dial again FAX a fax number TEL a telephone voice number FAX TEL both a fax a...

Страница 59: ...ed Dial and then the two digit Speed Dial number See Storing Speed Dial numbers on page 7 2 Search You can search for names you have stored in One Touch and Speed Dial memories Press Search Speed Dial To search for numbers alphabetically by name enter the first letter of the name by using the dial pad Press or See Storing Speed Dial numbers on page 7 2 Setup Send two digit number To search numeric...

Страница 60: ...dialing and Search pages 6 1 to 6 1 4 Press Fax Start The ADF can hold up to 10 pages feeding each one individually through the fax machine Use standard 17 lb 23 4 lb 64 g m2 90 g m2 paper when using the ADF if you are using heavier paper feed each sheet individually to prevent paper jams Press Resolution before you send the fax to select the resolution for the document you are sending If you wish...

Страница 61: ...the handset and listen for a dial tone OR Press Hook and listen for a dial tone 3 Enter the fax number you want to call You can enter the digits using the dial pad or you can enter a One Touch or Speed Dial number or you can call using Search Speed Dial See Storing One Touch Dial numbers on page 7 1 4 When you hear the fax tone press Fax Start 5 If you re using the handset hang up Sending a fax at...

Страница 62: ...ettings and go to the next step Contrast If your original is very light or very dark you may want to set the contrast Use S LIGHT to make the original darker Use S DARK to make the original lighter 1 Insert the original face down in the ADF Press Menu Set 3 3 2 Press or to select AUTO S LIGHT or S DARK Press Menu Set 3 Press 1 if you want to choose more settings and the LCD will return to the SETU...

Страница 63: ...lect the resolution for page 1 and press Menu Set 3 Repeat Step 2 for each page Press Stop Exit when you are finished The screen displays 4 Press 1 if you want to select additional settings The display returns to the Setup Send menu OR Press 2 if you are finished choosing settings and go to Step 5 The screen prompts you to enter the fax number you want to call 5 Enter the fax number and press Fax ...

Страница 64: ...Canceling a job while scanning dialing and sending the original You can cancel a job while you are scanning it into memory by pressing Stop Exit You can also cancel a job while the fax machine is dialing or sending the original by pressing Stop Exit Canceling a scheduled job You can cancel a fax job that is waiting in memory 1 Press Menu Set 4 Any jobs that are waiting will appear on the LCD 2 If ...

Страница 65: ...page 6 9 Cover Page for Next Fax Only Make sure Station ID is set up See Setting the Station ID on page 4 2 This feature does not work without the Station ID You can set the fax to send a cover page with a particular document This cover page will include the number of pages in your document 1 Insert the original face down in the ADF 2 Press Menu Set 3 1 3 Press Menu Set when the screen displays NE...

Страница 66: ...ax is not included when you use this setting 1 Press Menu Set 3 1 2 Press or to select ON or OFF 3 Press Menu Set when the screen displays COVERPAGE ON If you select ON a coverpage is always sent when you send a fax 4 If you selected ON the screen displays the cover page comment options Press or to view comment selections 5 Press Menu Set when the screen displays your selection The screen displays...

Страница 67: ...he screen displays 2 Use or to choose position 5 or 6 for your customized comment Press Menu Set 3 Use the dial pad to enter your customized comment See Entering text on page 4 2 4 Press Menu Set The screen displays 5 Press 1 if you want to select additional settings The display returns to the Setup Send menu OR Press 2 if you are finished choosing settings and exit 1 COVERPG SETUP COVER PAGE TO F...

Страница 68: ...is busy your machine will redial Overseas Mode If you are having difficulty sending a fax overseas due to possible interference on the phone line we recommend that you turn on the Overseas Mode After you send a fax using this feature the feature will turn itself off 1 Insert the original face down in the ADF 2 Press Menu Set 3 5 3 Press or to select ON or OFF Press Menu Set 4 Press 1 if you want t...

Страница 69: ...he screen displays the current setting for Call Back Message Press or to select ON or OFF Press Menu Set when the screen displays your selection The screen displays 5 Press 1 if you want to select additional settings The display returns to the SETUP SEND menu OR Press 2 if you are finished choosing settings and go to Step 6 The screen prompts you to enter the fax number you want to call 6 Enter th...

Страница 70: ...if you have finished choosing settings and then go to Step 6 6 Enter the fax number 7 Press Fax Start The fax machine will wait until the time you have entered to send the fax Setting up Polled Transmit Polled Transmit is when you set up the fax machine to wait with an original so another fax machine can retrieve it 1 Insert the original face down in the ADF 2 Press Menu Set 3 8 3 Press or to choo...

Страница 71: ... only press or to select NEXT FAX ONLY Press Menu Set 4 For the next fax only press or to select ON or OFF Press Menu Set 5 Press 1 to select additional settings The display returns to the SETUP SEND menu OR Press 2 if you are finished choosing settings and go to Step 6 6 Enter fax number and press Fax Start If you get an OUT OF MEMORY message while scanning the first page of a fax press Stop Exit...

Страница 72: ...nts that are waiting in the ADF 3 Insert the original you want to send now in the ADF 4 Enter the number for the fax you want to send now and press Fax Start 5 After the transmission is finished return the first document to the ADF 6 Press Menu Set 5 to restore the Delayed Fax If you set Delayed Fax or Polled Transmit using the memory that is if you have already scanned the document into your mach...

Страница 73: ...Press Menu Set 4 Use the dial pad to enter the name up to 15 characters Press Menu Set You can use the chart to help you enter letters See Entering text on page 4 2 OR Press Menu Set to store the number without a name Quick Dial numbers and dialing options If you lose electrical power the quick dial numbers that are in the memory will not be lost One Touch keys are not the dial pad keys They are t...

Страница 74: ...pad to enter a two digit Speed Dial number 00 99 For example press 0 5 Press Menu Set 3 Enter the number up to 20 digits Press Menu Set 4 Use the dial pad to enter the name up to 15 characters Press Menu Set You can use the chart on page 4 2 to help you enter letters OR Press Menu Set to store the number without a name 5 Press or to select the type of number and press Menu Set 6 Go to Step 2 to st...

Страница 75: ...umber OR Press 2 to exit without making a change 2 Enter a new number Press Menu Set If you want to erase the whole number or whole name press Stop Exit when the cursor is under the first digit or letter The characters above and to the right of the cursor will be deleted If you want to change a character use or to position the cursor under the character you want to change and then type over it 3 F...

Страница 76: ...e Touch key where you wish to store the number For example press One Touch key 2 to store a Group 3 Use the dial pad to enter the Group number and press Menu Set For example press 1 for Group 1 4 To include One Touch or Speed Dial numbers in the Group enter them as if you were dialing For example for One Touch key 3 press One Touch key 3 For Speed Dial location 09 press Search Speed Dial then pres...

Страница 77: ...s only one way the other party won t be able to hear you unless you pick up the handset 4 To hang up replace the handset One Touch Dialing 1 Pick up the handset OR Press Hook 2 When you hear a dial tone press the One Touch key of the location you want to call 3 If you pressed Hook to dial the call pick up the handset when the other party answers The speaker works only one way the other party won t...

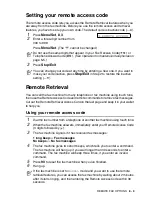
Страница 78: ...and setting them up on separate keys in any combination You can even include manual dialing using the dial pad The combined number will be dialed in the order that you entered it as soon as you press Fax Start See Storing Speed Dial numbers on page 7 2 For example you can store 555 on Speed Dial 03 and 7000 on Speed Dial 02 If you press Search Speed Dial 03 Search Speed Dial 02 and Fax Start you w...

Страница 79: ...ly and the line is busy press Redial Pause to try again Any time you want to make a second call to the last number dialed press Redial Pause to save time If you re sending a fax automatically and the line is busy the fax machine will automatically redial one time five minutes after the transmission Tone or Pulse Canada only If you have a Pulse dialing service but need to send Tone signals for exam...

Страница 80: ... 20 digits Press Menu Set 4 Press Stop Exit Programming your pager number When Paging is selected the fax machine dials the pager number you ve programmed and then dials your Personal Identification Number PIN This activates your pager so you will know that you have a fax message in the memory 1 Press Menu Set 8 1 2 Press or until the LCD shows PAGING Press Menu Set 3 Enter your pager phone number...

Страница 81: ...rations The LCD will show when you have a fax stored in memory 1 Press Menu Set 8 2 Press or to select ON or OFF Press Menu Set 2 Press Stop Exit If you press 1 all fax data is erased and Fax Storage is turned off If you press 2 faxes are not erased and Fax Storage stays on See Printing a fax from the memory on page 5 6 Backup Print If you ve set FAX STORAGE to ON the fax machine automatically pri...

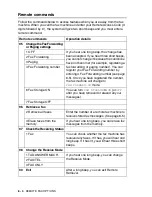
Страница 82: ...s immediately enter your Remote Access Code 3 digits followed by 3 The fax machine signals if it has received fax messages 1 long beep Fax messages No beeps No fax messages 4 The fax machine gives two short beeps which tells you to enter a command The fax machine will hang up if you wait longer than 30 seconds to enter a command The fax machine will beep three times if you enter an invalid command...

Страница 83: ...ee page 8 5 Once you have registered the number the fax machine will change to FAX FORWARD ON mode 2 Fax Forwarding 3 Paging 4 Fax Forwarding number 6 Fax Storage ON You can turn FAX STORAGE to ON or OFF after you have retrieved or erased all your messages 7 Fax Storage OFF 96 Retrieve a fax 2 Retrieve all faxes Enter the number of a remote fax machine to receive stored fax messages See page 8 5 3...

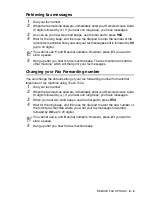
Страница 84: ...x messages Changing your Fax Forwarding number You can change the default setting of your fax forwarding number from another telephone or fax machine using Touch Tone 1 Dial your fax number 2 When the fax machine answers immediately enter your Remote Access Code 3 digits followed by If you hear one long beep you have messages 3 When you hear two short beeps use the dial pad to press 954 4 Wait for...

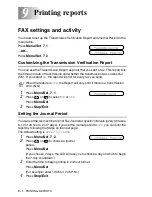
Страница 85: ...t Setting the Journal Period You can set the fax machine to print Fax Journal at specific intervals every 30 faxes 6 12 or 24 hours 2 or 7 days If you set the journal period to OFF you can print the report by following the Steps on the next page The default setting is EVERY 30 FAXES 1 Press Menu Set 7 2 2 Press or to choose a journal period Press Menu Set If you choose 7 days the LCD will ask you ...

Страница 86: ...n erase all jobs from memory If you want an extra report before it is due to print you can print it without erasing the jobs from memory Lists basic operational steps and menu selections Lists names and numbers stored in One Touch and Speed Dial memory in numerical order Journal lists information about the last 30 incoming and outgoing faxes TX means Transmit RX means Receive Prints a Transmission...

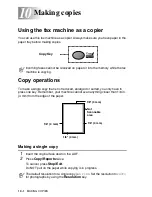
Страница 87: ...g closer than 1 6 in 4 mm from the edge of the paper Making a single copy 1 Insert the original face down in the ADF 2 Press Copy Reports twice To cancel press Stop Exit Do NOT pull on the paper while copying is in progress Making copies Incoming faxes cannot be received on paper or into the memory while the fax machine is copying The default resolution for a single copy is S FINE Set the resoluti...

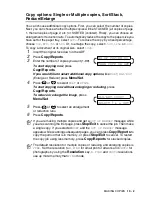
Страница 88: ...SORT ELG RDC Enlarge or Reduce press Menu Set 4 Press or to select SORT or STACK To start copying now without enlarging or reducing press Copy Reports To reduce or enlarge the image press Menu Set 5 Press or to select an enlargement or reduction ratio 6 Press Copy Reports If you are making multiple copies and get a OUT OF MEMORY message while you are scanning the first page press Stop Exit to canc...

Страница 89: ...d and modular plug is provided with this product It is designed to be connected to a compatible modular jack that is also compliant See installation instructions for details The REN is used to determine the number of devices that may be connected to a telephone line Excessive RENs on a telephone line may result in the devices not ringing in response to an incoming call In most but not all areas th...

Страница 90: ...le alarm equipment call your telephone company or a qualified installer If you are not able to solve a problem with the fax machine call Brother Customer Service See Brother numbers on page i WARNING For protection against the risk of electrical shock always disconnect all cables from the wall outlet before servicing modifying or installing the equipment This equipment may not be used on coin serv...

Страница 91: ...ticular installation If this equipment does cause harmful interference to radio or television reception which can be determined by turning the equipment off and on the user is encouraged to try to correct the interference by one or more of the following measures Reorient or relocate the receiving antenna Increase the separation between the equipment and receiver Connect the equipment into an outle...

Страница 92: ... type power outlet This is a safety feature If you are unable to insert the plug into the outlet call your electrician to replace your obsolete outlet Do not defeat the purpose of the grounding type plug 10 Do not allow anything to rest on the power cord Do not place this product where people can walk on the cord 11 If an extension cord is used with this product make sure that the total ampere rat...

Страница 93: ...as been dropped or the cabinet has been damaged If the product exhibits a distinct change in performance indicating a need for service 17 To protect your product against power surges we recommend the use of a power protection device Surge Protector Trademarks The Brother logo is a registered trademark of Brother Industries Ltd Brother is a registered trademark of Brother Industries Ltd Copyright 2...

Страница 94: ...the print cartridge is not properly installed Install the print cartridge again See Changing the ribbon on page 12 10 CHECK ORIGINAL The originals were not inserted or fed properly or were too long See Original Jam on page 12 2 Insert the original again CHECK PAPER The fax machine is out of paper Add paper and then press Fax Start COMM ERROR Poor phone line quality caused a communication error Try...

Страница 95: ...r until it clicks Paper Jam The paper is jammed in your fax machine 1 Remove any paper that is not jammed MACHINE ERROR XX The fax machine has a mechanical problem Call Brother Customer Service In USA 1 800 284 4329 In Canada 1 877 BROTHER NO RESPONSE BUSY The number you dialed does not answer or is busy Verify the number and try again OUT OF MEMORY The data is too large for the fax machine s memo...

Страница 96: ...ront of your fax machine If the printout is jammed then pull it toward the front of your fax machine 4 Remove the print cartridge and turn the spool to tighten the ribbon 5 Install the cartridge See Changing the ribbon on page 12 10 6 Close the top cover Press down on both sides of the top cover until it clicks 7 Put the paper back into the paper tray Top Cover NO YES Printout is jammed ...

Страница 97: ...de for your setup either FAX ONLY or FAX TEL Check for a dial tone If possible call the fax machine to hear it answer If there is still no answer check the telephone line cord connection Connect a standard telephone handset to the fax machine s telephone jack If there is no ringing when you call the fax machine ask your telephone company to check the line Telephone answering device TAD does not an...

Страница 98: ...t Fax Receive Code default setting is 51 When the fax machine answers hang up Fax machine hears voice as fax tone If the fax machine is set to Easy Receive ON it is more sensitive to sounds The fax machine may mistakenly interpret certain voices or music on the line as a calling fax machine and respond with fax receiving tones Deactivate the fax by pressing 51 if you are at an extension phone or p...

Страница 99: ...routine maintenance 1 Unplug the power cord for safety 2 Open the top cover by lifting the lever on the right side of the top cover 3 Take out the printing cartridge WARNING After you have just used the machine some internal parts of the machine are extremely HOT So please be careful Be careful not to cut yourself on the sharp edges of the metal part shown in the illustration Sharp Edge ...

Страница 100: ...t head with a lint free cloth that is dry or lightly moistened with isopropyl alcohol 5 Wait until the alcohol on the print head is totally dried 6 Install the printing cartridge See Changing the ribbon on page 12 10 7 Close the top cover Press down on both sides of the top cover until it clicks ...

Страница 101: ...r warranty 1 Unplug the fax machine from the AC power outlet 2 Remove the paper wire extension telephone line cord print cartridge and handset and pack them 3 Wrap the fax machine in the plastic bag and place it in the original carton with the original packing material If you are returning the fax machine to Brother as part of the Brother Exchange Service pack only the fax machine Keep all separat...

Страница 102: ...n the top cover by lifting the lever on the right side of the top cover 3 Clean the white bar and the glass strip under the bar with isopropyl alcohol on a lint free cloth Be careful not to drop anything into your fax machine 4 Close the top cover Press down on both sides of the top cover until it clicks White Bar Glass Strip ...

Страница 103: ... lifting the lever on the right side of the top cover 2 Remove the print cartridge containing the used ribbon and set it upside down with the blue gear in the upper left corner Be careful not to cut yourself on the sharp edges of the metal part shown in the illustration Sharp Edge Blue Gear ...

Страница 104: ...the lower roll 4 Slide the white elastic off the new refill rolls and set them down with the full roll in the lower position The ribbon s shiny side is facing down 5 Remove the white gear and spools from the ends of the used cardboard cores Then insert them into the same positions in the new cores Blue Gear Used Ribbon Upper White Spool Cartridge Lower White Spool White Gear White Gear White Spool...

Страница 105: ...sert the lower roll into the cartridge holders 2 Slip the upper left cardboard core onto the blue gear of the cartridge and insert the upper roll into the cartridge holders 7 Turn the upper right white spool clockwise to tighten the ribbon as shown White Spool Blue Gear Shiny side is face down ...

Страница 106: ...ROUTINE MAINTENANCE 12 13 8 Turn the cartridge over and re install it in your machine Insert the recessed first and place the cartridge into its four holders 9 Press down on both sides of the top cover to close it securely ...

Страница 107: ...The special tones beeps sent by fax machines during automatic transmission to tell the receiving machine that they are from a fax machine Communication error or Comm Error An error during fax sending or receiving usually caused by line noise or static Contrast Setting to compensate for dark or light documents by lightening dark documents or darkening light documents Cover Page Prints a page at the...

Страница 108: ...peed Dial numbers that are stored as One Touch and or Speed Dial number for Broadcasting Help list A printout of the complete Menu that you can use to program your machine when you do not have the User s Guide with you LCD liquid crystal display The display screen on the fax machine that shows interactive messages during On Screen Programming and shows the date and time when the machine is idle Ma...

Страница 109: ...and Photo Ring Delay The number of rings before the fax machine answers in FAX ONLY and FAX TEL modes Search An electronic alphabetical listing of stored One Touch Speed Dial and Group numbers Speed Dial A pre programmed number for easy dialing You must press the Search Speed Dial key and then two digit code to start the dialing process Standard resolution 203 x 98 dpi It is used for regular size ...

Страница 110: ...play 16 characters x 1 Line Operating Environment 50 95 F 10 35 C Best Print Quality 68 91 F 20 33 C Power Source 120V AC 50 60 Hz USA and Canadian version only Power Consumption Standby under 5 watts Operating under 170 watts Dimensions 13 1 W x 11 9 D x 11 1 H inch 334 W x 301 D x 281 H mm with paper tray and paper wire extension Weight 7 5 lb 3 4 kg with components Enlarge Reduce 50 to 150 50 7...

Страница 111: ...ling Types Standard Sequential Contrast Control Automatic Super Light Super Dark manual setting Resolution Horizontal 203 dot inch 8 dot mm Vertical Standard 98 line inch 3 85 line mm Fine Photo 196 line inch 7 7 line mm Superfine Photo copy 392 line inch 15 4 line mm One Touch Dial 4 stations Speed Dial 100 stations Groups Up to 4 groups Broadcasting Up to 104 locations Automatic Redial One time ...

Страница 112: ...6 6 Fax Forwarding 8 4 Paging 8 4 while scanning a fax 6 6 Cleaning 12 6 scanner 12 9 Connecting external TAD 1 9 external telephone 1 8 Control panel overview 1 4 Copy multiple 10 2 operations 10 1 reduce enlarge 10 2 Resolution 10 1 10 2 single 10 1 10 2 sort 10 2 specifications S 1 Cover Page 6 7 to 6 9 Credit card numbers 7 6 Custom telephone features 1 14 12 5 D Date and Time 4 1 Delayed Fax ...

Страница 113: ...specifications S 2 FAX TEL mode 5 1 answering at extension phones 5 5 double ringing voice calls 5 3 Easy Receive 5 3 Fax Receive Code 5 6 receiving faxes 5 5 setting F T Ring Time 5 3 setting Ring Delay 5 2 Telephone Answer Code 5 5 FCC notices 11 1 G Gray scale S 2 Groups setting up 7 4 H Handset volume 4 5 Hearing aid compatible 11 1 HELP 3 1 9 2 Hold 7 7 I International calls 6 10 Interrupting...

Страница 114: ...nds 8 4 getting your faxes 8 5 Reports 9 2 Fax Journal 9 2 Journal Period 9 1 Memory Status 9 2 Quick Dial List 9 2 Transmission Verification 9 1 User Settings 9 2 Resolution fax Standard Fine SuperFine Photo S 2 for next fax only 6 5 Ring Delay setting 5 2 S Safety instructions vii 11 4 Setup Date and Time 4 1 Station ID fax header 4 2 Shipping the machine 12 8 Speed Dial 1 4 changing 7 3 dialing...

Страница 115: ...I 4 INDEX U User Settings List 9 2 V Volume setting beeper 4 3 handset 4 4 4 5 ring 4 5 speaker 4 4 W Warranties iii Canada vi Notice Disclaimer iii USA iv World Wide Web i ...

Страница 116: ... Access Code 1 Dial your fax number from a telephone or fax machine using touch tone When your fax machine answers immediately enter your Remote Access Code 3 digits followed by Your Fax machine signals the kinds of messages received 1 long beep Fax messages No beeps No messages After 2 short beeps enter a command Press 9 0 to reset your fax machine when you finish Hang up 2 3 4 5 6 1 4 Press 9 7 ...

Страница 117: ... then to Retrieve all faxes press 2 then enter the number of remote fax machine followed by After the beep hang up and wait Erase all fax messages press 3 Changing Remote Access Code 1 2 Enter a three digit number from 000 to 999 The cannot be changed 3 Press Menu Set 4 Press Stop Exit Remote Commands C HANGE P AGING F AX F ORWARDING S ETTING Press 9 5 then to Turn feature OFF press 1 Select Fax F...

Страница 118: ...ifications NOTICE The Ringer Equivalence Number is an indication of the maximum number of devices allowed to be connected to a telephone interface The termination on an interface may consist of any combination of devices subject only to the requirement that the sum of the RENs of all the devices does not exceed five ...

Страница 119: ...ay not be compatible with the power available in foreign countries Using USA or CANADA models overseas is at your own risk and may void your warranty Brother International Corporation 100 Somerset Corporate Boulevard P O Box 6911 Bridgewater NJ 08807 0911 USA Brother International Corporation Canada Ltd 1 rue Hôtel de Ville Dollard des Ormeaux QC CANADA H9B 3H6 Visit us on the World Wide Web http ...

Отзывы: