3 - 5
Adjustment
Adjus
tme
nt
Adjus
tme
nt
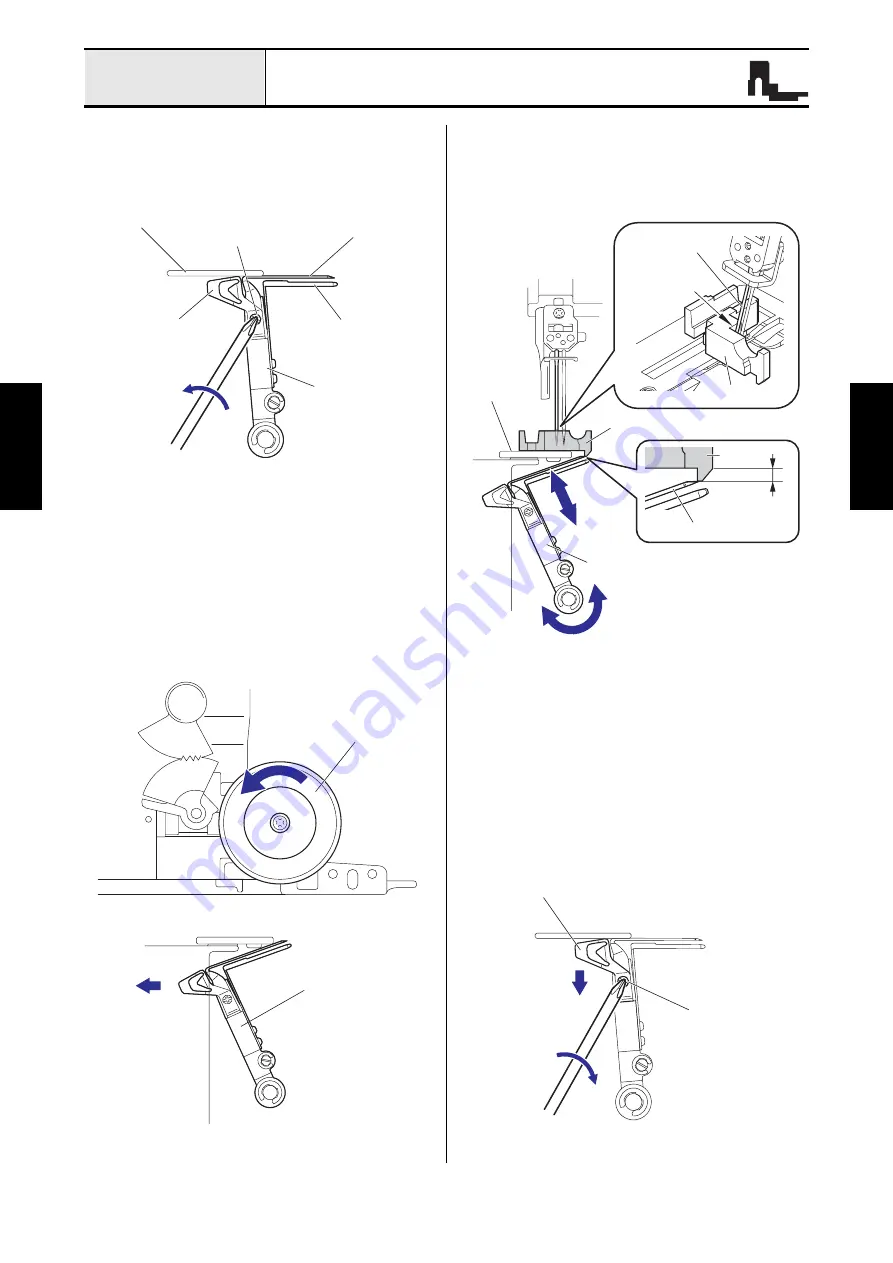
Lower looper position adjustment
1. Loosen the screw (screw, bind M3x6) for the
lower looper.
2. Turn the pulley counterclockwise rotation, and
then the lower looper is the most left position.
3. Set the gauge at the position of the figure, and then
move the UL lever while turning the pulley
counterclockwise rotation, and then adjust the position
of the tip of the gauge and the tip of the lower looper.
4. Fasten the screw (screw, bind M3x6) for the
lower looper.
*Key point
• Check that the UL threader is the lowest
position.
Needle plate
UL threader
Screw, bind M3x6
Lower looper
Movable needle
guard
UL lever
Pulley
UL lever
Lower looper
Gauge
2.7 mm
Contact to
the end face
Needle
Gauge
UL lever
Gauge
Needle
plate
UL threader
Screw, bind M3x6
Содержание 1034DX
Страница 2: ......
Страница 6: ...1 1 1 Main mechanisms 1 2 Driveline 1 3 Outline of Mechanism ...
Страница 32: ...Disassembly 2 21 Disassembly Disassembly Presser foot unit Presser foot unit location diagram ...
Страница 46: ...Disassembly 2 35 Disassembly Disassembly Feed mechanism Feed mechanism location diagram ...
Страница 54: ...Disassembly 2 43 Disassembly Disassembly Driving mechanism Driving mechanism location diagram ...
Страница 60: ...Disassembly 2 49 Disassembly Disassembly Needle bar Needle bar location diagram ...
Страница 87: ...34KH15HF884B02 03 ...


