background image

14

15


PAIR2 LED INDICATOR will turn off 5 seconds after 


pairing. Pressing any button will activate POWER/   


PAIRING LED INDICATOR and the PAIR2 LED    


INDICATOR for 5 seconds. 

6.  After a few seconds, the PAIR2 LED INDICATORS on both 


the 

Main Speaker

 and the 

Auxiliary speaker

 will be solid,  


the Pair2 stereo tone will sound on each speaker, and the  


speakers will be in stereo mode. 

7.  Resume audio from your device. 

8.  To put the speakers in left/right mode, press and hold the 


Pair2 BUTTON on the 

Main speaker

 or the 

Auxiliary  


speaker 

until the Pair2 left and right tones sound on each  


speaker. To put the speakers back into stereo mode, press  


and hold the Pair2 BUTTON on the 

Main speaker


or the 

Auxiliary speaker

 until the Pair2 stereo tones sound  


on each speaker.

9.  To exit out of Pair2 stereo or left/right modes,  


power either speaker off by pressing the POWER/  


PAIRING BUTTON.


Notes: 

• To cancel PAIR2 mode, either press the POWER/ 

 PAIRING BUTTON on the Main Speaker, a tone will sound 

and the speaker will turn off, or wait 2 minutes for the speaker 

to cancel pairing automatically. 

•  The POWER/PAIRING LED INDICATOR and the 

Содержание SpeakOut917703p

Страница 1: ...SpeakOut BLUETOOTH OUTLET SPEAKER ...

Страница 2: ...The exclamation point within an equilateral triangle is intended to alert the user to the presence of important operating and maintenance servicing instructions in the literature accompanying the unit IMPORTANT SAFETY INSTRUCTIONS All of the safety and operating instructions should be read adhered to and followed before the unit is operated 1 TABLE OF CONTENTS Warnings and Cautions 1 FCC Informati...

Страница 3: ...a PROTECTIVE EARTH Connection and having a neutral connection which can be reliable identified 3 The equipment shall be used at maximum 35 degree C ambient temperature WARNING Please refer to the information on exterior front enclosure for electrical and Safety information before installing or operating the apparatus WARNING The mains plug is used as disconnect device the disconnect device shall r...

Страница 4: ...ent that radiates heat 6 Never block the air openings of the unit with materials such as clothing plastic bags or papers or place it on a soft surface such as a bed or couch where the air openings may be blocked 7 Do not overload the electrical outlet Use only the power source as indicated 8 Never operate this unit if it has a damaged plug if it is not working properly or if it has been dropped or...

Страница 5: ... this equipment does cause harmful interference to radio or television reception which can be determined by turning the equipment off and on the user is encouraged to try to correct the interference by one or more of the following measures 6 7 Reorient or relocate the receiving antenna Increase the distance between the equipment and receiver Connect the equipment to an outlet on a circuit differen...

Страница 6: ...Indicator 9 10 7 1 3 4 5 6 2 11 8 SETTING UP THE SPEAKER 1 Plug the speaker into an electrical wall outlet and rotate speaker to desired position 2 Remove the AC PLUG COVER to use the AC PLUG PASS THROUGH USING THE NIGHT LIGHT 1 Press the NIGHT LIGHT BUTTON to turn the Night Light on 2 Press the NIGHT LIGHT BUTTON to turn the Night Light off Note The Night Light can be used when the speaker is pow...

Страница 7: ...r details if necessary 2 Press the POWER PAIRING BUTTON The POWER PAIRING LED INDICATOR will turn on and the power on tone will sound 3 Press and hold the POWER PAIRING BUTTON until the POWER PAIRING LED INDICATOR starts flashing to put the speaker in pairing mode 4 Select SpeakOut on your device If prompted use 0000 as a PIN for the pairing code The speaker will wait for a connection in pairing m...

Страница 8: ...a Pair2 connection for up to 2 minutes 4 Press and hold the Pair2 BUTTON on the Auxiliary speaker until the PAIR2 LED INDICATOR starts flashing on the Auxiliary speaker 5 Release the Pair2 BUTTON on the Auxiliary speaker USING Pair2 FOR STEREO OR LEFT RIGHT SOUND LISTENING TO AUDIO 1 Press the POWER PAIRING BUTTON The POWER PAIRING LED INDICATOR will turn on and the power on tone will sound 2 The ...

Страница 9: ...and hold the Pair2 BUTTON on the Main speaker or the Auxiliary speaker until the Pair2 left and right tones sound on each speaker To put the speakers back into stereo mode press and hold the Pair2 BUTTON on the Main speaker or the Auxiliary speaker until the Pair2 stereo tones sound on each speaker 9 To exit out of Pair2 stereo or left right modes power either speaker off by pressing the POWER PAI...

Страница 10: ...Watts Frequency Response 100Hz 20KHz Compatibility Bluetooth 2 0 or above with A2DP AVRCP Weight Approx 242 grams Dimensions 5 1 x 2 4 x 3 1 The Bluetooth word mark and logos are registered trademarks owned by Bluetooth SIG Inc and any use of such marks by Brookstone is under license Brookstone 2015 CARE AND MAINTENANCE To clean wipe the speaker with a soft dry cloth ...

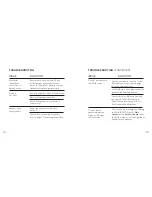
Страница 11: ...ary for optimal performance TROUBLESHOOTING Audio is not clear Speaker does not play audio Can not put speakers into Pair2 mode Confirm your device is paired to the Main speaker Please refer to page 10 for pairing instructions Confirm there is not a previous device paired to the Auxiliary speaker Confirm both the Main and Auxiliary speaker are in Pair2 connection mode Please refer to page 13 for P...

Страница 12: ...one that can be identified by the Brookstone trademark trade name or logo affixed to them or their packaging The Limited Warranty does not apply to any non Brookstone products Manufacturers or suppliers other than Brookstone may provide their own warranties to the purchaser but Brookstone in so far as permitted by law provides these products as is This warranty does not apply to a damage caused by...

Страница 13: ...917703 917725 Find thousands more great ideas online Merrimack New Hampshire USA 03054 800 846 3000 Brookstone com ...

Отзывы: