


Brocade DCX 8510-4 Backbone QuickStart Guide
19 of 24
Publication Number: 53-1002178-01
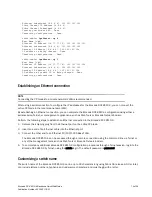
Ethernet Subnetmask [0.0.0.0]: 123.123.123.123
Fibre Channel IP Address [0.0.0.0]:
Fibre Channel Subnetmask [0.0.0.0]:
Issuing gratuitous ARP...Done.
Committing configuration...Done.
swDir:admin>
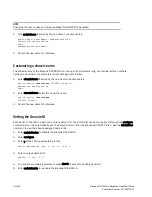
ipaddrset -cp 0
Host Name [cp0]:
Ethernet IP Address [10.77.77.75]: 123.123.123.121
Ethernet Subnetmask [0.0.0.0]: 123.123.123.123
Gateway IP Address [0.0.0.0]: 123.123.123.124
IP address is being changed...Done.
Committing configuration...Done.
swDir:admin>
ipaddrset -cp 1
Host Name [cp1]:
Ethernet IP Address [10.77.77.74]: 123.123.123.122
Ethernet Subnetmask [0.0.0.0]: 123.123.123.123
Gateway IP Address [0.0.0.0]: 123.123.123.124
IP address of remote CP is being changed...Done.
Committing configuration...Done.
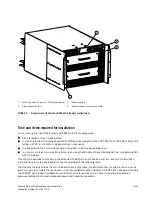
Establishing an Ethernet connection
NOTE
Connecting the CP blades to a private network/VLAN is recommended.
After using a serial connection to configure the IP addresses for the Brocade DCX 8510-4, you can connect the
active CP blade to the local area network (LAN).
By establishing an Ethernet connection, you can complete the Brocade DCX 8510-4 configuration using either a
serial session, Telnet, or management applications, such as Web Tools or Brocade Network Advisor.
Perform the following steps to establish an Ethernet connection to the Brocade DCX 8510-4.
1. Remove the shipping plug from the Ethernet port on the active CP blade.
2. Insert one end of an Ethernet cable into the Ethernet port.
3. Connect the other end to an Ethernet 10/100/1000 BaseT LAN.
The Brocade DCX 8510-4 can be accessed through a remote connection using the command line via Telnet or
any of the management tools, such as Web Tools or Brocade Network Advisor.
4. To complete any additional Brocade DCX 8510-4 configuration procedures through a Telnet session, log in to the
Brocade DCX 8510-4 by Telnet, using the admin login. The default password is password.
Customizing a switch name
The switch name of the Brocade DCX 8510-4 can be up to 30 characters long using Fabric OS release 6.3.0 or later;
can include letters, numbers, hyphens, and underscore characters; and must begin with a letter.