


12 of 24
Brocade DCX 8510-4 Backbone QuickStart Guide
Publication Number: 53-1002178-01
1. Connect the two AC power cords to the two power supplies.
2. Connect the power cords to a power source with voltage of 200 to 240 VAC, 47 to 63 Hz or optionally to a power
source with voltage of 110 to 120 VAC, 47 to 63 Hz. If using any application blades in the chassis, the 200 to
240 VAC option is necessary in order to achieve power supply redundancy.
ATTENTION
Use of the high-voltage line (200 to 240 VAC) is highly recommended because of better power-conversion
efficiency.
For a fully-loaded DCX 8510-4 or DCX-4S, 200 to 240 VAC is required for high availability (ability to hot swap a
failed power supply without affecting system operation.
3. Turn the AC power switches on the power supplies to
I
. The AC power switches light green when switched on and
power is supplied.
4. The Brocade DCX 8510-4 performs a power-on self-test (POST) each time it is powered on. POST takes
approximately 10 minutes and is complete when the indicator light activity displays the operational state.
You can bypass POST by using the fastBoot command. You can also disable POST for successive reboots on the
Brocade DCX 8510-4 using the diagDisablePost command.
ATTENTION
Do not connect the switch to the network until the IP addresses are configured.
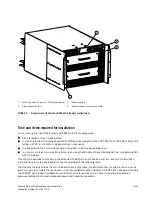
Managing cables
The vertical cable management fingers are attached to the rack to either side of the chassis door and allow for
simple cable management. The fingers can be installed without service disruption.
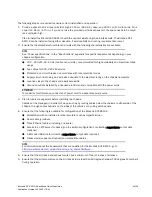
Route the cables along the front of the blades to keep LEDs visible. Leave at least one meter of slack for each fiber
optic cable to provide room to remove and replace blades.
ATTENTION
The minimum bend radius for a 50 micron cable is 2 in. under full tensile load and 1.2 in. with no tensile load.
Cables can be organized and managed in a variety of ways, for example, using cable channels on the sides of the
cabinet or patch panels to minimize cable management. Following is a list of recommendations:
NOTE
You should not use tie wraps with optical cables because they are easily overtightened and can damage the optic
fibers.
•
Plan for rack space required for cable management before installing the switch.
•
Leave at least 1 m (3.28 ft) of slack for each port cable. This provides room to remove and replace the
switch, allows for inadvertent movement of the rack, and helps prevent the cables from being bent to less
than the minimum bend radius.
•
If you are using Brocade ISL Trunking, consider grouping cables by trunking groups. The cables used in
trunking groups must meet specific requirements, as described in the
Fabric OS Administrator’s Guide
.
•
For easier maintenance, label the fiber optic cables and record the devices to which they are connected.
•
Keep LEDs visible by routing port cables and other cables away from the LEDs.
•
Use Velcro
®
type straps to secure and organize fiber optic cables.