


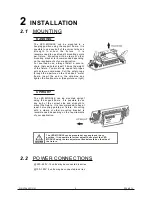


2 INSTALLATION
5
2008.8.13
2.1
MOUNTING
The LED MODULE can be mounted in a
hanging position using the support frame. It is
possible to use any bolt of the correct size and
s t r e n g t h t o m o u n t t h e f i x t u r e . I t i s
recommended to use at least 2 mounting points
per fixture. Mounting with a clamp or other
mounting bracket is recommended depending
on the requirements of your application.
For overhead use, always install a secure-
chain that can hold at least 10 times the weight
of the fixture. You must only use safety-ropes
with screw-on carabines. Pull the safety-rope
through the aperture on the the base's metal
frame. Insert the end in the carabine and
tighten the fixation screw. (See picture on right)
HANGING
UPRIGHT
The LED MODULE can be mounted upright
using the support frame. It is possible to use
any bolt of the correct size and strength to
mount the fixture. It is recommended to use at
least 2 mounting points per fixture. Mounting
with a clamp or other mounting bracket is
recommended depending on the requirements
of your application.
The LED MODULE can be mounted at any angle and in any
position. It is possible to further adjust the angle of the LED
MODULE using the two adjustment knobs located on the side of
the fixture.
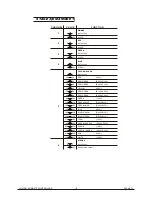
2.2
POWER CONNECTIONS
2
INSTALLATION
UPRIGHT
@ 220~240V: 15 units may be connected in series
@100~120V: 8 units may be connected in series
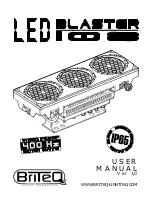
Содержание LED Blaster 108
Страница 1: ...USER MANUAL Ver 1 0 WWW BRITEQ LIGHTING COM...
Страница 2: ......


