5
Assembly
WARNING
Before beginning any service work turn off the PTO, set
the parking brake, turn off the ignition, and disconnect
the spark plug wire(s).
Note: All hardware should be fully tightened using the
appropriate tools unless specified.
Note: Fold the seat forward for the entire assembly
process.
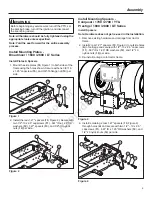
Install Mounting Plates -
Broadmoor / 1600 / 2600 / LT Series
Install Plates & Spacers
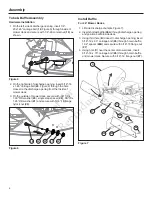
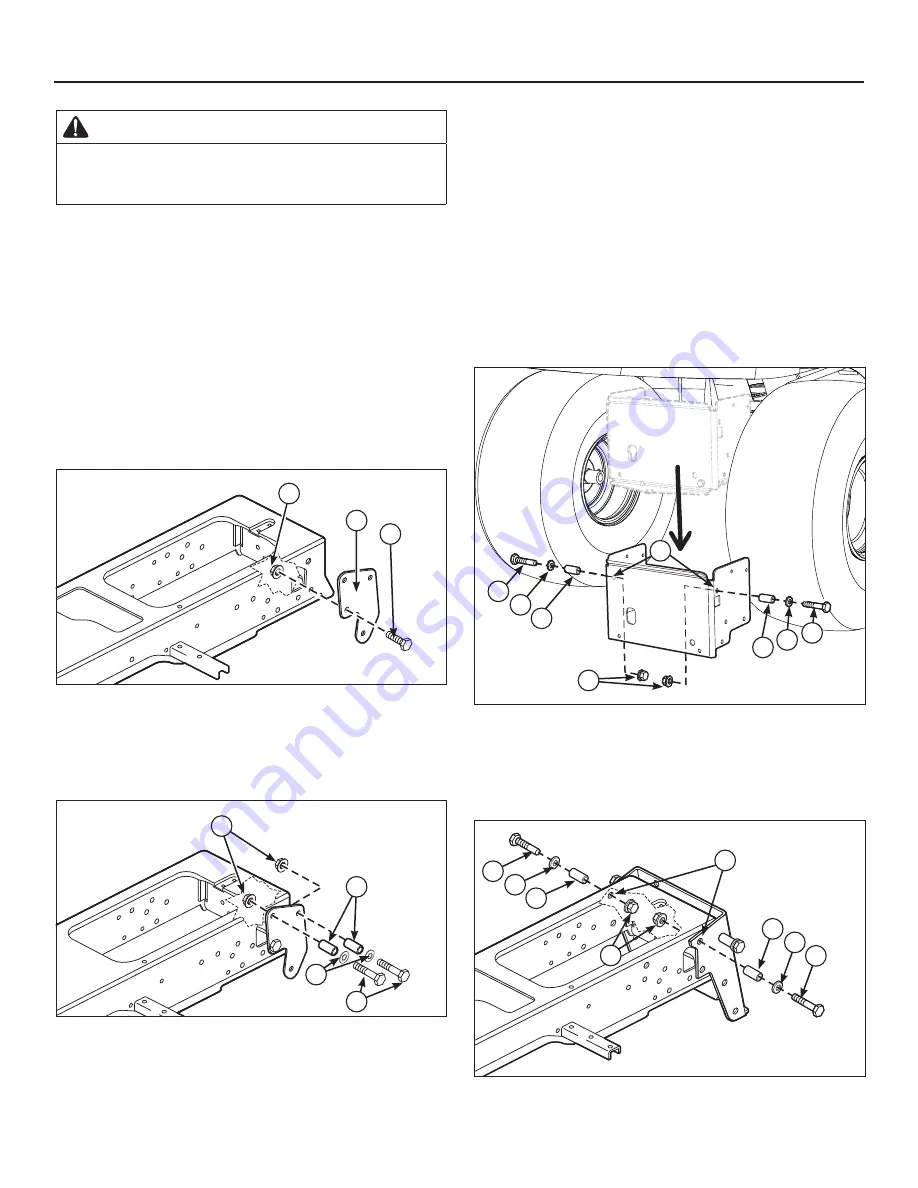
1. Mount the side plates (
16
, Figure 1) to both sides of the
frame using the holes shown. Secure with one 3/8”-16
x 1.25” capscrew (
15
), and 3/8”-16 flange nut (
10
) per
side.
10
16
15
Figure 1
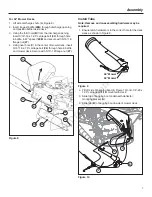
2. Install the rear 1.27” spacers (
13
, Figure 2). Secure with
two 1/2”-13 x 2.5” capscrews (
11
), .561” ID x 1.25” OD
washers (
12
), 1.27” spacers (
13
), and 1/2”-13 nylock
nuts (
14
) per side.
14
13
11
12
Figure 2
Install Mounting Spacers -
Conquest / 1700 / 2700 / YT &
Prestige / 1800 / 2800 / GT Series
Install Spacers
Note: Hardware does not get re-used in the installation.
1. Remove existing hardware and carriage from tractor
frame.
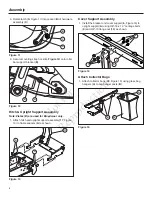
2. Install 2 rear 1.27” spacers (
13
, Figure 3) to outside holes
(
A
) of carriage and secure with 1/2” -13 x 2.5” capscrews
(
11
), .561” ID x 1.25” OD washers (
12
), and 1/2”-13
nylock nuts (
14
) per side.
3. Re-install carriage onto tractor frame.
14
11
12
13
A
13 12
11
Figure 3
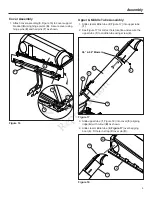
4. Install remaining 2 rear 1.27” spacers (
13
, Figure 4)
through holes (
A
) and secure with two 1/2” – 13 x 2.5”
capscrews (
11
), .561” ID x 1.25” OD washers (
12
), and
1/2”-13 nylock nuts (
14
) per side.
A
11
12
13
14
13
12
11
Figure 4
No
t fo
r
Rep
rod
uct
ion
Содержание 1695710
Страница 13: ...13 Notes N o t f o r R e p r o d u c t i o n ...
Страница 14: ...14 Notes N o t f o r R e p r o d u c t i o n ...
Страница 15: ...15 N o t f o r R e p r o d u c t i o n ...


