8
M7 Software Upgrade Installation Instructions
If you received this new V2 as an upgrade for your M7, installation is quite simple and only requires a few simple tools to
install.
What you will need:
•
#1 Phillips head screw driver
•
Optional Ground Strap ( available at most any electronics supply like Radio Shack, RS etc)
•
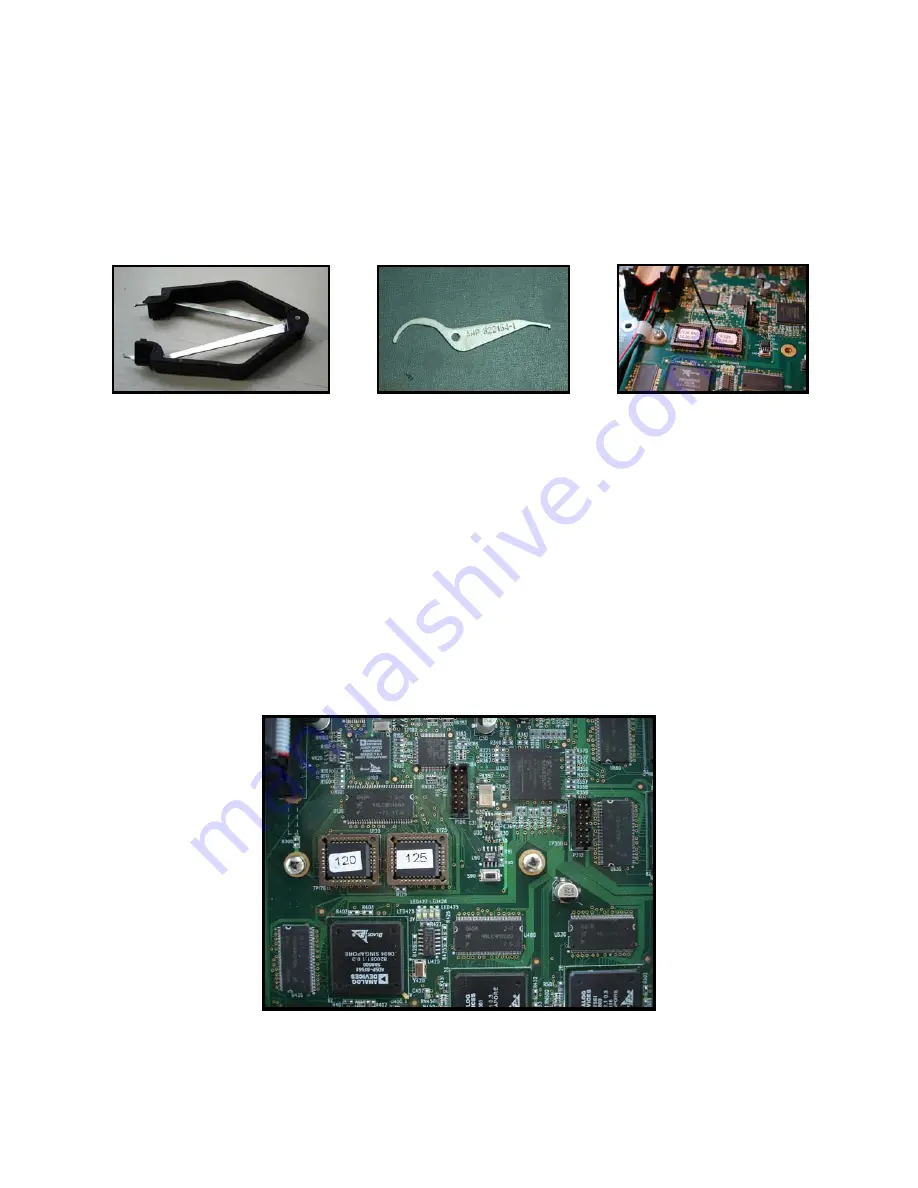
PLCC 32 memory removal tool, as pictured below (available at most any electronics supply like Radio Shack, RS
etc) or (as provided with the upgrade kit), a small hex key pictured below.
or
or
Performing the upgrade:
1.
Power on the M7 and press program and load a preset from one of the standard presets, and leave the unit in program
not edit. There are some new edit parameters and this will correct for any display errors that can occur if the unit is left in
EDIT. If you forget to do this just load a new preset after installing the new software before editing.
2.
Power off, and disconnect all audio and AC mains! As you will be opening the M7 you must remove the AC power to
protect against accidental shock and or component damage.
3.
Remove the top cover by removing the fasteners with the #1 Phillips screw driver. There are 12 screws, 3 on the top
front, 2 on the right side, 3 on the left side, and 4 across the back side.
4.
Ground yourself! You must take care, when removing / installing the flash parts of static discharge.
If you have a ground strap attach it to your wrist and to the M7 chassis. If you do not have one, be sure to have one
hand on the chassis, while handling the parts, so that you are grounded. This will prevent static discharge of the parts.
5.
Remove the existing parts using the removal tool. There are 2 PLCC-32 Flash Memory chips installed on the main
digital PC board. They are labeled U120 and U125 as pictured below. The tool will grip under the opposite corners of
the chip, and then carefully pull them out; using a slight rocking motion will help.
Note: If you can not find a tool as shown above, or one is not provided in your upgrade kit, a very small screw driver or
pointed object can be used to pry them out. Care must be taken when using this technique and you must carefully pry up
under each corner, a bit at a time, moving from one side to the other until it comes free, and then remove it.


