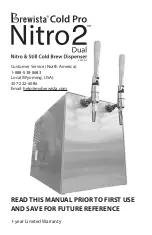
BREWISTA Cold Pro Nitro 2 Dual Скачать руководство пользователя страница 7

7

• 

Connect the intake line tubing (13) to your cold brew container such as the 

Brewista Cold Pro 2™. If your intake line is connected to a keg, be sure the 

system can draw air or is fed with inert gas when tapping starts and coffee is 

dispensed.

For use with the included Bag in Box (BiB) system:

• 

Connect the BiB Adaptor (12) to your BiB bag of coffee or tea. Lift the collet of 

your BiB Adaptor and place it on comfortably on the nozzle of the BiB bag. 

• 

Note that the nozzle must be facing the direction of the tube as that will be 

the flow of the liquid. Turn the screw at the far side of the BiB Adaptor so that 

it pierces the nozzle and is securely in place.

• 

Connect the BiB adaptor to the Still Cold Brew Inlet (5) or Nitro Cold Brew Inlet 

(6) of your Cold Pro Nitro 2 Dual™ using the short length of tubing attached to 

it.


Use of the provided BiB system included with your Cold Pro Nitro 2 

Dual™ is not required.  You can use your own BiB bags and adaptors if 

you choose. Simply attach your desired BiB adapter to the intake tube 

and use a corresponding BiB bag with the appropriate nozzle.


If you do not wish to use a BiB system, simply remove the BiB adaptor 

from the end of the intake tube. 

Dispensing your Nitro Cold Brew

1)  Push power button (7) on the bottom of the machine to the “I” (on) position. 
2)  Place a glass under one of the tap-outlet spouts (3) and pull that spout’s tap 

handle (1) forward to about a 90° angle. 

3)  The unit now pumps the coffee from the container and after a short period of 

time, cooled and nitrogenated cold brew coffee flows out of the tap. You may 

need to tap 1-2 glasses until you reach the desired foam level.

4)  To stop dispensing, tilt the tap handle (1) upwards to a vertical position.

Adjustable Settings

• 

Temperature 

The target dispense temperature is set at 36°F / 2°C (+/- 2°F or 1°C) by default. 


The temperature control knob is in the control panel at the side of the 

machine.


To switch the cooling system off, turn the knob to the OFF position. 

Make sure there is an audible clicking sound when turning it off. 


To achieve the coldest temperature, turn the knob to the MAX position.

Содержание Cold Pro Nitro 2 Dual

Страница 1: ...Customer Service North America 1 888 538 8683 Local Wyoming USA 307 222 6086 Email help mybrewista com READ THIS MANUAL PRIOR TO FIRST USE AND SAVE FOR FUTURE REFERENCE 1 year Limited Warranty V2PX NS...

Страница 2: ...Avoid contacting moving parts Do not insert objects into rotating parts fan or compressor Prevent dirt dust fibers etc from entering the unit Operate the Cold Pro Nitro 2 Dual in a dust free environm...

Страница 3: ...ppliance must be grounded while in use CAUTION To ensure continued protection against risk of electric shock connect to properly grounded outlets only GROUNDING INSTRUCTIONS In North American markets...

Страница 4: ...evel 8 Higher Cooling Power for High Volume Dispensing 8 Filtration 8 Decomissioning 8 Product Shelf Life 9 Downtimes 9 Cleaning Instructions 9 Maintenance 10 Remove Dust at Condensator Grid 10 Changi...

Страница 5: ...Cold Brew Inlet 7 Power Button 8 Non slip Feet 9 Power Cord 10 Air Intake Vent 11 Control Panel Cover protects Temperature Control and Gas Level Control 12 Bag in Box Adaptors 13 Intake Line 2 0 m wi...

Страница 6: ...3 Assemble the tap handles 1 by screwing each on at the top of the dispenser s spout component 2 and 3 4 Ensure the power button 7 at the bottom of the machine is switched off If the red light inside...

Страница 7: ...ors if you choose Simply attach your desired BiB adapter to the intake tube and use a corresponding BiB bag with the appropriate nozzle If you do not wish to use a BiB system simply remove the BiB ada...

Страница 8: ...ed in the intake line to prevent damage to the interior components of your Cold Pro Nitro 2 Dual Thick liquids risk slowing down the liquid pump inside the machine Decommissioning Before putting the d...

Страница 9: ...ntling parts 2 Unscrew spout 3 and rinse it with fresh water Use a brush if needed to remove any particles in the strainer Reassemble tap parts 1 2 and 3 3 Disconnect the intake filter 15 and unscrew...

Страница 10: ...arts depends on the specific system being used Brewista recommends checking these connections about once a month to ensure proper system function Other Maintenance and Repairs In case of failure probl...

Страница 11: ...system causes air leaks that need to be removed Dispensed coffee is not cold enough No electrical power or temperature control is turned off Check the dispenser s electrical connection If the air com...

Страница 12: ...e Filter adapter 15 in the intake line is clogged Check to see if the filter strainers are clogged and clean per instructions on page 9 of this manual if needed Air compressor is turned off or has no...

Страница 13: ...ns of this manual page 9 Check to see if there is a blockage 2 Test to see if the dispenser pours 3 If not there may be a bigger blockage in the liquid pump You will need to unscrew the spout 4 Remove...

Страница 14: ...quality or repair attempts by non authorized persons are not covered by the warranty The same applies for failure to comply with the use of consumables e g cleaning and decalcifying agents that do no...

Страница 15: ...e unit in water or any other liquid This may cause electric shock or damage the appliance TECHNICAL DATA For countries with voltage ranging from 110 127V Rated voltage 115 V 60 Hz Rated current 3 2A R...

Страница 16: ...1133 W 27th Street Cheyenne WY 82001 USA www mybrewista com Toll Free in North America 888 538 8683 Local 307 222 6086 V2PX NS...

Отзывы: