background image

Document # 101522   0608   REV A   ER 784 

Leveling the table

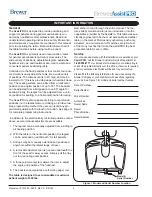
A leveling screw pad (Figure 5) is located in six places 

under the table’s base. Adjust the six leveling pads to 

achieve a solid, level installation.

Installing the power Cord

 1.  Remove the power cord from the shipping box.

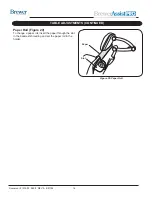
 2.  Insert the plug end of the power cord into the recep-

tacle on the table (Figure 6). Make sure the plug end 

shape is correctly oriented to the receptacle shape.

Installing the foot Control

 1.  Remove the foot control from the shipping box.

 2.  Insert the end of the cord into the foot control recep-

tacle on the table (Figure 6). Make sure the tab on the 

cord plug is aligned with the groove in the receptacle, 

and the plug is fully seated.

3. Thread the locking collar onto the receptacle

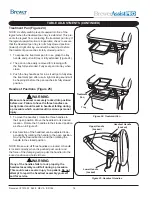
4.  Make sure the on/off switch located on the backrest 

shroud is turned to the “on” position. See figure 7.

5. Make sure both Safety On/Off Switches are on (lighted).

    See figure 9.

6. Test the foot control for operation.

Figure 5. Leveling Screw Pad (located under table)

Figure 6. Power Cord & Foot Control Cord Receptacles

Figure 7

InStaLLatIOn (COntInUED)

Locking Collar

Receptacle

foot Control/Hand 

pendant On/Off 

switch

Содержание AssistPRO

Страница 1: ...84 Installation Operation Manual Important Information 2 Safety Information 3 Component Identification 3 Specifications 4 Electrical Requirements 4 Installation 5 Operation 8 Table Adjustments 11 Main...

Страница 2: ...e can be tilted from a horizontal position to an angled position of up to 30 The backrest can be adjusted from a flat position to an 85 angle for seating Finally the legrest can be adjusted from a ver...

Страница 3: ...of The Brewer Company is that the equipment is operated and maintained with the safety of the patient and healthcare staff in mind To ensure safe and reliable operation Read and understand all instruc...

Страница 4: ...gainst ingress of water for foot control IPX1 Can accept paper rolls of 18 in x 3 0 in 21 in x 3 0 in Certifications UL6060 1 UL2601 1 IEC60601 1 CAN CSA C22 2 No 601 1 Transport and Storage Condition...

Страница 5: ...hipping skid by sliding it off the front of the skid Be sure to lift at the correct points as indicated in Figure 3 Position the table in the desired room location WARNING The table weighs approximate...

Страница 6: ...control from the shipping box 2 Insert the end of the cord into the foot control recep tacle on the table Figure 6 Make sure the tab on the cord plug is aligned with the groove in the receptacle and t...

Страница 7: ...ord into the hand pendant receptacle on the backrest shroud See figure 8 3 Make sure the tab on the cord plug is aligned with the groove in the receptacle and plug is fully seated 4 Thread the locking...

Страница 8: ...r continuous opera tion If the table is operated continuously causing the control to exceed its allowable operating temperature the table will go into a reduced speed mode If normal opera tion ceases...

Страница 9: ...d result in unwanted motion and possible damage to the table NOTE Each control function will automatically stop mov ing when either the UP or DOWN travel limit is reached If the button is pressed with...

Страница 10: ...ument 101522 0608 REV A ER 784 10 Leg Up Leg Down Tilt Down TiltUp Program Recall 2 Program Recall 4 Back Up Back Down Table Down Table Up Program Recall 1 Program Recall 3 Figure 11 Operation continu...

Страница 11: ...Height Control Table Height Figure 12 The table top can be adjusted to any height between 19 to 40 1 To raise the table depress and hold the Table Up function until the desired height is achieved 2 T...

Страница 12: ...le reduce the amount of tilt or raise the back Figure 14 Tilt Function Figure 13 Adjusting Backrest Backrest Position Control Figure 15 Do Not Allow Headrest to Contact Objects Back Positions Figure 1...

Страница 13: ...ht to blink and a double beep alarm to sound NOTE The legrest mechanism is controlled by an actuator that raises the legrest when activated When lowered the actuator retracts and gravity causes the le...

Страница 14: ...positions 3 Any of the four stored positions can be re pro grammed by following the steps above Note if the treatment pan tray is out the position recall will not work if the pre set position require...

Страница 15: ...rd and rotate the cushion downward to engage the stop Two height positions are provided table adjustments continued Cam positioned in slot Lift up over center NOTE Make sure the legrest cushion is ful...

Страница 16: ...8 REV A ER 784 16 Figure 20 Paper Roll Slot Paper table adjustments continued Paper Roll Figure 20 To change a paper roll insert the paper through the slot in the backrest shrouding and set the paper...

Страница 17: ...rotate outward to desired position 2 When the desired position is achieved lower the stir rup to engage the lateral locking mechanism 3 Check that lateral locking mechanism is engaged by attempting to...

Страница 18: ...re 25 warning Make sure headrest is securely locked into position before use Failure to have the three handles cor rectly locked could result in headrest falling during a procedure which could result...

Страница 19: ...be allowed Products must not be returned without proper written authorization from The Brewer Company Requests for authorization must be in writing and accompanied by the original purchase order The...

Отзывы: