background image

20

care and cleaning

 Always unplug your Gourmet Pie Maker from the mains supply socket before 

cleaning it. 
Never immerse your Gourmet Pie Maker body, mains lead or plug in water or any 

other liquid.
Never use harsh abrasive cleaners or cleaning materials.

Cleaning

1.  Unplug your Gourmet Pie Maker from the mains supply socket.
2.  Allow your Gourmet Pie Maker to cool until it is just warm 

but not hot

. Using a non 

metallic utensil, gently scrape off any food deposits. Give the plates a quick wipe with 

a damp cloth.

3.  Allow your Gourmet Pie Maker to completely cool down.
4.  Wipe the cooking plates with a soft cloth. If this doesn’t remove any cooked-on food, 

reheat your Gourmet Pie Maker for 1-2 minutes, then brush with a little oil or melted 

butter. Allow your Gourmet Pie Maker to stand for five minutes then wipe the plates 

with a damp cloth.

5.  Wash the cutters in warm soapy water. Wipe the exterior of your Gourmet Pie Maker 

with a soft damp cloth or sponge. 

6.  Before using it again, make sure that all parts of your Gourmet Pie Maker are 

completely dry.

Storing

Make sure that your Gourmet Pie Maker has completely cooled down and is clean. Store 

your Gourmet Pie Maker unplugged in its packing box or in a clean, dry place. To prevent 

damage to the mains supply cord, ensure that it is not put under stress where it enters 

your Gourmet Pie Maker. You can store your Gourmet Pie Maker on its side so that it 

takes up less room.

Содержание GOURMET PIE MAKER

Страница 1: ...selection of recipes included ...

Страница 2: ...2 ...

Страница 3: ...ice agent or similarly qualified persons in order to avoid a hazard Never use this appliance for anything other than its intended use This appliance is for household use only Do not use this appliance outdoors Always ensure that hands are dry before handling the plug or switching on the appliance Always use the appliance on a stable secure dry and level surface This appliance must not be placed on...

Страница 4: ...en the light goes out your Gourmet Pie Maker is ready to use 3 Latch Keeps the plates closed during cooking and storage 4 Upper cooking plate 5 Lower cooking plate 6 Lid trimmer pie shaping tool Used to trim the lid pastry and to push the pastry into the lower cooking plate pie moulds 7 Base lid cutter tool Used to cut circles of pastry for the pie base and lid parts ...

Страница 5: ...5 ...

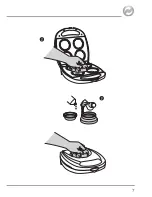
Страница 6: ...er 1 Remove any promotional labels and or stickers from your Gourmet Pie Maker before use 2 Check that the cooking plates are clean and free of dust If necessary wipe them with a damp cloth 3 Wash both pastry cutters in warm soapy water Dry thoroughly 4 Wipe the outside of your Gourmet Pie Maker with a damp cloth Do not immerse the main body of your Gourmet Pie Maker or power cord set in water or ...

Страница 7: ...7 ...

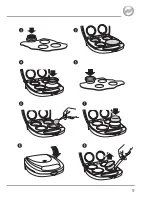
Страница 8: ...your pies 6 Spoon your chosen filling in each pie being careful not to let it over flow the sides of the pie Don t overfill your pie otherwise the lid won t seal properly 7 Place the pastry lids on the pies and use the lid trimming shaping tool as shown to press down and trim the lid pastry Remove any excess pastry from around each pie 8 Brush each pie with either beaten egg for a savoury pie fill...

Страница 9: ...9 ...

Страница 10: ... into a clean dry bowl 3 Quickly work the butter into the flour using your fingers to make a crumbly mixture 4 Slowly add two tablespoons of milk or water and the salt Use a rounded knife to bring the mixture together Add more milk or water if you think it needs it 5 Finally bring the mixture together with your hands to form a dough that leaves the sides of the bowl clean 6 Once the dough is smoot...

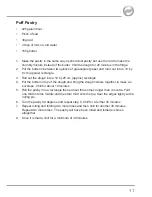
Страница 11: ...x rectangle 4 Put the butter on top of the dough and bring the dough corners together to make an envelope Chill for about 10 minutes 5 Roll the pastry into a rectangle that is about three times longer than it is wide Fold one third into the middle and the other third onto the top Seal the edges lightly with a rolling pin 6 Turn the pastry 90 degrees and repeat step 5 Chill for a further 30 minutes...

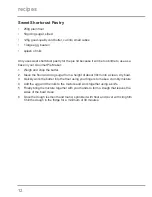
Страница 12: ...2 Sieve the flour and icing sugar from a height of about 30cm into a clean dry bowl 3 Quickly work the butter into the flour using your fingers to make a crumbly mixture 4 Add the egg and the milk to the mixture and work together using a knife 5 Finally bring the mixture together with your hands to form a dough that leaves the sides of the bowl clean 6 Once the dough is smooth and round sprinkle i...

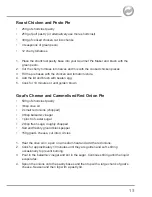
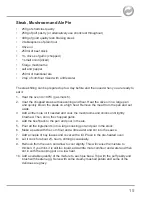
Страница 13: ...until golden brown Goat s Cheese and Caremelised Red Onion Pie 500g of shortcrust pastry 1tbsp olive oil 2 small red onions chopped 4 tbsp balsamic vinegar 1 pinch of caster sugar 2 tbsp fresh sage roughly chopped Salt and freshly ground black pepper 150g goat s cheese cut into 4 circles 1 Heat the olive oil in a pan on a medium heat and add the red onions 2 Cook for approximately 10 minutes until...

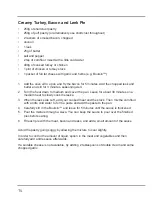
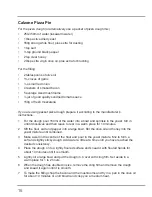
Страница 14: ...bout 30 minutes on a medium heat to slowly cook the leeks 3 When the leeks are soft add your cooked meat and the stock Then mix the cornflour with a little cold water to form a paste and add the paste to the pan 4 Carefully stir in the Boursin and leave for 5 minutes until the sauce is thickened 5 Pour the mixture through a sieve You can keep the sauce to pour over the finished pies before eating ...

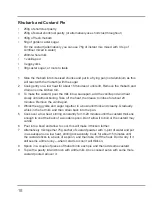
Страница 15: ...et aside 3 Add a little more oil if needed and cook the mushrooms and onions until lightly browned Then stir in the chopped garlic 4 Add the beef back to the pan and pour in the ale 5 Pour all the ingredients in to a large cooking pot and pour in the stock 6 Make a paste with the corn flour and a little water and stir into the sauce 7 Add a couple of bay leaves and cover with a lid Place in the pr...

Страница 16: ...il it dissolves and then leave to rest in a warm place for 10 minutes 2 Sift the flour salt and pepper into a large bowl Stir the olive oil and honey into the yeast mixture until combined 3 Make a well in the centre of the flour and pour in the yeast mixture Mix to form a soft and slightly sticky dough Add water a little at a time until you have reached the desired consistency 4 Place the dough on...

Страница 17: ...hopped 200g of fresh spinach 150g of ricotta cheese 120g of cubed feta cheese 50g of grated parmesan optional When making pies especially sweet ones they will taste better if the pastry is as thin as possible By making sure your pie maker is hot and carefully lifting the pie out when it is fully cooked you should be able to achieve this without breaking the pastry 1 In a pan over medium heat sauté...

Страница 18: ...use for about 20 minutes Remove the vanilla pod 4 Whisk the egg yolks and sugar together in a bowl until thick and creamy Gradually whisk in the hot milk and then strain back into the pan 5 Cook over a low heat stirring constantly for 10 20 minutes until the custard thickens enough to coat the back of a wooden spoon Don t allow it to boil or the custard may curdle 6 Pour into a bowl and allow to c...

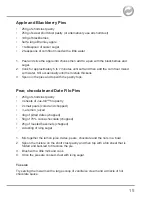
Страница 19: ... the pies and top with the pastry tops Pear chocolate and Date Filo Pies 250g of shortcrust pastry 4 sheets of Jus roll filo pastry 2 small pears cored and chopped a lemon juiced 30g of pitted dates chopped 50g of 70 cocoa chocolate chopped 25g of roasted hazelnuts chopped A dusting of icing sugar 1 Mix together the lemon juice dates pears chocolate and the nuts in a bowl 2 Spoon the mixture on th...

Страница 20: ... If this doesn t remove any cooked on food reheat your Gourmet Pie Maker for 1 2 minutes then brush with a little oil or melted butter Allow your Gourmet Pie Maker to stand for five minutes then wipe the plates with a damp cloth 5 Wash the cutters in warm soapy water Wipe the exterior of your Gourmet Pie Maker with a soft damp cloth or sponge 6 Before using it again make sure that all parts of you...

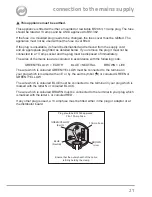
Страница 21: ...nce with the following code GREEN YELLOW EARTH BLUE NEUTRAL BROWN LIVE The wire which is coloured GREEN YELLOW must be connected to the terminal in your plug which is marked with an E or by the earth symbol or coloured GREEN or GREEN YELLOW The wire which is coloured BLUE must be connected to the terminal in your plug which is marked with the letter N or coloured BLACK The wire which is coloured B...

Страница 22: ...liance to the Customer Service Department follow the steps below 1 Pack it carefully preferably in the original carton Ensure the unit is clean 2 Enclose your name and address and quote the model number on all correspondence 3 Give the reason why you are returning it 4 If within the guarantee period state when and where it was purchased and include proof of purchase e g till receipt 5 Send it to o...

Страница 23: ...e misuse abuse repair or alteration by a person other than a person authorised by JCS Europe Faults that occur through improper use damage abuse use with incorrect voltage acts of nature events beyond the control of JCS Europe repair or alteration by a person other than a person authorised by JCS Europe or failure to follow instructions for use are not covered by this guarantee Additionally normal...

Страница 24: ...93282 1 VTP147_Iss_2 10 13 ...

Отзывы: