EN
5
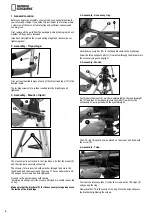
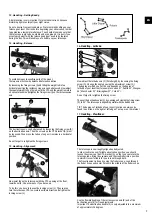
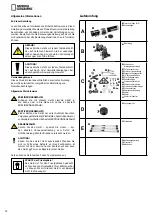
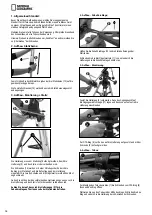
7. Assembly - Viewfinder:
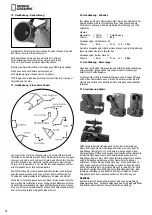
First place the viewfinder scope (2), as indicated, through the finder
holder.
Then gently tighten the adjusting screws (3), so that the telescope
does not fall out.
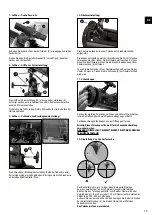
8. Assembly - Flexible handles:
X
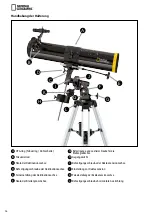
The flexible handles (13) must be attached to the mount (X) in
order to make exact and fine adjustments of the declination and the
rectascension axis easier to use.
Secure the handles, by solidly turning the screws into the notches on
the mount.
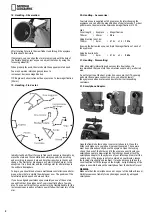
9. Assembly - Screw for latitude adjustment:
X
The screw for latitude adjustment (Pole height) can be found under
the last inlay in the accessory box. Attach the screw as shown in the
illustration (X).
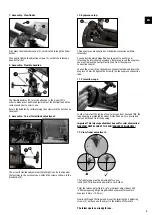
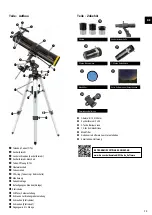
10. Eyepiece setup:
X
Three eyepieces are supplied as standard accessories with this
telescope.
You can decide which magnification you want to use for your
telescope, by interchaning eyepieces. Before you insert the eyepiece,
you must remove the dust-protection-cap from the eyepiece
connection tube (6).
Loosen the screw (X) on the eyepiece connection tube and insert the
eyepiece 30 mm. Retighten the screw (X) on the eyepiece connection
tube.
11. Protection-caps:
In order to protect the inside of your telescope from dust and filth, the
tube opening is protected by a dust protection cap. For observation
remove both caps from the opening.
Important: This telescope should not be used for solar observation.
WARNING! NEVER LOOK AT THE SUN! DANGER OF BLINDNESS!
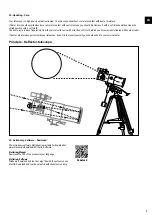
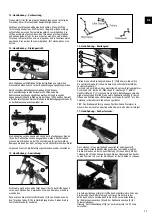
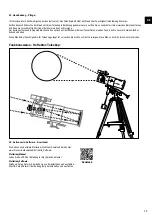
12. View-finder adjustment:
(A)
The finder scope must be adjusted before use:
it and the OTA tube must be parallel to each other.
Point the telescope (picture: A) at a prominent object about 300
- 500m away using a high magnification eyepiece (for example:
eyepiece 8 mm or 12.5 mm).
Now look through the finder and move it by twisting the 6 adjusting
screws (3), until you see the object in the middle of the reticle.
The telescope is now ready for use.


