Niemals mit dem Teleskop in oder in die Nähe der Sonne blicken:
E
rblindungsgEfahr
!
10
Getting Started
Balancing the telescope
To ensure that the telescope is secure and stable on the tripod and moves
smoothly and evenly, it must be balanced. To balance the telescope, open
the RA clamp (33, Fig 1d). When the axis is now free, the telescope rotates
around the RA axis. Later on, you will also open the DEC clamp (17, Fig
1d). When this is then open, the telescope will also rotate around the DEC
axis. The movement of the telescope occurs around these two axes, indi-
vidually or simultaneously. Try to familiarise yourself with these clamps and
observe how the telescope moves around each axis. To find the best pos-
sible balance for your telescope, follow the method described below:
1. Hold the tube tightly so that it does not swing around freely by accident.
Loosen the RA clamp (33, Fig 1d). The tube now moves freely around
the RA axis. Now let the telescope rotate until the counterweight rod is
parallel to the ground.
2. Open the counterweight clamping screw and slide the counterweight
(21, Fig 1d) back and forth on the counterweight rod until the telescope
is in a position in which it does not move in either direction when relea-
sed and is thus in balance. Then tighten the counterweight screw again
so that the counterweight remains in its current position and cannot slip.
3. Then hold the tube again so that it cannot move freely. Then close the
RA clamp (33, Fig 1d) and open the DEC clamp (17, Fig 1d) again. The
telescope is now able to move freely around the DEC axis.
Loosen the tube clamp screws (13, Fig 1a) so that the main tube can
easily slide back and forth in the tube clamps. Now move the tube back
and forth in the tube clamps until it stays in one position without moving
in any particular direction. Then close the DEC clamp (17, Fig 1d) and
retighten the pipe clamp clamping screws. The telescope is now pro-
perly balanced in both axes. The next step is to align the finder scope.
Aligning the viewfinder
The LED viewfinder must be adjusted before use. This means that the
"viewing direction" of the LED viewfinder and the optical tube must be
matched:
1. Remove the dust caps from your telescope.
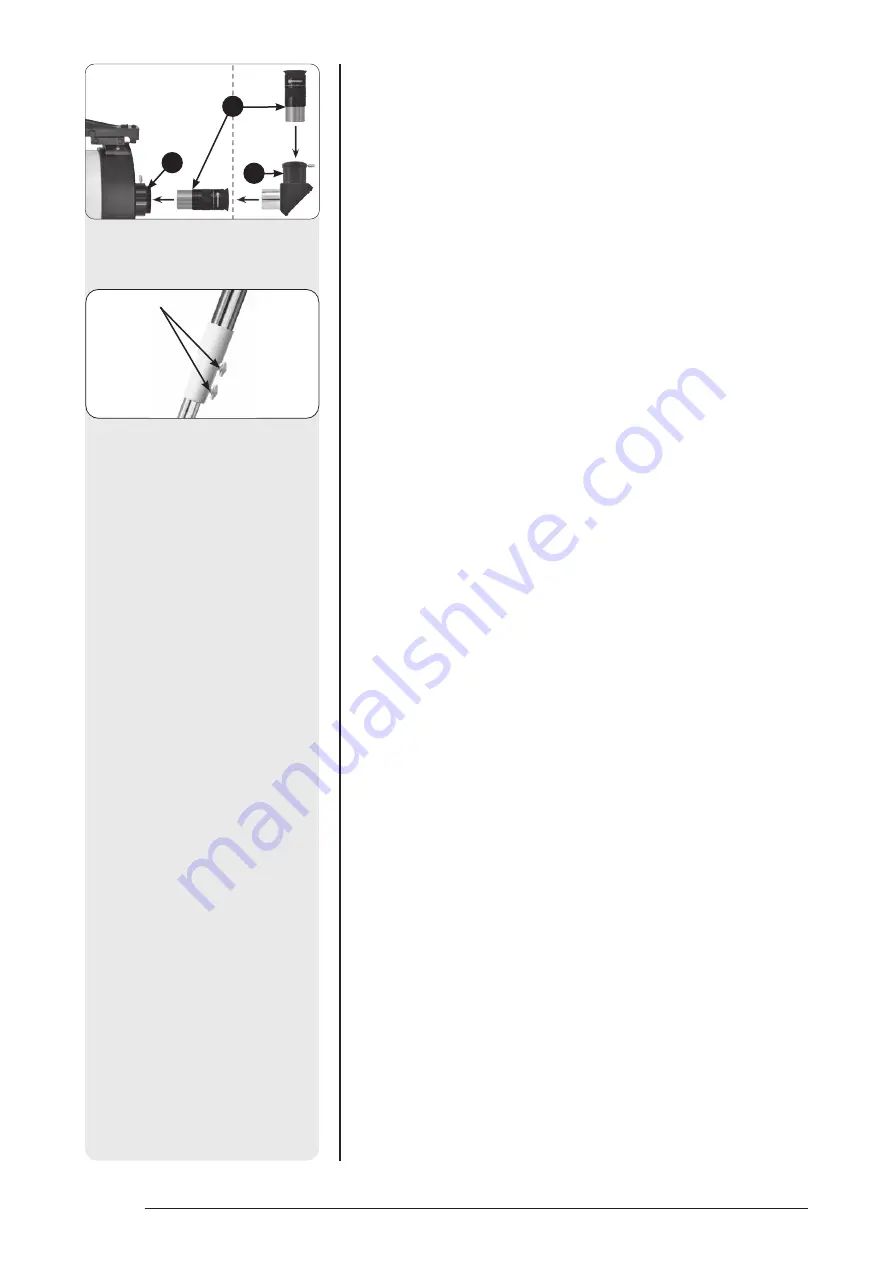
2. If not already done, attach the eyepiece holder (2, Fig 1b) to the screw
thread of the tube end. Then insert the zenith mirror (2a, Fig 1b) and the
eyepiece (3, Fig 1b) into the eyepiece holder. Please read points 11 to 13
in the chapter "Structure".
3. Now look through the LED viewfinder and find an object that is at least
1000m away. Ideally, the red dot of the LED viewfinder should already
be visible as centrally as possible above the observed object when
aiming at it.
4. Open the RA clamp (33, Fig 1d) and the DEC clamp (17, Fig 1d) so that
the telescope moves freely in both axes. Now point the main telescope
at a large, clearly visible fixed land object (e.g. a church spire, a high-
voltage pylon or another prominent fixed point) located at a distance
of at least 1000m and bring it to the centre of the eyepiece of the main
telescope. Focus the image by turning the focusing knob (8, Fig 1b).
Then tighten the RA and DEC clamps again.
5. Now look "straight" through the LED viewfinder and check whether the
targeted object can also be seen here in the centre. If so, then the view-
finder is already adjusted!
If this is not the case, turn the viewfinder adjustment screws (A+B, Fig
13) carefully one after the other until the red dot is exactly in line with
the object you are aiming at (e.g. a tree top).
Check this occasionally with a comparative look through the eyepiece of
the telescope.
Now you are ready to make your first observation.
ATTENTION! DANGER!
NEVER
look at or near the sun! Observing the sun will inevitably lead to
ASSEMBLY
Fig 12 Adjust the height of the tri-
pod legs and tighten the clamping
screws.
Clamping screws
Fig 11 Mounting options for the
optical accessories on the focusing
unit.
A
B
C
Содержание First Light MAK
Страница 1: ...Instruction manual First Light MAK 100 1400 EQ Maksutov telescope Art No 9621802...
Страница 18: ...NOTES...
Страница 19: ...NOTES...


