55
3.4
SETUP THE CONSOLE
Follow the procedure to setup the console connection with sensor(s) and WI-FI.
3.4.1 POWER UP THE DISPLAY CONSOLE
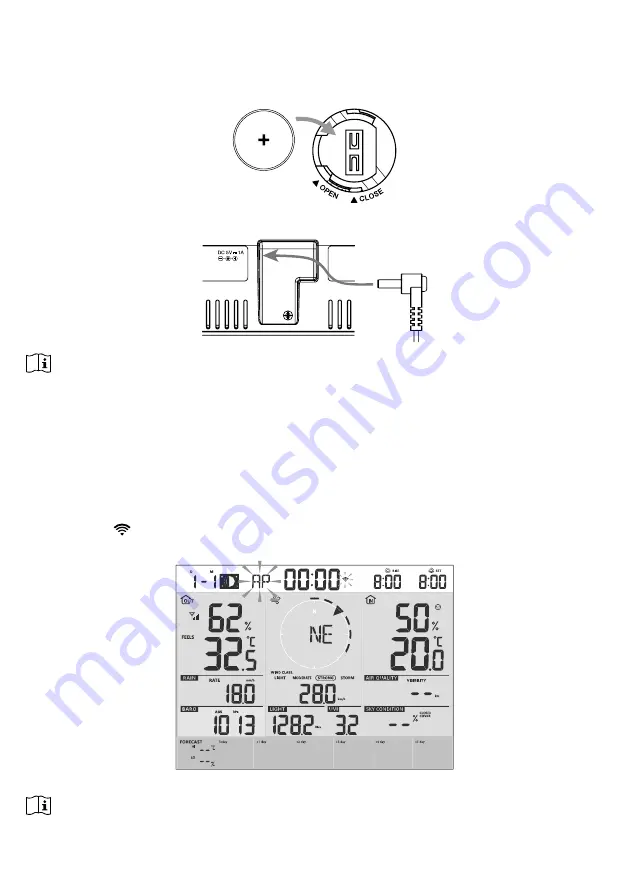
1. Install the back-up CR2032 battery (Optional).
2. Connect the display console power jack to AC power with the adaptor included.
NOTE:
-The backup battery can backup: Time & Date & Max/Min weather records, rainfall records.
-The built-in memory can backup: WI-FI setting, Hemisphere setting, Calibration values, and Sensor ID of
paired sensor(s).
-Please always remove the back-up battery if the device is not going to be used for a while. Please keep in
mind that even when the device is not in use, certain settings, such as the clock, alert settings and records
in its memory, will still drain the back-up battery.
3.4.2 SETUP DISPLAY CONSOLE
1. Once the console power up, all the segments of the LCD will be shown.
2.
When you power up the console for the first time, and the console is not in AP mode (flashing
"AP" and " " icons), press and hold the
[ SENSOR / WI-FI ]
key for 6 seconds to enter AP
mode manually. Follow
section
6
to setup the WI-FI connection.
Start up screen (7-in-1 sensor connected)
NOTE:
If no display appears when power up the console, you can press
[ RESET ]
key by using a
pointed object. If this process still not work, you can remove the backup battery and unplug the
adapter then re-power up the console again.


