background image

4

NOTE:


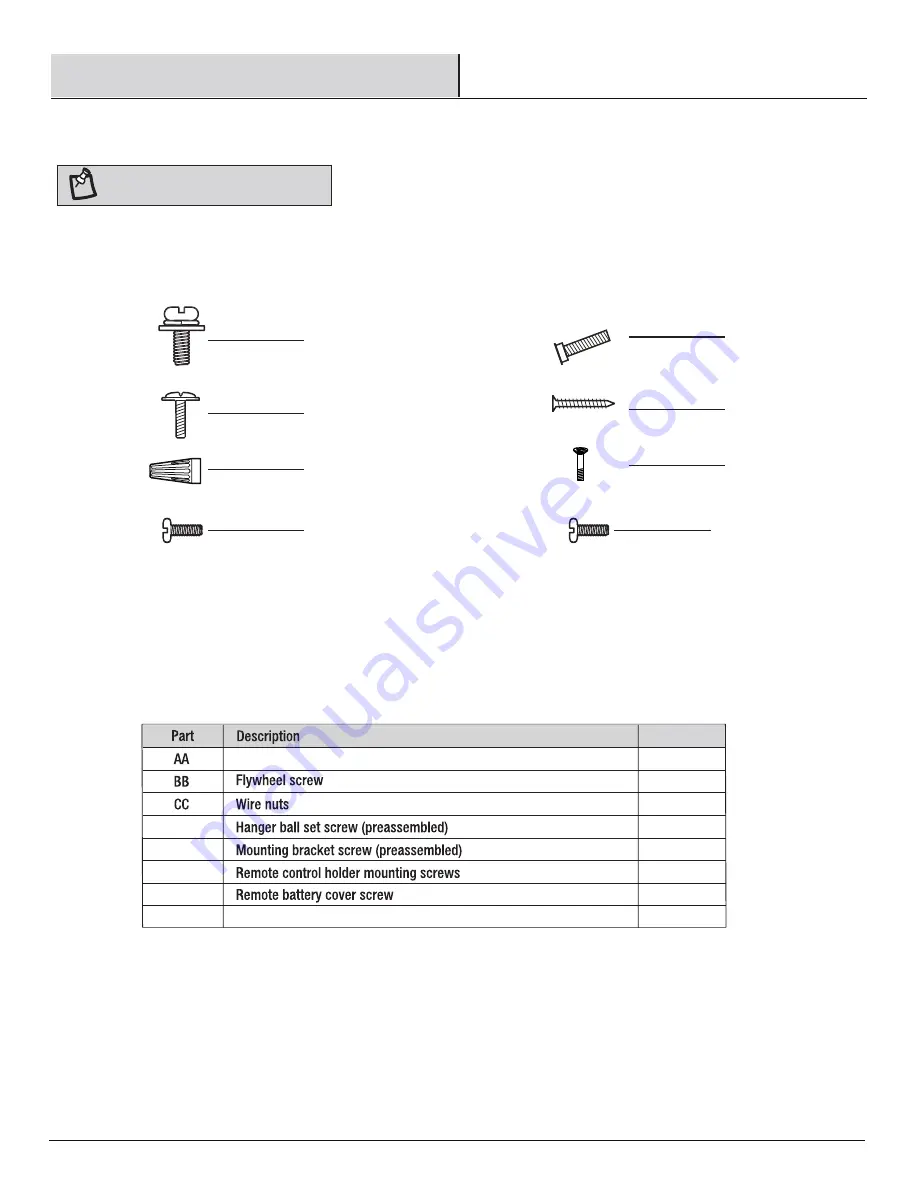
Hardware shown to actual size 

Pre-Installation (continued)

HARDWARE INCLUDED

Quantity

GG

HH

FF

EE

DD

6+1 

spare

6+1 

spare

3

3

3

2

2

1

(preassembled)

Blade screw  (preassembled)

(preassembled)

DD

HH

CC

BB

AA

GG

FF

EE

Light kit screw (preassembled)

Содержание ALAMEDA BF9453L56BKDK

Страница 1: ...USE AND CARE GUIDE Item 0000 000 000 Item 0000 000 000 Model BF9453L56SL Model BF9453L56BKDK ALAMEDA 56 INCH CEILING FAN BREEZISM...

Страница 2: ...ide of the outlet box All setscrews must be checked and retightened where necessary before installation 1 2 3 4 5 6 7 READ AND SAVE THESE INSTRUCTIONS WARNING To reduce the risk of personal injury do...

Страница 3: ...o any part such as by accident misuse improper installation or by affixing any accessories is not covered by this warranty Because of varying climatic conditions this warranty does not cover any chang...

Страница 4: ...to actual size Pre Installation continued HARDWARE INCLUDED Quantity GG HH FF EE DD 6 1 spare 6 1 spare 3 3 3 2 2 1 preassembled Blade screw preassembled preassembled DD HH CC BB AA GG FF EE Light ki...

Страница 5: ...V Battery 1 1 1 1 1 1 Remote control Remote control holder Extension lead wire Receiver Blade Mounting bracket preassembled 3 B C D Part A Quantity Description F E Canopy preassembled 1 1 1 1 Hanger b...

Страница 6: ...1 not included directly to the building structure Use appropriate fasteners and materials not included The outlet box and its bracing must be able to fully support the weight of the moving fan at lea...

Страница 7: ...r assembly H 1 Attaching the mounting bracket to the electrical box Secure the mounting bracket B to the ceiling outlet box with the screws and washers provided with your outlet box WARNING B To reduc...

Страница 8: ...plate screws DD securely Fastening the light kit plate to the fan motor assembly 4 3 Assembly Attaching the Fan Blades Installing the Light Kit 8 A AA X6 A BB DD DD I X6 H H H Attach the fan blades A...

Страница 9: ...nect the light lead wire align the light kit G with the light kit plate I until the screws HH engage to the slots on the light kit G 5 G I I J H H Place the plastic shade J into the light kit plate I...

Страница 10: ...cket Lift the fan motor assembly H into position and place the hanger ball E into the mounting bracket B Rotate the fan motor assembly H until the check groove drops into the registration slot and sea...

Страница 11: ...e wires spread them apart so that the green yellow and white wires are on one side of the outlet box 1 and the black wires are on the other side Carefully tuck the wire connections up into the outlet...

Страница 12: ...g the two mounting bracket screws EE previously removed Tighten the mounting bracket screws EE Assembly Hanging the Fan continued Align the oval shape on the canopy C with canopy cover D Push up the c...

Страница 13: ...l battery If a new or used lithium button coin cell battery is swallowed or enters the body it can cause severe internal burns and can lead to death in as little as 2 hours Always completely secure th...

Страница 14: ...he light on or off Press to increase the desired light level Press to decrease the desired light level 4 Fan reverse button Must be Pushed when the fan is in operation Counterclockwise Direction A dow...

Страница 15: ...r lint free cloth to avoid scratching the finish The plating is sealed with a lacquer to minimize discoloration or tarnishing Optional Apply a light coat of furniture polish to the wood blades Optiona...

Страница 16: ...n and switch wire connections in the switch housing Make sure all motor housing screws are snug Make sure the screws that attach the fan blade arm to the motor hub are tight Make sure wire nut connect...

Страница 17: ...d to try to correct the interference by one or more of the following measures Reorient or relocate the receiving antenna Increase the separation between the equipment and receiver Connect the equipmen...

Страница 18: ...BREEZISM...

Отзывы: