4
Small Weather Shield
-
Installation, Operation & Maintenance Manual Continued
Mounting:
Mount the valve in a location with sufficient clearance
to remove the weather shield cover and actuator.
Before installing the electric actuator, use an adjustable
wrench to manually rotate the valve stem several
times. Rotating the valve stem breaks the torque that
may have built up during long-term storage.
To mount the Small Weather Shield Kits:
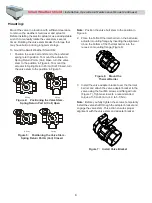
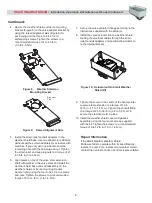
1. Position the valve ball and stem to the preferred
spring return position. To mount the actuator to
Spring Return Port A (Coil) Open, turn the valve
stem to the position in Figure 4. To mount the
actuator to Spring Return Port A (Coil) Closed, turn
the valve stem to the position in Figure 5.
Note:
Position the valve ball stem to the position in
Figure 4.
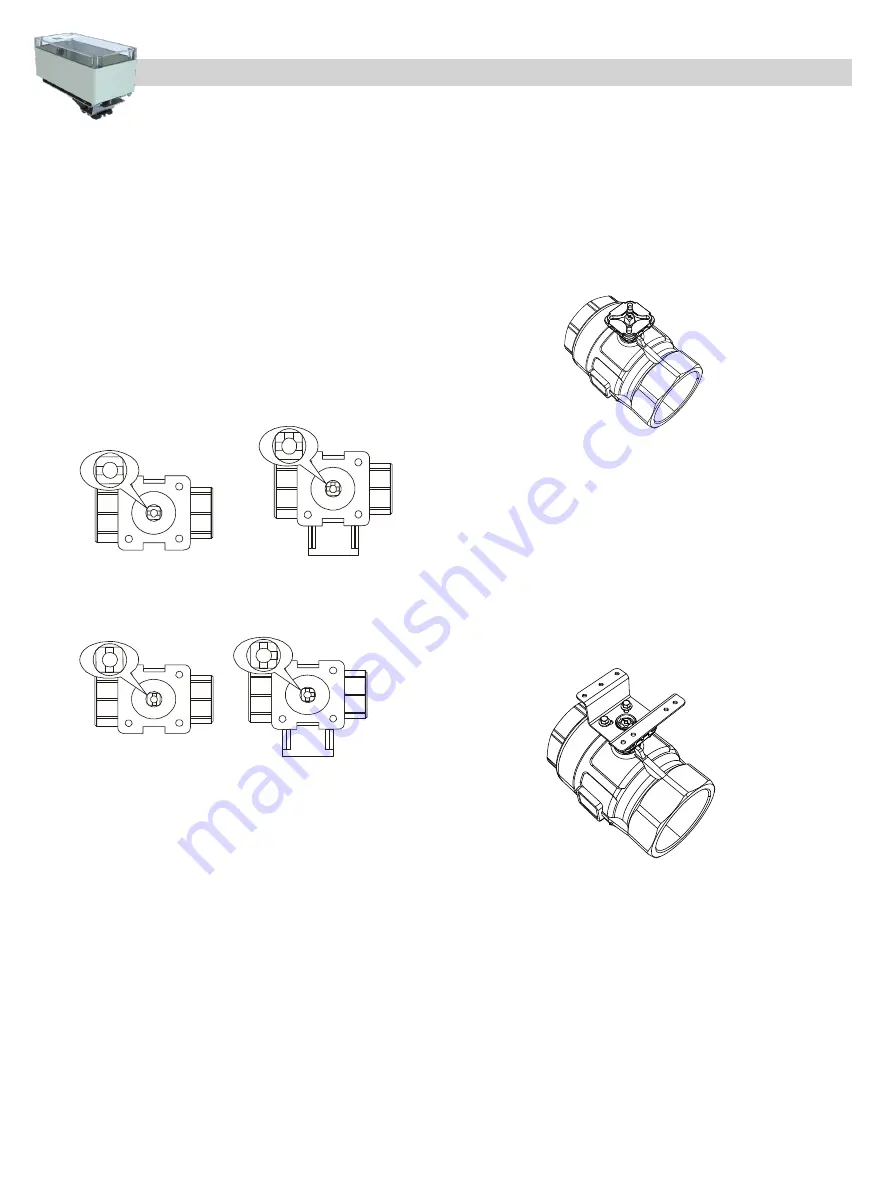
2. Place the Teflon® thermal barrier on the ball valve
actuator mounting flange by inserting the alignment
rib on the bottom of the thermal barrier into the
recess on mounting flange (Figure 6).
3. Install the valve adapter bracket over the thermal
barrier and attach the valve adapter bracket to the
valve using the four M6 screws and flanged nuts
(Figure 7). Tighten screws to a recommended
torque of 35 to 44 lb·in. (4.0 to 5.0 N·m).
Note:
Before you fully tighten the screws, temporarily
install the valve shaft through the adapter bracket and
engage the valve stem. This action ensures proper
alignment with the valve stem and adapter bracket.
Figure 4: Positioning the Valve Stem -
Spring Return Port A (Coil) Open
3 Way
2 Way
2 Way
3 Way
Figure 5: Positioning the Valve Stem -
Spring Return Port A (Coil) Closed
Figure 6: Mount the
Thermal Barrier
Figure 7: Install Valve Bracket


