27
2 / INSTALLING YOUR APPLIANCE
EN
• Recycling
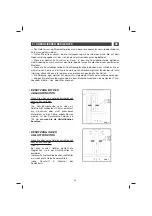
— Calculate the fi nal height for fi xing the
duct support U-bracket.
— Mark the two holes.
— Drill 8 mm diameter holes and secure
the duct support bracket, ensuring that it is
fi xed in the same axis as the hood.
— Fix the fl at bracket behind the lower
duct.
— Fit the sleeve adapter on the defl ector
(Pic. 8).
— Connect the extendable sleeve to the
defl ector.
— Fit the two parts of the duct on to the
hood (Pic. 5).
— Fit the defl ector (Pic. 8) into the upper
duct by the ventilation inlets (Pic. 6)
— Make the electrical connection to the
hood using the mains supply cable.
— Lift the upper duct up to the ceiling and
fi x it to the bracket using the two screws.
Pict 8
Pict 6
Pict 5
Pict 4
Warning
Do not use tools to remove the safety fi lm of hood.
Tip
For optimal use of your appliance, we recommend that you connect the hood to a 150
mm-diameter fl ue (not delivered with the appliance). Minimise the number of angles and
bends and the lengths of the fl ue. In the event that the hood will be operated using outdoor
evacuation, you should ensure a suffi cient infl ow of fresh air to avoid a pressure defi ciency
in the room.
Содержание 0000844359
Страница 6: ...6 1 A L ATTENTION DE L UTILISATEUR FR DESCRIPTION DE VOTRE APPAREIL ...
Страница 22: ...22 1 NOTICES TO THE USER EN DESCRIPTION OF YOUR APPLIANCE ...
Страница 38: ...38 1 WAS DER BENUTZER BEACHTEN SOLLTE DE BESCHREIBUNG DES GERÄTS ...
Страница 54: ...54 1 INFORMAZIONI PER L UTENTE IT DESCRIZIONE DEL DISPOSITIVO ...
Страница 70: ...70 1 MÆRKNINGER TIL BRUGER DK BESKRIVELSE AF APPARATET ...
Страница 86: ...86 1 TER ATTENTIE VAN DE GEBRUIKER NL BESCHRIJVING VAN HET APPARAAT ...
Страница 102: ...102 1 TILL ANVÄNDARENS UPPMÄRKSAMHET SV BESKRIVNING AV APPARATEN ...
Страница 114: ......
Страница 115: ......
Страница 116: ......


