


DCD-24 User Manual (rev 1.00)
Page 5
Page 4
DCD-24 User Manual (rev 1.00)
• Press the [
right
] navigation key once to go to the external reference menu
• Select WC
• Press the [
right
] key to move to the OUTPUT WC RATE
• Select FOLLOW INPUT
• Press the [
set
up
] key again to exit SET UP (SET UP led goes out)
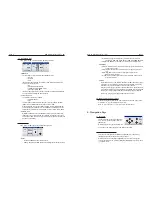
5. Front Panel
Displays & LED’s
5.1. 6 DIGIT
DISPLAY
The 6 digit display has several functions:
• Generated frequency (output frequency in Hz)
• Reference frequency (input frequency in Hz)
• VSO amount (Cents)
• Output termination (values in Ohms)
• IP address
• Name, version & serial number
The functions of the display change depending on the mode of operation:
Normal Use:
• The generated frequency (output) is normally displayed.
• To view the input frequency (reference), press and hold the [
view
] key.
SET UP Mode:
• In SET UP mode, the display remains unchanged, except while adjusting
the VSO (VSO ADJUST) it indicates the amount of VSO in Cents.
• To view the output termination, press and hold the [
view
] key. To view
another output, use the [
up
] or [
down
] key while still holding the [
view
] key.
The display has 2 other special functions:
IP Address:
To view the IP address, press and hold the [
set
up
] key.
Start Up Banner:
When the unit is powered up, the display shows the following three banners,
each lasting approx 2 sec:
“DCD-24” -- name
“1.00“
-- version
“1234”
-- serial number
The banner can be cancelled by hitting any switch.
3.2 ETHERNET
The Ethernet port is used to connect the DCD-24 via TCP/IP protocol to access the
unit remotely and to upload firmware from any computer on the network.
Connector: RJ45 jack
☛
Use a standard Ethernet cat5 cable with RJ45 plugs.
3.3 UNIVERSAL REFERENCE INPUT & TERMINATION SWITCH
Input accepts WC, AES (AES-3id unbalanced), 10MHz and HD and SD video sync
(see Appendix 1 for a list of supported video formats).
The switch enables 75Ω termination
Connector: BNC
☛
Use a standard 75Ω BNC cable.
3.4 WORD CLOCK OUTPUTS 1-24
24 BNC Connectors
When connecting the outputs keep in mind that 9-12 have a multiplier/divider.
☛
Use a standard 75Ω BNC Cable.
4. Quick Start
You should read this manual in its entirety to familiarize yourself with the DCD-24
features and its modes of operation. The following simple steps are only provided
to get you started right away.
Connect the power supply provided with the DCD-24 to the Power A connector on
the rear panel and plug the IEC cable into a wall outlet. Then tap the front panel
power switch to turn on your unit (there will be a small delay, approximately 4-5
seconds, before the front panel actually turns on).
Out of the box, the DCD-24 is set to generate a 48KHz Word Clock, referenced
to its internal crystal. This rate is fed to all WC outputs
.
4.1. GENERATING A DIFFERENT RATE
To change the rate:
• Press the [
set
up
] key (SET UP led lights up; INT led starts flashing)
• Press the [
right
] key once to move to the Rate menu (48K LED starts flashing)
• Press the [
up
] or [
down
] keys to select the desired rate
• Press the [
set
up
] key again to exit SET UP (Set Up LED goes out)
Your change is reflected in the output rate LED column.
4.2. DISTRIBUTING AN EXTERNAL WORD CLOCK
To distribute and external Word Clock:
• Press the [
set
up
] key (the SET UP led lights up; the selected rate led starts
flashing)
• Press the [
left
] navigation key to move to the Reference menu (INT led starts
flashing)
• Press the [
down
] navigation key once to select EXT


