background image


1 Port RS232 Card 

Chapter 3  

  10 

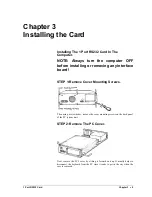
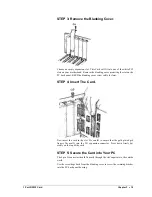
STEP 3: Remove the Blanking Cover. 


Choose an empty expansion slot. This Card will fit into one of the white PCI 
slots on your motherboad.  Remove the blanking cover protecting the slot on the 
PC back panel. KEEP the blanking cover screw safely for later. 

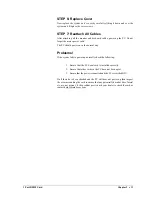
STEP 4:


Insert The  Card. 


Now insert the card in the slot. Be careful to ensure that the gold plated pcb 
fingers fits neatly into the I/O expansion connector. Press down firmly but 
evenly on the top of the card. 

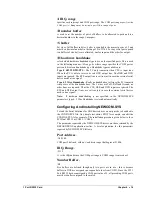
STEP 5: Secure the Card into Your PC 

The 9 pin D connector should fit neatly through the slot’s aperture to the outside 
world.  

Use the screw kept back from the blanking cover to screw the retaining bracket 
into the PC back panel housing. 

Содержание 1 Port Rs232 Card

Страница 1: ...Brain Boxes 1 Port Rs232 Card By Paul D Sinclair...

Страница 2: ...ing The 1 Port RS232 Card In The Computer 9 STEP 1 Remove Cover Mounting Screws 9 STEP 2 Remove The PC Cover 9 STEP 3 Remove the Blanking Cover 10 STEP 4 Insert The Card 10 STEP 5 Secure the Card into...

Страница 3: ...ager 37 Chapter 8 Windows NT4 Installation 41 Introduction 41 Driver Installation 41 Checking Your Installation 42 Port Configuration 43 Advanced Port Settings 45 Uninstalling Serial Solutions PCI 45...

Страница 4: ...uivalent unit COPYRIGHT COPYRIGHT 1985 2000 BRAIN BOXES LIMITED All rights reserved No part of this hardware circuitry or manual may be duplicated copied transmitted or reproduced in any way without t...

Страница 5: ......

Страница 6: ...tions drivers have the following features Drivers for PC FIFO UARTs e g 16550 as well as the new improved 32 byte 16650 and 64 byte 16750 UARTs Support for any mix of RS232 RS422 and RS485 handshake s...

Страница 7: ...o grasp They demonstrate in depth serial port programming in a variety of languages but they are also useful tools for using serial devices Comtest exe Comtest is a short but invaluable program that i...

Страница 8: ...ual device drivers providing the shared ssvel vxd ssmult vxd ssm485 vxd interrupt handlers and dispatch routines etc for the various Serial Solutions serial cards Serial Solutions For Windows NT Windo...

Страница 9: ...face to configure cards and their ports under Device Manager Multi port serial adapters SsCard hlp The help file for the SsCard dll user interface Complete Documentation and Technical Backup We believ...

Страница 10: ...t 15m and beyond Word length of 5 6 7 or 8 bits Even Odd None Mark or Space parity options 1 start bit always sent 1 1 5 for 5 bit data word length or 2 stop bits Full modem control TXD RXD DSR DCD DT...

Страница 11: ...1 Port RS232 Card Chapter 2 8 Configuring PCI Cards PCI cards by definition require no hardware configuration and can be installed directly from the box...

Страница 12: ...r removing any interface board STEP 1 Remove Cover Mounting Screws Then using a screwdriver remove the cover mounting screws on the back panel of the PC system unit STEP 2 Remove The PC Cover Next rem...

Страница 13: ...w safely for later STEP 4 Insert The Card Now insert the card in the slot Be careful to ensure that the gold plated pcb fingers fits neatly into the I O expansion connector Press down firmly but evenl...

Страница 14: ...normal way Problems If the system fails to power up normally check the following 1 Ensure that the PC Serial card is installed correctly 2 Ensure that other cards in the PC have not been upset 3 Ensu...

Страница 15: ......

Страница 16: ...supplied disk BBCARDS EXE will return a string that looks similar to the following values contained in the string may differ in individual PC s due to resource availability card 1 is on bus 0 device...

Страница 17: ...transmits irrespective of the handshake lines The 3 wires are TxD RxD and Ground no other lines are required Thus the CTS DSR and DCD inputs are ignored The RTS and DTR output lines are set true just...

Страница 18: ...n assembled the NEWCOM SYS command line looks like DEVICE NEWCOM SYS A5 0140 I 11 5 B5 S 512 H 4 and should be entered into the CONFIG SYS file Once you are sure that these parameters have been entere...

Страница 19: ......

Страница 20: ...EXE from the supplied Serial Solutions CDROM Place the supplied Serial Solutions CDROM disk in a suitable drive From File Manager choose Run and enter Drive diskimg ssutil pci bbcards where drive is t...

Страница 21: ...onents are installed For further details on the Component Options consult the README TXT file on the supplied disk If only logical ports COM1 to COM9 are to be used then de select the Comms API librar...

Страница 22: ...1 Port RS232 Card Chapter 5 19 Serial Port Installation From Main double click Control Panel Double click on Serial Ports Click on the add button...

Страница 23: ...is 8 higher than the previous i e if COM2 has an address of 0140h then COM3 has an address of 0148h In the IRQ field enter the value 11 Note The values used in the above section were those returned b...

Страница 24: ...o configure and click on Settings the following dialogue will be displayed Note A port that has been added has the default values of Baud Rate 9600 Data Bits 8 Parity None top Bits 1 0 Flow None Chang...

Страница 25: ...from the system Note Never try to leave out a serial port number when using the delete button because Windows may automatically shift serial port numbers which results in a mis match of settings in t...

Страница 26: ...1 Port RS232 Card Chapter 5 23 made ALL the necessary changes restart Windows so that the new settings come into effect...

Страница 27: ......

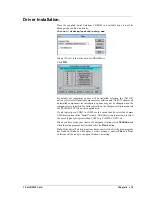
Страница 28: ...he Driver During the booting process Windows 95 will detect the PCI 1 Port RS232 Card but will display it simply as a PCI CARD and you will briefly see a message box to this effect Windows will then d...

Страница 29: ...e shows that the Update Device Driver Wizard has found a suitable driver and the location of that driver Click Finish Click OK In the location space type drive diskimg sswin9x where drive is the appro...

Страница 30: ...32 card will appear under the Multi function adapters branch Also a Communications Port will appear under the Ports COM LPT branch For most users who have 4 or less COM ports the new port will appear...

Страница 31: ...1 Port RS232 Card Chapter 6 28 Click on the Device Manager tab...

Страница 32: ...e the I O address and interrupt and is usually used only for legacy devices which require specific settings This is an advanced feature which should only be tackled by experieced users In this window...

Страница 33: ...ick on the My Computer icon on your desktop Click on Properties Double clicking on the Ports COM LPT label you will reveal a list of ports installed on your machine Click on the port you wish to confi...

Страница 34: ...maximum value selectable is 921 600 this is due to standard Windows COM port drivers being used Data Bits Parity Stop Bits Flow Control Change to suit the remote device being used Restore Defaults wh...

Страница 35: ...l allow the interrupt to be serviced quicker which is good for slow machines If you have a fast machine setting a high value will give you more time for multi tasking operations Transmit Buffer These...

Страница 36: ...sert the PCI 1 Rs232 Card into your PC as described in Chapter 3 Installing the Card and restart Driver Installation During the booting process Windows 98 will detect the PCI 1 port RS232 but will dis...

Страница 37: ...where drive is the appropriate letter for your CDROM drive Click Next Click Finish After copying the file Windows 95 will then detect each of the serial ports in turn and install them as communication...

Страница 38: ...the Ports COM LPT branch For most users who have 4 or less COM ports the new port will appear as COM5 as pictured above for users with more than 5 COM ports the new port will appear as the first avail...

Страница 39: ...y double clicking on the Multi function adapters label you will reveal any cards that you have installed Click on the PCI 1 Port RS232 Card label to highlight it then click on the Properties button Cl...

Страница 40: ...port assignment may be changed simply by selecting a new COM port value from the pull down menu relevant to the port However COM port usage other than those for the PCI 1 Port RS232 card itself are no...

Страница 41: ...on your machine Click on the port you wish to configure to configure to highlight it then click on the Properties button Selecting the Port Settings tab produces Settings available in these windows a...

Страница 42: ...y recommended that the FIFO for both ports is left enabled Receive Buffer These settings allow the selection of a receiver FIFO trigger setting Selecting a low value will allow the interrupt to be ser...

Страница 43: ......

Страница 44: ...ministrator level privileges if you do not have these please contact your system administrator Insert the PCI 1 Rs232 Card into your PC as described in Chapter 3 Installing the Card and restart Driver...

Страница 45: ...RS232 Card Chapter 8 42 InstallShield will then install the driver software as shown below Click Next Checking Your Installation Open the Control panel by clicking on Start then Settings then Control...

Страница 46: ...uble click on Serial Solutions icon This window will show the Card and the ports which have been installed by the Serial Solutions driver Port Configuration Open the Control panel by clicking on Start...

Страница 47: ...ch you wish to configure by clicking on it s label Click the Properties button Select the Port Settings tab Settings available in these windows are Bits per second determines the baud rate at which th...

Страница 48: ...th ports is left enabled Receive Trigger Level These settings allow the selection of a receiver FIFO trigger setting Selecting a low value will allow the interrupt to be serviced quicker which is good...

Страница 49: ...rol Panel open the Add Remove Programs applet then close the Control Panel Select from the list Serial Solutions PCI Click the Add Remove button Windows NT will then uninstall the Serial Solutions PCI...

Страница 50: ...under Windows2000 you must be logged in as a user with Administrator level privileges if you do not have these please contact your system administrator Insert the PCI 1 Rs232 Card into your PC as desc...

Страница 51: ...ter 8 48 Select Search for a suitable driver for my device Click Next Select Specify a location Click Next Type drive diskimg sswin2k where drive is the letter of the CDROM drive containing the Serial...

Страница 52: ...1 Port RS232 Card Chapter 8 49 Click Next Click Yes Click Finish The Brain Boxes serial port will now be installed and messages will flash on the screen to indicate that this is happening...

Страница 53: ...on click on the My Computer icon on your desktop Click on Properties Select the Hardware Tab Click on the Device Manager Button The PCI 1 port RS232 card will appear under Multi port serial adapters A...

Страница 54: ...rt RS232 Card Chapter 8 51 Card Configuration Using the right hand mouse button click on the My Computer icon on your desktop Click on Properties Select the Hardware Tab Click on the Device Manager Bu...

Страница 55: ...ndow the COM port assignment may be changed simply by selecting a new COM port value from the pull down menu relevant to the port However COM port usage other than those for the PCI 1 Port RS232 card...

Страница 56: ...quicker which is good for slow machines If you have a fast machine setting a high value will give you more time for multi tasking operations Software Transmit Level These settings allow the selection...

Страница 57: ...he Device Manager Button Double clicking on the Ports COM LPT label you will reveal a list of ports installed on your machine Double click on the port you wish to configure Select the Port Settings ta...

Страница 58: ...though the maximum value selectable is 921 600 this is due to standard Windows COM port drivers being used Data Bits Parity Stop Bits Flow Control Change to suit the remote device being used Restore D...

Страница 59: ......

Страница 60: ...computer industry terms Introduced in 1962 it is now widely established RS232 is a slow speed short distance single ended transmission system i e only one wire per signal Typical RS232 maximum cable l...

Страница 61: ...r device Traditionally making up the cross over cable has been considered a black art However provided you have the pin outs and handshake requirements of both sides of your RS232 connection the cross...

Страница 62: ...This allows the receiving device to signal when it can no longer accept data The receiving device sets DTR false when it is unable to receive any more data The sending device reads DTR on its CTS and...

Страница 63: ...ter 8 60 9 Pin D Serial Port Loop Back Connector A loop back connector can be used to echo RS232 data transmitted by a serial port back into its own RS232 receiver In this way the function of the seri...

Страница 64: ...D CONNECTOR 9 To 25 Way Adapter This adapter cable makes the AT style 9 pin serial port look like the standard PC 25 pin serial port It is NOT a cross over cable 9 Pin AT SERIAL PORT 25 Pin PC SERIAL...

Страница 65: ...1 Port RS232 Card Chapter 8 62...

Страница 66: ...3 x 17 device driver 13 14 DOS 13 DSR 3 7 59 DTR 3 7 59 E emulation 4 F FIFO 3 7 H handshake 3 58 HARDWARE 3 I installation 5 interrupts 4 L loop back 4 57 60 M Millenium 33 mode 4 modem 7 N NEWCOM S...

Страница 67: ...1 Port RS232 Card Index 64...

Отзывы: