Seguridad Personal
Pueden causar daños corporales y/o daños en el equipo si no se observan las medidas
de seguridad apropriadas.
Asegure que lo carrete esteja propriamente instalado antes de conectar la manguera.
Mantengas la presión del fluido/gas antes de empezar a trabajar con el carrete.
Antes de conectar el carrete a la línea de trabajo, certifique que la presión no eres mayor
que la presión máxima indicada para el trabajo con el carrete.
Recuerde , mismo la baja presión es muy peligrosa y puede causar daños corporales o
muerte.
Si un escape acontecer en la manguera o carrete, retire la presión inmediatamente.
Asegure-se que el carrete, manguera, y equipo que están trabajando esté
correctamente fijo.
Si el carrete deja de desenrollar o de rebobinar, quite la presión del sistema
inmediatamente. No tire ni mueva de un tirón la manguera.
Instrucciones de Instalación
Antes de montar el carrete, asegure-se que la línea de presión no eres mayor que la
presión máxima adecuada para el trabajo del carrete.
Desempaquete y examine el carrete para saber si hay daño. De una vuelta con la mano
para comprobar la operación.
Examine todo
Coloque el carrete en el suelo, pared o techo. Instale en un lugar usando cuatro pernos
de montaje.
Dependiendo de donde se coloca el carrete, puede ser necesario ajustar el limitador de
manguera y el brazo para su utilización correctamente. Vea las instrucciones en la página
siguiente para ajustar el limitador de la manguera y para colocar el brazo de la guía
nuevamente.
Tensión del resorte
Aviso:
Tenga mucho cuidado; carrete bajo tensión. Evite al mecanismo de cierre.
Si necessario, ajuste la tensión en lo carrete agregando o quitando los abrigos de la
manguera del carrete, uno por vez, hasta la tensión deseada. Agregue los abrigos a la
tensión del aumento.
Quite los abrigos para bajar la tensión.
Saque la manguera hasta que el redentor de la traba este acoplado. Suelte el limitador de
la manguera y después agregue y disminuye los
abrigos.
Cuidado: Cuando agregar abrigos en la
manguera, sea cuidadoso para no exceder la
capacidad del resorte del mecanismo de bobina.
Agregue suficiente para alcanzar la tensión
deseada.
Daños al mecanismo resultará se el resorte ocurrir una sobre-tensión.
AJUSTANTO EL LIMILITADOR LA MANGUERA
Saque la manguera hasta que el redentor de la traba este acoplado. El limitador de la
manguera puede ser ajustado aflojando los tornillos rasurados. Resbale el limitador hasta
la posición deseada y aprete los tornilhos antes de tirar la manguera desunir el redentor de
la traba.
Precauciones:
Tire toda la tensión antes de efectuar los servicios. Peligros o prácticas
inseguras pueden causar daños corporales pequeños a lo producto o daños morales.
Aviso:
Antes de efectuar cualquier servicio, siempre desconecte y trabe el aire
comprimido o fluido, y quite toda la tensión del resorte. Los peligros e prácticas inseguras
pueden causar daños graves.
El usuario solo puede hacer el cambio de las manguera de entrada/salida. Todos los
outros reparos deberán ser hecho por un servicio autorizado. Si caso la persona lo hacer
puede resultar perdida de la garantía.
Instrucciones de Servicio
QUITANDO Y POSICIONANDO EL BRAZO
Saque la manguera hasta que el redentor de la traba este
acoplado. Quite el limitador quitando los tornilhos.
Desacople la traba y mantenga la presión en el carrete. Giré
la mano del carrete sobre la mano aproximadamente dos o
tres vueltas en el sentido de la muelle de movimentación
hasta que la tensión este removida.
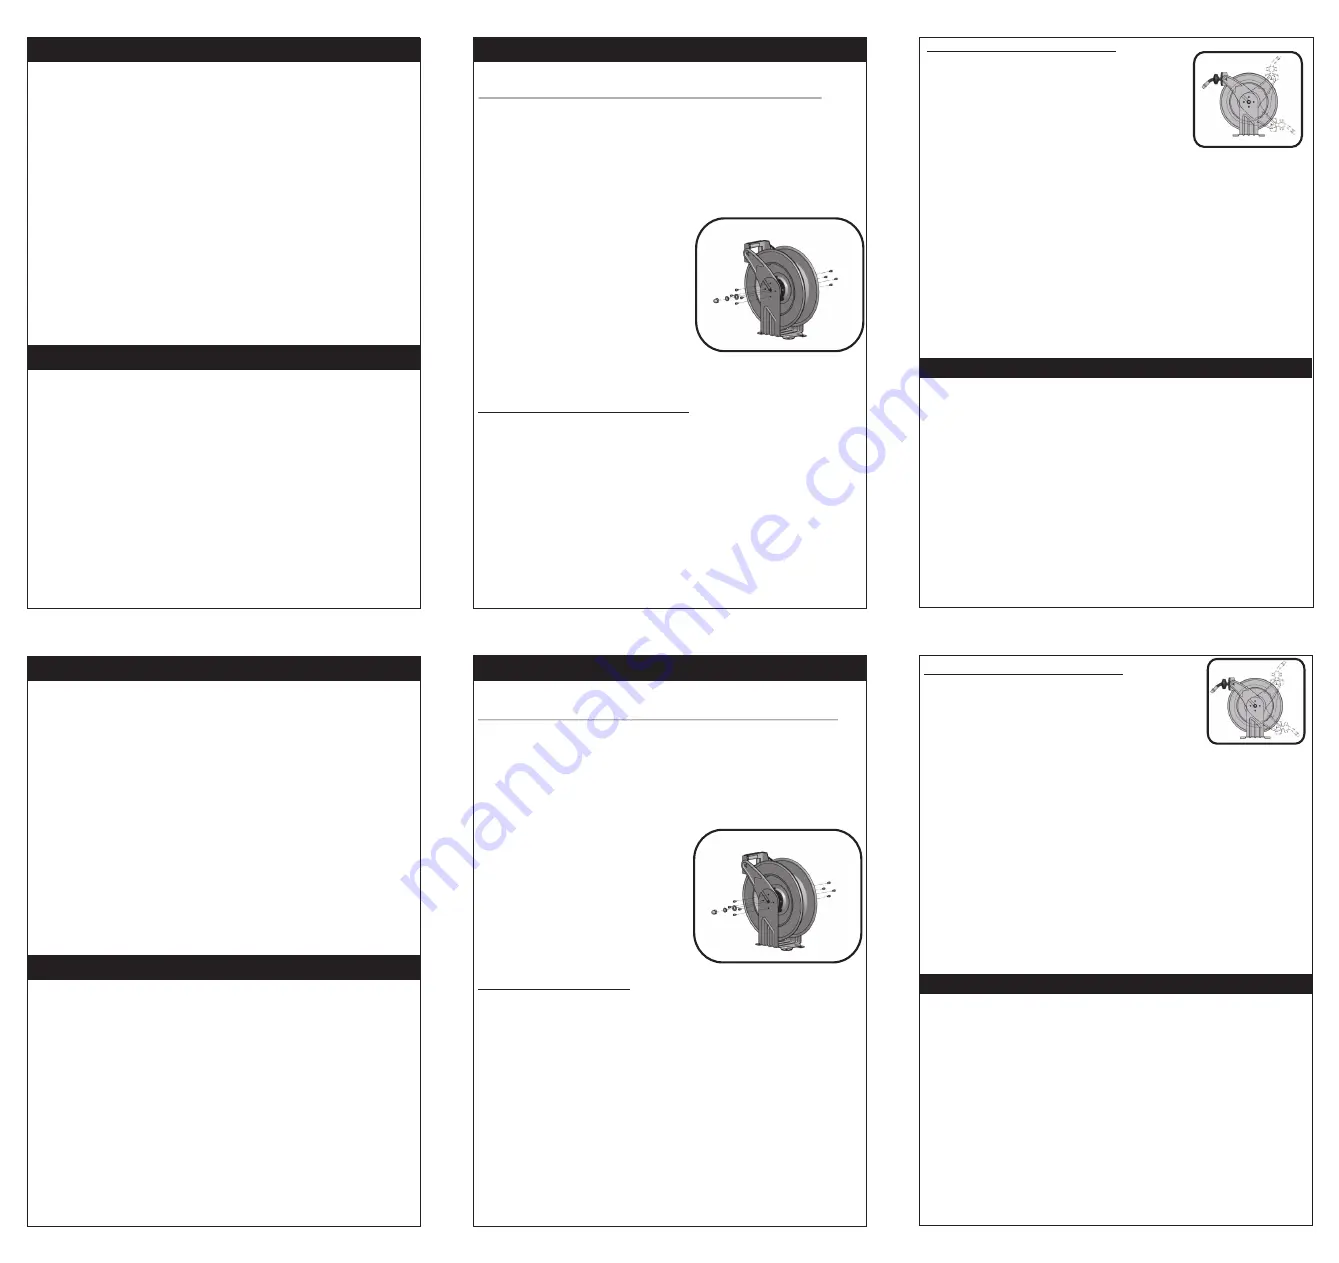
Quite las tuercas y la arandela que prende el brazo y lo desplazamiento de la guía a la
base.
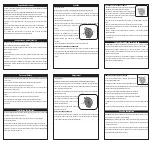
Remueva el brazo de la guía y ajuste-o en una de las 3 posiciones sugeridas.
Según cada uso de montaje, use las posiciones recomendadas. Sustituya y aprete las
tuercas y arandelas.
Aprete el resorte de movimentación girando el carrete dos o tres vueltas y acople el
redentor de la traba.
Tire la manguera por la abertura del rodillo en el brazo de la guía y sustituya el limitador
de la manguera.
Personal Safety
Installation Instruction
Personal injury and/or equipament damage may result if proper safety precautions are
not observed.
Ensure that reel is properly installed before connecting input and output hoses.
Bleed fluid/gas pressure from system before servincing reel.
Before connecting reel to suply line ensure that pressure does not exceed maximum
working pressure rating of reel.
Remember, evenblow pressure is very dangerous and can cause personal injury or
death.
If a leak occurs in the hose or reel, remove system pressure immediately.
Ensure that reel, hose, and equipament being service are properly grounded.
If reel ceases to unwind or rewind, remove system pressure immediately. Do not pull or
jerk on hose.
Prior to mounting the hose reel, ensure that the supply line pressure does not exceed the
maximum working pressure of the rose reel.
Unpack and inspect reel for damage. Turn by hand to check for smooth operation.
Check for completeness.
Position the reel on the floor, wallor ceiling. Secure into place using four mouting bolts.
Depending on where reel is placed, it way be necessary to adjust the rose bumper and
guide arm to uso hose property. See the instructions on the next page to adjust the hose
bumper and reposition the guide arm.
REMOVING AND POSITIONING GUIDE ARM
Pull out hose until the latch pawl is engaged. Remove bumper
by removing the slotted screws.
Disengage the latch awl while maintaining a firm hold on spool.
Turn the spool hand over hand approximately two or three revolutions in the directions of the
direction of the drive spring until tension is removed.
Remove the nuts and washer holding the guide arm and shift to base.
Revolute the guide arm and adjust to any of the three position hinted.
According to each mouting application, recommend Guide Arm positions.
Replace and thighten the nuts and washer
Thigten the drive spring by turning the spool tow or three revolutions and engage the latch
pawl.
Pull the hose through the roller opening in the guide arm and replace the hose bumper.
Caution:
Remove all tension before servicing. Hazards or unsafe practices may result in
minor personal injury, product or property damage.
Warning:
Before performing any service, always disconnectand lock out compressed air
or fluid, and remove all spring tension. Hazards or unsafe practices could result in severe
personal injury or death.
User servicing of the reels is limites to replacing input/output hose only. Refer all other
repairs to an authorized service person. Failure to do so can result in person injury and/or
equipment damage and way void the warranty.
Service Instruction
Spring Tension
Warning:
Use extreme caution; reel under tension. Avoid releasing latch mechanism.
If necessary, adjust spring tension on reelby adding or removing wraps of the hose from
spool, one wraps at a time, until desired tension is obtained. Add wraps to increase tension.
Remove wraps to decrease tension.
Pull out the hose until the latch pawl is engaged. Loose the hose bumper, then add wraps
and decrease the wraps.
Caution: When adding wraps of hose, be careful
not to exceed the winding mechanism’s spring
capacity. Add just enough wraps of hose to
achieve the desired tension.
Damage to the winding mechanism will result if
spring is over-tensioned.
ADJUSTING THE HOSE BUMPER
Pull out thehose until the latch pawl is engaged. The hose bumper may be adjusted by
loosening the slotted screws. Slide the bumper to the desired position and tighten the
screws before pulling hose to disengage the latch pawl.
Adjustment
Ajustes


