background image


OSD (On Screen Display) Manu 
 
Display/Exit OSD Menu


!

Press MENU key to display the main menu.   

!

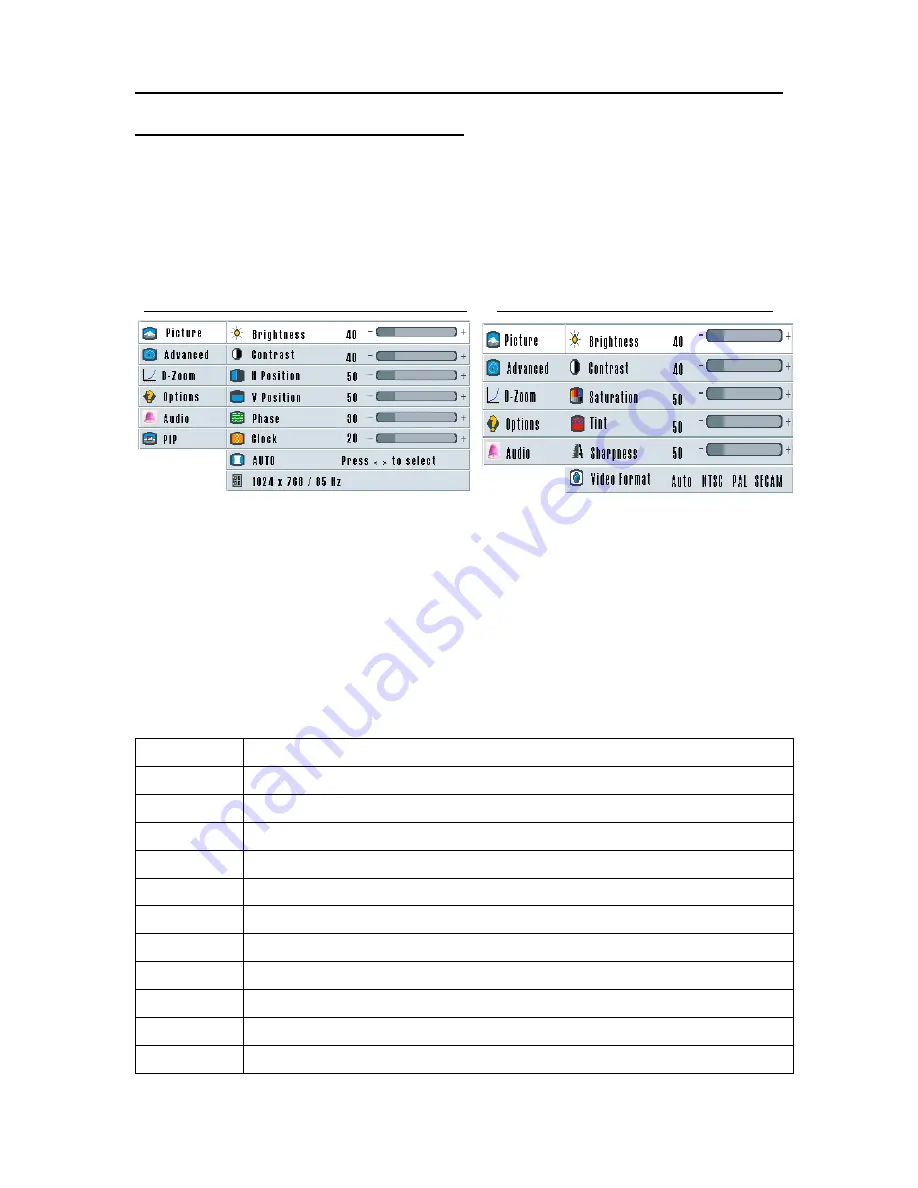
The contents of main menu are different according to various input signals 

which are shown as the following


!

Press EXIT key to Exit the main menu.   

Input signals of

 VGA or DVI

XGAType

      Input signals of AV or


S -VIDEO


Image Quality Adjustment 

!

After displaying main menu, press 

"


#


key to move Bar to “Picture ”   

!

Press 

$

 key to enter sub menu.   

!

Press 

"


#

 key to move Bar to the option which needs to be adjusted . 

!

Press 

$


%

 key to set the value and press MENU key to return to main 

menu. 

!

Press EXIT key to exit the menu and save the setting.   

!

The “Adjust Option” is different according to various input signals which   

are shown as the following


Options


The instruction 


Brightness  To adjust the brightness value of the image . 
Contrast 

To adjust the contrast of image (higher value means high contrast) 

H position  To adjust the horizontal position


V position  To adjust the vertical position


Phase 

To adjust the Phase value of the image. 


Clock 

To adjust the Clock value of the image.


Auto Tune  To adjust the Phase and Clock Automatically.


Saturation  To adjust color saturation 
Tint 

To adjust the Tint 

Sharpness  To adjust the Sharpness of the image.   
Video 

To select input signal as 

Auto

NTSC

PAL or SECAM 

format. 


Содержание XP-56d

Страница 1: ...Micro Portable LCD Projector USER S MANUAL MAIN PAGE...

Страница 2: ...functions 4 Setting Up Location for Setting Up 5 Zoom Focus and Height Adjustment 6 External Connections Connecting to PC 7 Connecting to Video Signals 8 OSD On Screen Display Menu Display Exit OSD M...

Страница 3: ...of the front and rear side of projector Do not use multiplex socket to avoid overload or short circuit The lamp of the projector is high voltage mercury lamp which needs specific driving circuit Plea...

Страница 4: ...onnecting wire XGA Type Remote Controller Video Wire RCA Jack No 4 AAA Battery x 2 PS 2 Mouse connecting wire Audio Wire Phone Jack User s Manual S Video Wire Carrying bag for projector and accessorie...

Страница 5: ...3 Definitions of Keys and Indicators Remote Controller Keys of Control Panel...

Страница 6: ...r DVI XGA Type in sequence Keystone Adjust Shape of Image from keystone to square Volume Adjust the volume Laser Laser Pointer Auto Auto adjust the image quality Only on VGA mode L R L Left click of t...

Страница 7: ...solid ceiling Adjust projector so the lens is perpendicular to screen otherwise the image on screen will have trapezoidal shape Projection Distance Size Table Projection Size inch Project Distance m M...

Страница 8: ...g of the lens which is the outer ring at the lens in front side of projector Size adjustment Turn the inner side zoom ring increase when clockwise Adjustment for Height and Deformation of Projection S...

Страница 9: ...tions Connecting to PC Connect the D Sub 15 pin cable from the VGA card of the computer into the VGA IN terminal of the projector Mark sure that both parts have a good connection Turn on projector fir...

Страница 10: ...8 Connecting to Video Signals Connecting to video signal sources such as VTR DVD or LD The method for connecting RCA jack AV wire is shown below The method for connecting S Video Wire is shown below...

Страница 11: ...return to main menu Press EXIT key to exit the menu and save the setting The Adjust Option is different according to various input signals which are shown as the following Options The instruction Brig...

Страница 12: ...are shown below Input signals of VGA or DVI XGAType Input signals of AV or S VIDEO Options The instruction Color Temp To adjust color temperature of image to personal performance Normal temp value is...

Страница 13: ...key to return to main menu Press EXIT key to exit the menu and save the value The options to be adjusted are shown as the following Input signals of VGA or DVI XGAType Input signals of AV or S VIDEO...

Страница 14: ...als of VGA or DVI XGAType Input signals of AV or S VIDEO Options The instruction OSD To select OSD position on screen Translucent To select OSD Translucent function for on or off Language To select la...

Страница 15: ...V or S VIDEO Adjust options The instruction Volume To adjust the volume of speaker PIP Adjustment After displaying main menu press key to move Bar to PIP Press key to enter sub menu Press key to move...

Страница 16: ...ust turn off Projector and restart again If it still doesn t work please contact with your dealer Cleaning the Projector Un plug the power of projector before cleaning Clean with a non cotton dry clot...

Страница 17: ...local dealer Turn off projector and unplug power cord Loosen the 2 screws of the cap of lamp module You need to find a special star type screwdriver When screws are loosed take off the cap of lamp mod...

Страница 18: ...0 960 75Hz 75 93KHz 640 480 75Hz 37 5KHz 1280 960 85Hz 85 93KHz 640 480 85Hz 43 3KHz 1280 1024 43Hz 46 6KHz 640 400 70Hz 31 5KHz 1280 1024 60Hz 64KHz 640 400 85Hz 37 9KHz 1280 1024 74Hz 78 8KHz 800 60...

Отзывы: