background image


AUTHORIZING THE 

SPOT EAP 

To activate the EAP after mounting it on the robot, the payload must be authorized in the 
robot's admin console.  

1. Log in to the admin console web page with an admin account. By default, the 

console address is: http://10.0.0.3.  

2. Open the Payloads section of the console. 
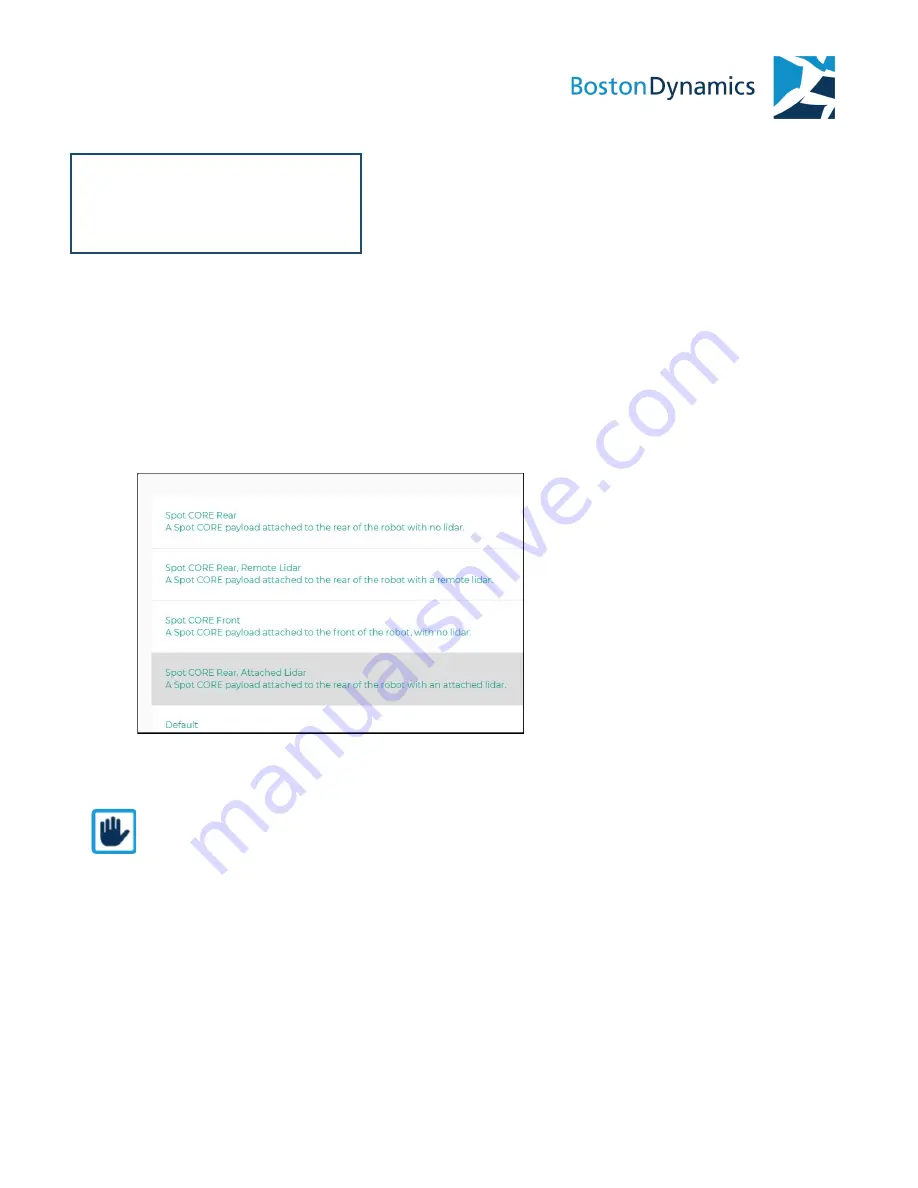
3. A message appears requesting payload authorization. 
4. The payload is ​

Spot CORE Rear, Attached Lidar​

. Click Authorize. 


5. The payload is ready for use. 


NOTE: ​

If the robot’s IP number has been changed, use the updated IP in the corresponding 

console URL. 


Boston Dynamics proprietary & confidential

12 

Содержание SPOT 2.0.1

Страница 1: ...SPOT ENHANCED AUTONOMY PACKAGE SPOT 2 0 1 ...

Страница 2: ... Boston Dynamics 2020 All rights reserved July 2020 Boston Dynamics 78 4th Ave Waltham MA 02451 USA 617 868 5600 support bostondynamics com Boston Dynamics proprietary confidential 2 ...

Страница 3: ...NTS WHAT S IN THE BOX SPOT LIDAR CABLE CONNECTORS LIDAR CAMERA ASSEMBLY ATTACHING THE EAP ASSEMBLY ATTACH THE SPOT CORE AND LIDAR UNIT TO THE ROBOT DETACHING THE CORE COMPUTER FROM SPOT DEFAULT PASSWORD AUTHORIZING THE SPOT EAP EAP SPECIFICATIONS LIDAR SPECIFICATIONS DOCUMENT CHANGE HISTORY Boston Dynamics proprietary confidential 3 ...

Страница 4: ...ties for the Spot robot The LIDAR sensor helps to extend the robot s operational range in feature deserts areas that lack sufficient physical features the robot needs to localize itself to a position in a GraphNav or Autowalk map EAP assembly showing Spot CORE LIDAR mount LIDAR and roll cage Boston Dynamics proprietary confidential 4 ...

Страница 5: ...Restoring Spot CORE software Spot CORE specifications If you have an Enhanced Autonomy Package you will need to take note of this when choosing which installations to download SPOT DOCUMENTATION AND TRAINING RESOURCES Visit and subscribe to Boston Dynamics Support on YouTube to watch training videos on all aspects of Spot setup and operations Boston Dynamics proprietary confidential 5 ...

Страница 6: ...Visit bostondynamics com spot training to view training videos download Spot documentation and access developer resources including the Spot SDK Boston Dynamics proprietary confidential 6 ...

Страница 7: ...and regulated power in an integrated package WHAT S IN THE BOX ITEM DESCRIPTION Spot CORE unit The Spot CORE assembly Spot CORE AC adapter Power supply for the Spot CORE computer when detached or disconnected from the robot LIDAR cable Connects the Spot CORE assembly components including an optional LIDAR Ethernet cable Within the CORE it connects the computer to the Spot GXP USB stick Contains Sp...

Страница 8: ...e LIDAR cable connects the GXP CORE computer and LIDAR camera to provide data and power connections The cable is built into the CORE LIDAR cable CABLE CONNECTOR CONNECTS TO LIDAR cable M12 LIDAR camera LIDAR cable DC power CORE DC input LIDAR cable RJ45 CORE LAN 2 LIDAR cable DB15 Spot GXP DB15 LIDAR cable DB9 Unused for the EAP payload Ethernet GXP RJ45 CORE LAN 1 Boston Dynamics proprietary conf...

Страница 9: ...mera assembly consists of four integrated components Roll cage with plastic guard LIDAR Velodyne Puck sensor Mount assembly LIDAR cable Weight 1 6 kg Overall dimensions Height 158 8 mm Width 180 mm Length 176 2 mm Boston Dynamics proprietary confidential 9 ...

Страница 10: ... safe place The robot will not operate without the payload cap or a payload attached to the port 4 Attach the free end of the payload cable to the port and tighten the mounting screws to 0 2 N m 5 Insert three t slot nuts on each side of the payload rails taking care that the tip of the set screw is pointed down Loosen the set screw if needed to fit the nut into the slot so that it lays flat and m...

Страница 11: ...ned DETACHING THE CORE COMPUTER FROM SPOT Detaching the CORE computer makes it easier to connect a display keyboard and mouse To detach the CORE unit from the robot 1 Remove the Spot CORE assembly from the robot following the installation process in reverse order 2 Turn the unit over to access the HDMI port for attaching an external monitor 3 Unplug the DC power from the gray cable and attach the ...

Страница 12: ... account By default the console address is http 10 0 0 3 2 Open the Payloads section of the console 3 A message appears requesting payload authorization 4 The payload is Spot CORE Rear Attached Lidar Click Authorize 5 The payload is ready for use NOTE If the robot s IP number has been changed use the updated IP in the corresponding console URL Boston Dynamics proprietary confidential 12 ...

Страница 13: ... 6 kg Environmental rating IP54 Operating temperature 10 C to 50 C Storage temperature 40 C to 105 C Customer usable mounting holes 162 mm above robot plane centered 456 mm from ICD center 10x M5 bolt holes 136mm mm Bolt Circle Diameter Boston Dynamics proprietary confidential 13 ...

Страница 14: ...aser product classification Class 1 eye safe per IEC 60825 1 2007 2014 Laser wavelength 903 nm Power consumption 8 W Operating voltage 9 V 18 V with interface box and regulated power supply Environmental protection IP67 Operating temperature 10 C to 60 C Storage temperature 40 C to 105 C Output 3D LIDAR data points generated Single return mode 300 000 points per second Dual return mode 600 000 poi...

Страница 15: ...DOCUMENT CHANGE HISTORY Document version Date Change description 1 0 July 2020 Initial release Boston Dynamics proprietary confidential 15 ...

Отзывы: