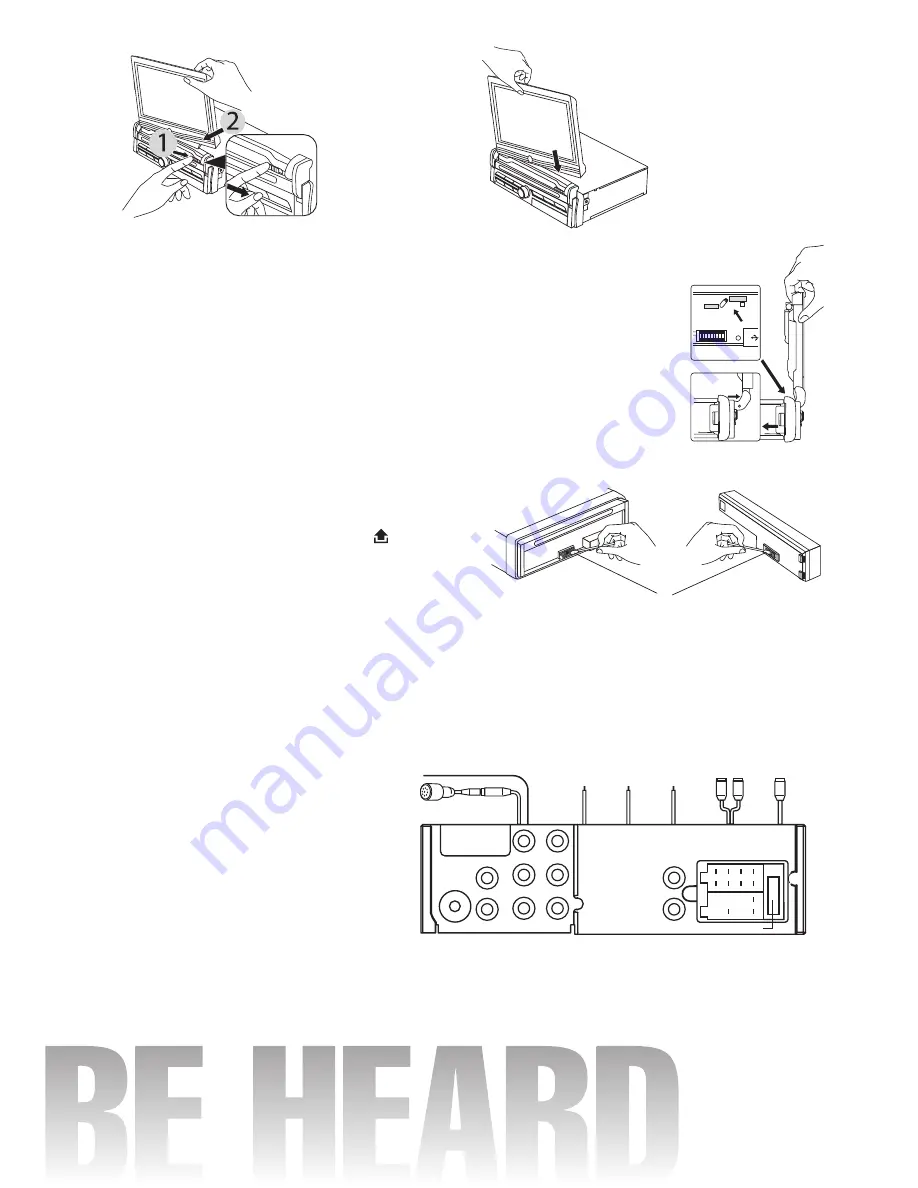
Notes :
• Do not press the front panel hard against the unit when attaching it. It can be
easily attached by pressing it lightly against the unit.
• When you carry the front panel with you, put it in the supplied front panel
case.
Moving the screen forward
Depending on vehicles’s dashboard design, there might be instances where the
display screen might collide or bump into the dashboard’s control knobs.
Follow the steps below to move the screen forward.
1. Slide the switch to
UNLOCK
position.
2. Hold it in
UNLOCK
position then move the screen forward. The unlock switch
will move to
LOCK
position automatically when in place.
Cleaning the connector
The unit may not function properly if the connectors
between the unit and the front panel are contaminated
with dirt. In order to prevent this from happening,
detach the front panel by pressing the
button and
clean the connector from time to time.
Clean the connector with a cotton swab together with
contact cleaner as illustrated. Be sure to clean them
carefully pin by pin and make sure not to damage the
connecting points.
WIRE CONNECTION
IN / OUT CONNECTOR
DVD Audio Out: White (L) Red (R)
Connect this wire to rear seat A/V monitor system to enjoy
DVD movie
Audio Out (Front): White (L) Red (R)
Audio Out (Rear): White (L) Red (R)
Video Out: Yellow
Connect to external A/V system to display
Video In: Yellow
Connect to external Video equipment
Rear Camera In: Blue
Connect to rear camera output
RCA Audio Input (Black):
Left (White) Right (Red)
Subwoofer Output (Green): Plug (Yellow)
External Bluetooth Microphone
CONTROL WIRE
Parking (Gray) :
Connect this wire to car hand brake system
Auto Antenna/Remote Control (Blue) :
Rear Camera (Red) :
Connect to back rear camera
During back gear condition, this wire should be connected to hight voltage.
LOCK
UNLOCK
Cotton Swab
Rear of
front panel
Main unit
To detach
1. Slide the screen release button
to the right side.
2. Hold the display by the trim
(not screen). Gently lift the
display right and upwards.
To attach
Push and insert the screen all
the way down until you heard
2
click sounds
indicating both hole
connector is attached properly.
GRAY
PARKING
SUBWOOFER
AUDIO IN
BLUE
AUTO
ANTENNA
RED
GREEN
BLACK
WHITE
RED
YELLOW
BACK GEAR
CONTROL
LINE OUT
LINE OUT
AUDIO OUT
ANTENNA
CONNECTOR
FRONT
REAR
CAMERA IN VIDEO IN
VIDEO OUT 1
VIDEO OUT 2
FUSE 10A
L
R
L
R
L
R
ISO CONNECTOR
B
A
1
2
3
4
5
6
7
8
4
7
8
BLUETOOTH
EXTERNAL MICROPHONE
BLUETOOTH ANTENNA
Содержание BV9958B
Страница 15: ...15 There is a disc already in the DVD player...


